Cross Stitch: Preparation is Key

So you have your pattern, your fabric and all the beautiful colours of floss.

Your hoop and needles are ready to go. You lay everything out on the table and take in the cross stitch graph… and you think, “what have I got myself into? Where do I even start?” Not to worry, I’ll help you get started.

Organize the floss

Your pattern will have a legend with a description of each of the colours in your project, a symbol that represents that colour on the graph and a DMC colour number.

If you bought a kit, those might be organized on pieces of cardstock, with the colour numbers next to them on the card. If so, you will definitely want to draw the matching symbols next to the corresponding floss. Take your time and double check that you are putting the symbols in the correct place.

Trust me, this will make your life way easier!

Skeins of Floss

Starting with full skeins? One option is to wind it onto bobbins. Take the colour number from the skein and tape it onto one wide end of the bobbin so you can see the number clearly, before you get started. I recommend you also put a temporary label with the symbol for that colour on the other end of the bobbin. (You will remove this once your project is complete.) Keep all those bobbins in a container like a tin or a floss organizer box to keep them clean and safe when not in use. Bobbins are available in cardboard and in plastic. You can buy sets with a ring to keep them all together.

Take your time to be sure that you have put the correct symbol with each colour.

You could make an extra label to tape around each skein with its respective symbol. You can simply pull a length of floss out of the skein, separate the strands as you need, and attach the extra strands around the skein until you need them. I have found that this method can get very messy, and as you use up the floss, the labels can fall off. So although it works, you have to be really careful to manage everything as you go along.

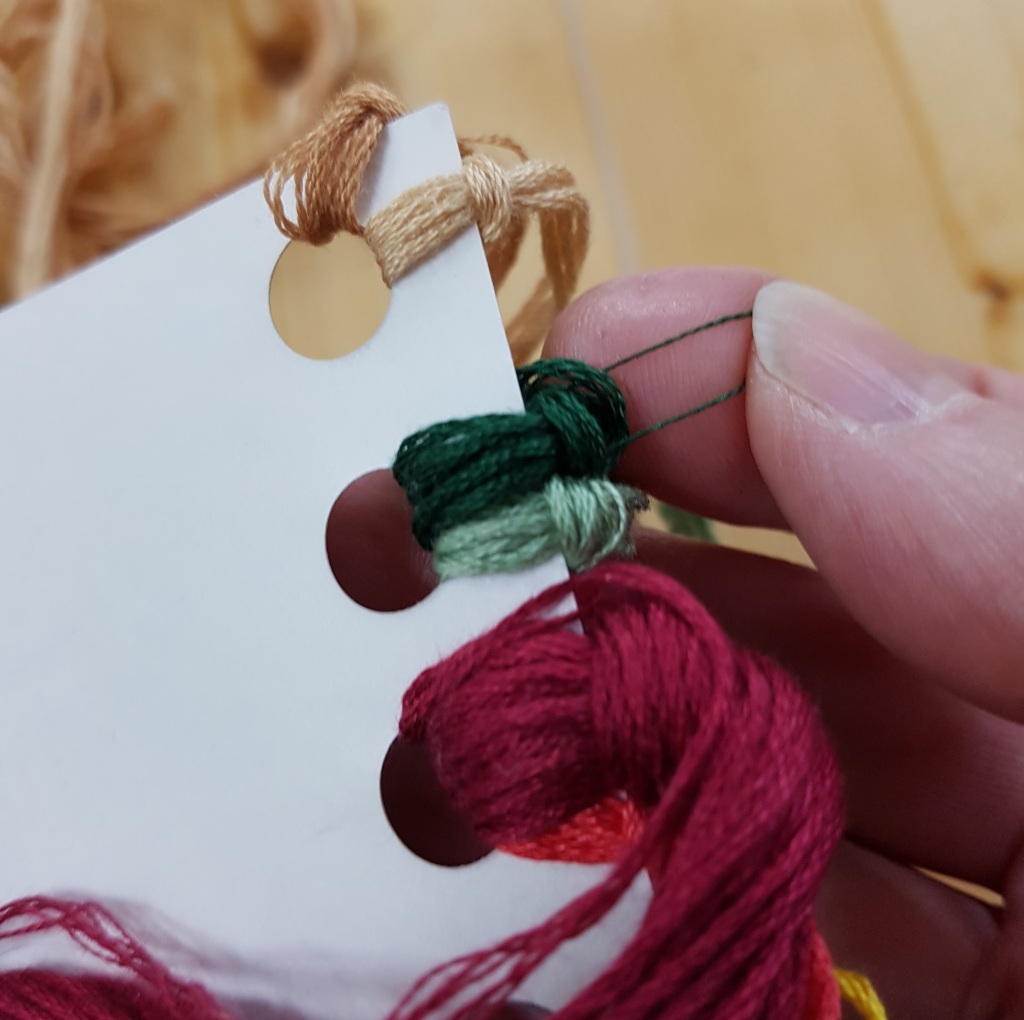
You can also cut your skeins of floss into shorter lengths, say 18″ long or so, lay them together and put them onto a home made floss organizer. You can make one or more using thin cardboard from a cereal box and a hole punch. Just make enough holes for all the colours. Label them carefully as you go with the number and the symbol and keep them in a tin or other organizer when not in use. Prepare one skein at a time to avoid confusion.

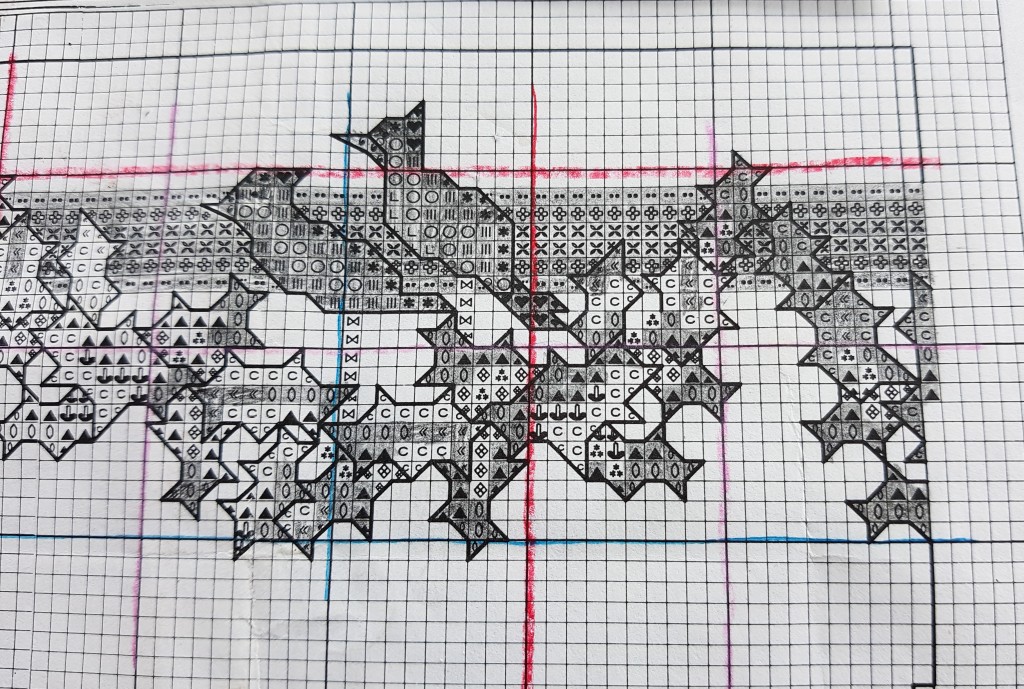
Prepare your pattern

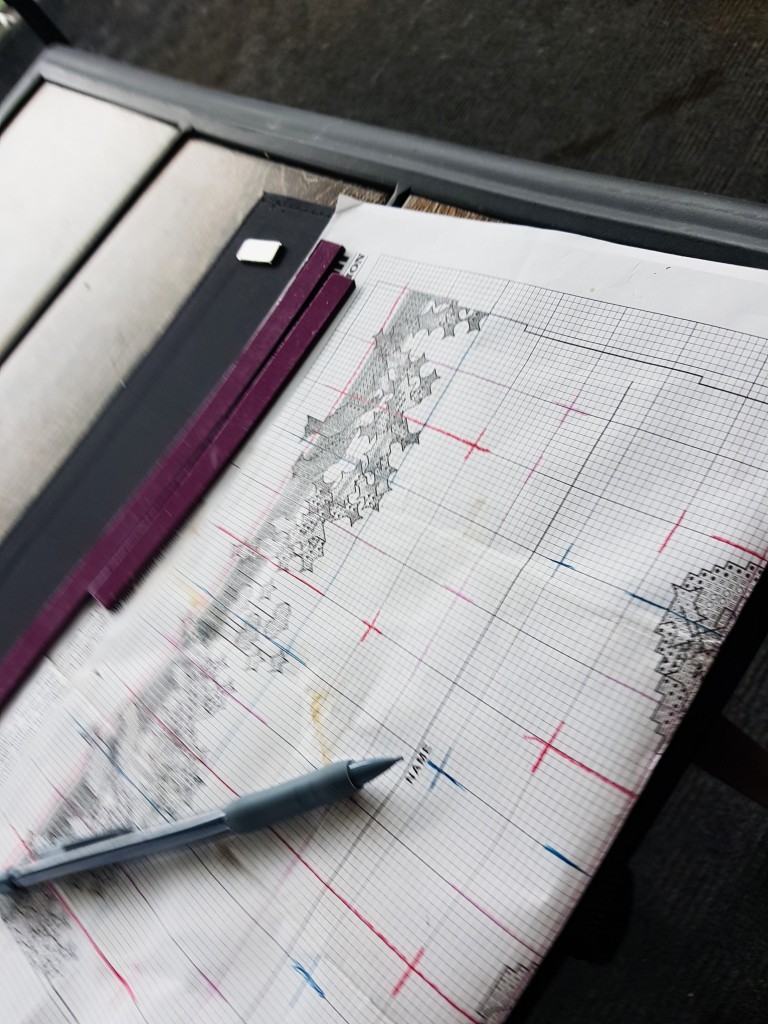
Whether a small or large pattern, mark the center of the graph. Now pull out your pencil crayons or markers and choose a few bright colours that are distinct from one another. For a large pattern use at least three different colours. Using a ruler, draw over the heavy lines that mark each section of ten stitches. Alternate the coloured pencils in the same order across the graph and the from top to bottom and left to right.
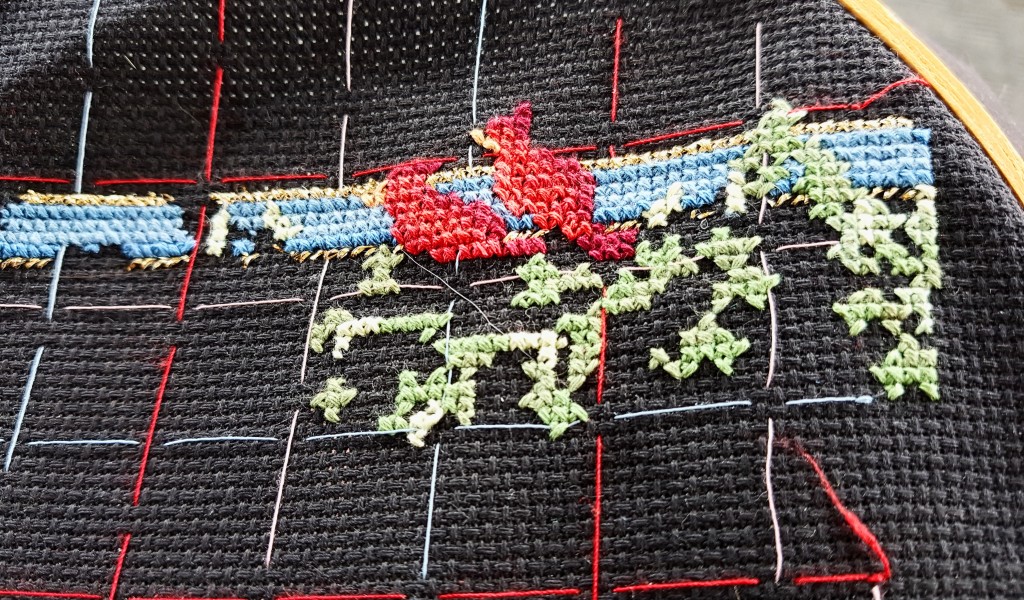
Prepare your fabric

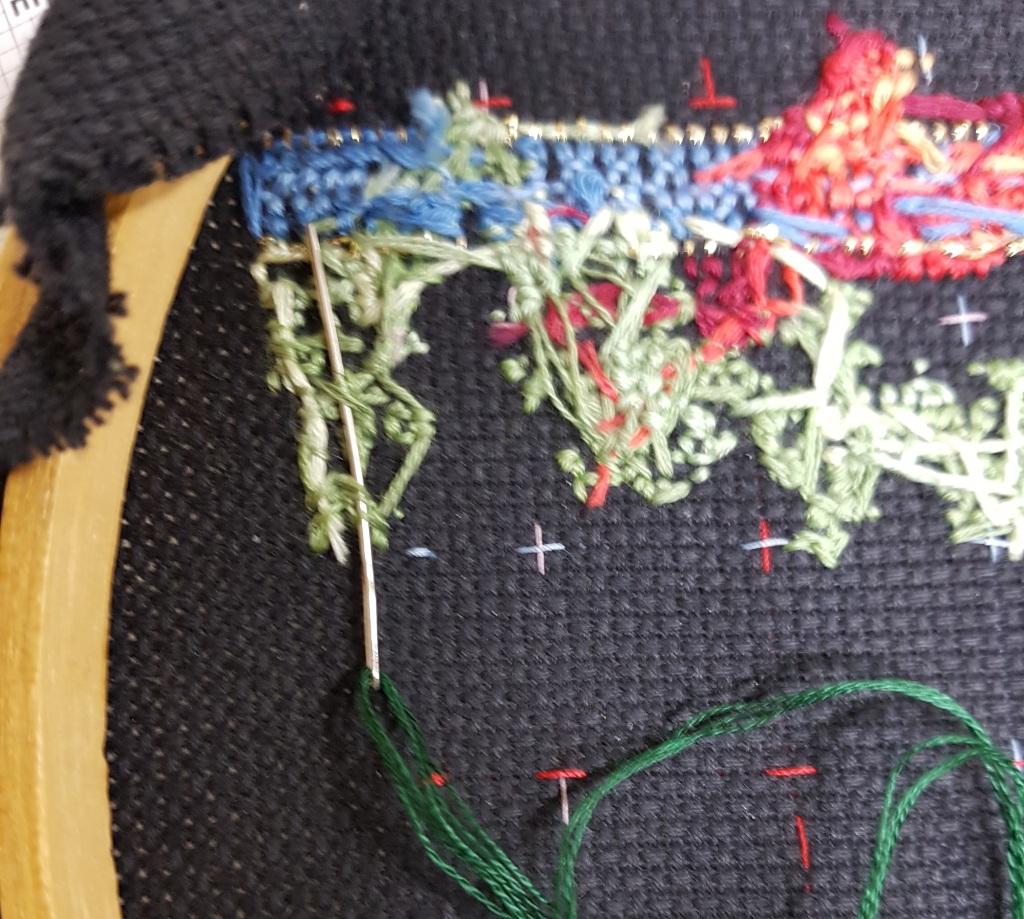
Find the center of the fabric. Mark it with one horizontal pin and one vertical pin. If you want to be really fussy about it, you can count the stitches on each side to make sure you are at the center. Using this as a guide, locate the closest heavy lines on the pattern, relative to the center and mark them with either a pin or a needle. Thread a needle with sewing thread in the colour that matches that line on the pattern. You will put a running stitch along all those ten-stitch lines on the fabric to correspond to the way you drew it on the pattern. Double check it! You want to be able to easily identify that coloured grid to orient where you are on the fabric relative to the pattern. If you are doing a small project this will go quickly. If you are doing a large complex project, trust me, you will thank me for urging you to take the time to do this. It may seem like a lot of preparation when you just want to get started already, but it’s worth it.

Once you have prepared all that, decide which area you want to stitch first. Find the square on the fabric and mark it with a pin or needle. Arrange the fabric in your hoop so that you can easily access that area, making sure you are orienting the fabric in the same direction as the pattern (top is at the top).

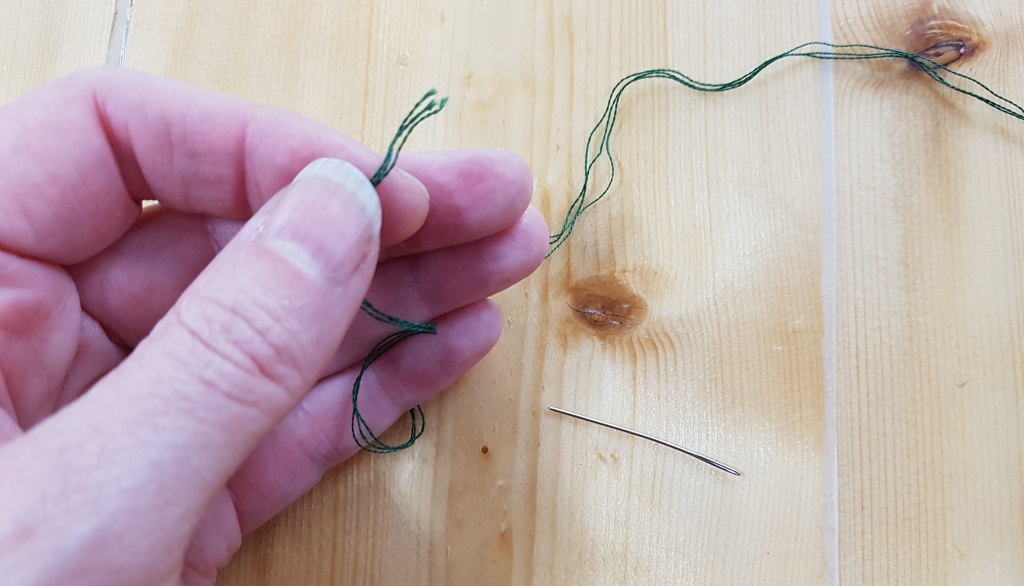
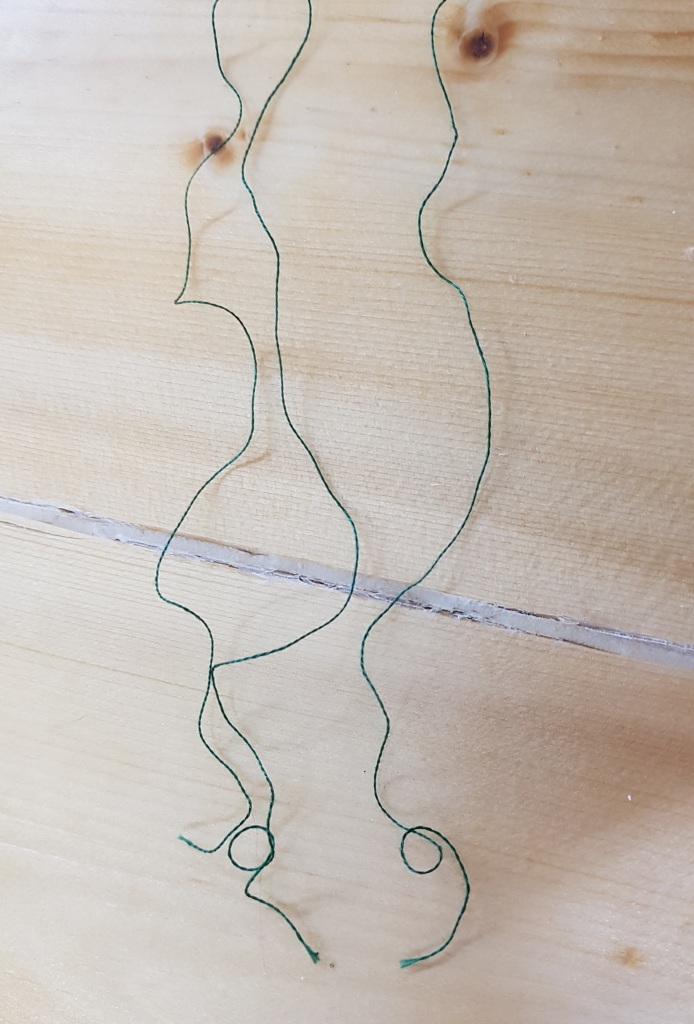
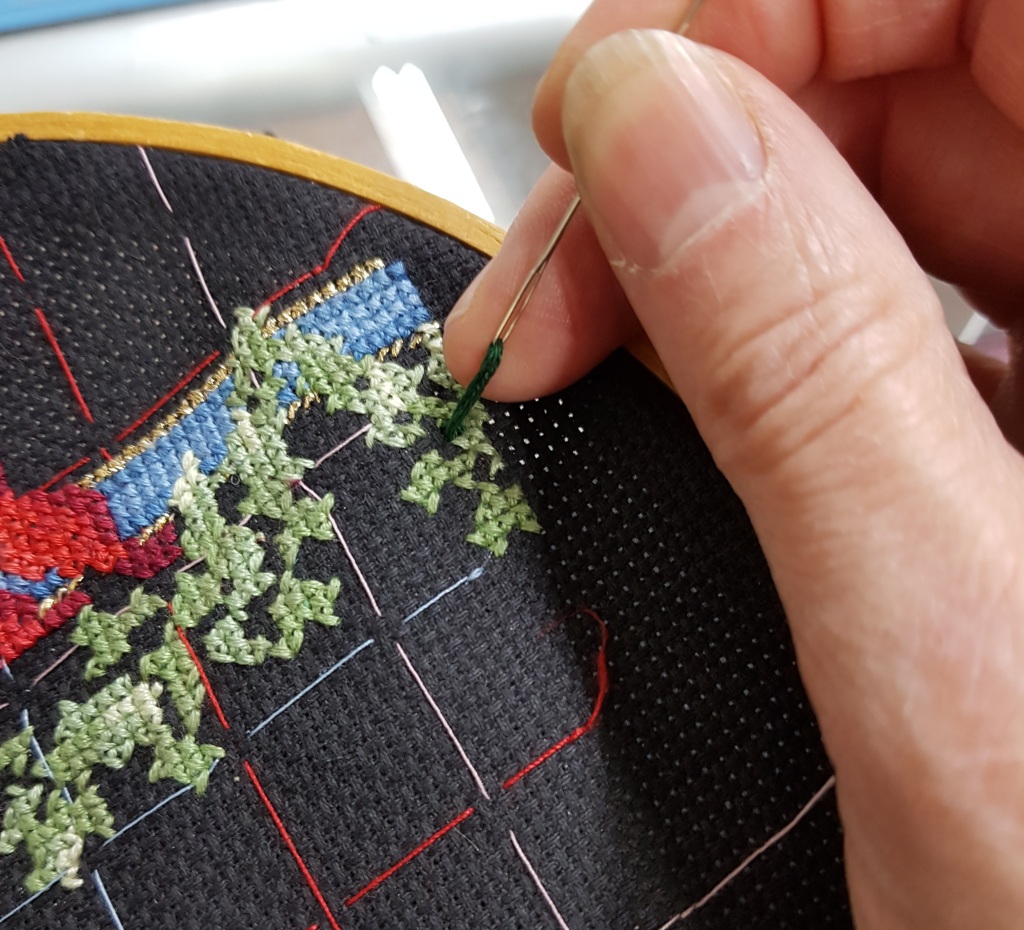
Check the instructions to determine how many strands of floss you need to use. Depending on the stitch count, you will need one, two or three strands. Choose the colour you want to start stitching with based on the symbols in the area you chose. You will want to have a manageable piece of around 18″. One by one, gently pull out the number of strands you need and lay them side by side. Align the ends and thread them into your needle. For your initial start, leave a long enough tail so you can weave it in behind the work.

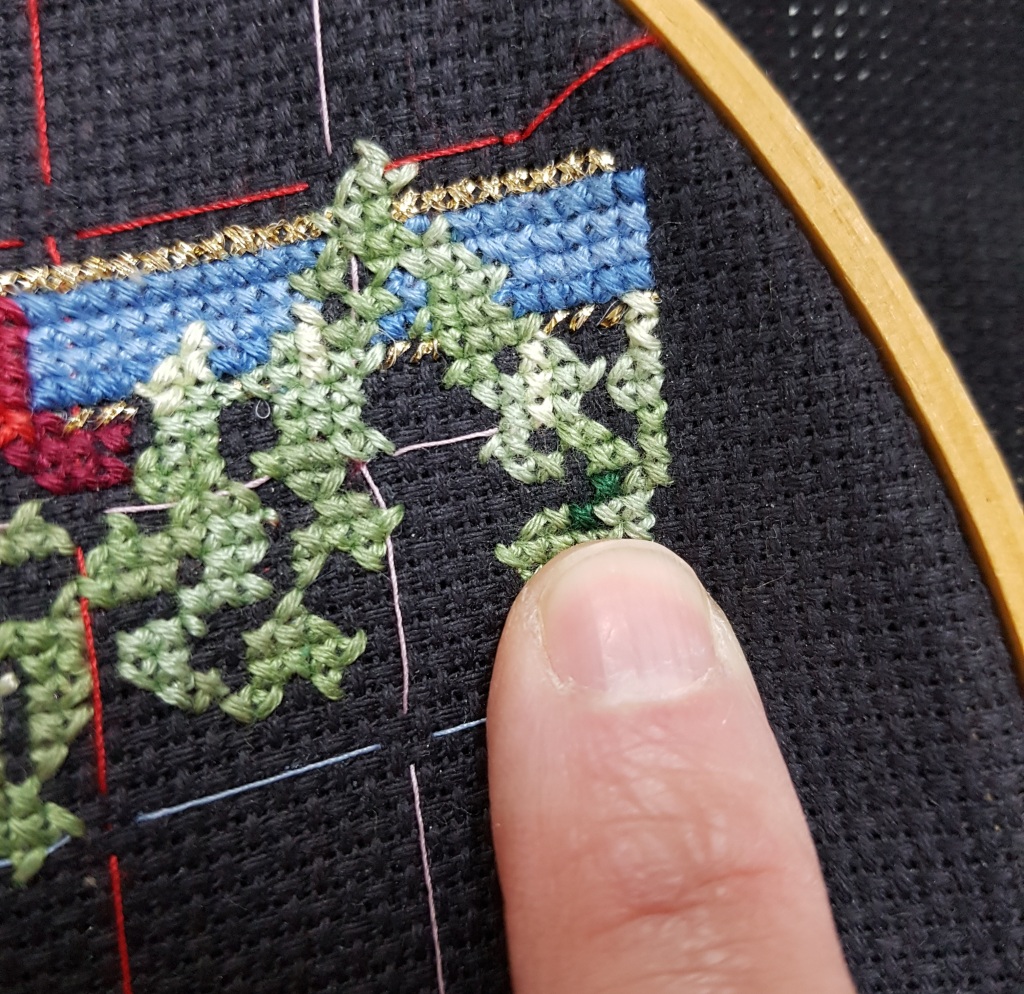
It’s important that all the crosses lay in the same direction.

If they don’t, the light will catch it and it will show. Follow the graph and stitch the crosses accordingly. When you get to the end of your colour or thread, weave in the end of the floss immediately and trim the tail as you go. Lightly colour in the completed squares on the pattern as you complete them. Using a pencil allows you to erase mistakes, or erase and reuse the same pattern again later.

Take your time, double check your work and pick out mistakes; this requires precision.

Happy Stitching!

Building a Foundation

A while ago I wrote about a flat bed knitting machine I was gifted; a floor loom that was entrusted to me and my recent purchase of a circular sock knitting machine. Since then I acquired a used Singer studio style knitting machine. All I can say is, “Wow!” It’s pretty amazing what you can do with one of these.

My new (old) Singer 360C Studio style knitting machine has a punch card reader as well as a pattern “reader”. The previous owner was clearly very skilled in its use! It came with a ton of punch cards and basic patterns for garments and all the bells and whistles. It’s a little mind blowing how much you can do with these machines, even without a ribber attachment.

I’m a long way from more than scratching the surface with it. Frankly, it’s a little overwhelming to consider all the possibilities. I played around with it just a little to get a sense of how it works, so far. I tried out a few of the punch cards, only doing colour-work so far. The punch cards include some repeating patterns and some motifs. Depending on the settings you use, you can do colour-work, lace, tuck stitches or slip-stitch patterns and weaving effects. I’m grateful that it came with all the original manuals. Between those and You-Tube videos I feel like I’m getting a good overview and that I’ll soon be able to make all kinds of fun things.

Punch cards

Way back, when computers were a brand new thing, everything started with 1’s and 0’s. Punch cards are basically 1’s and 0’s.

There’s a hole or there isn’t a hole. The carriage goes past the card reader and memorizes the pattern of holes and “not-holes” and depending on which is where, needles are directed one way or another. The settings determine what happens with those needles. So I guess you could say that this makes it a computerized machine… in a primitive sense.

If you have multiple colours of yarn, the gate number one yarn needles align with yarn number one and the yarn two needles align with yarn number two. The downside of this is that you can end up with some pretty long floats. (I haven’t looked into how people typically deal with this issue yet. Of course, you can machine knit the pieces so fast that you could just knit a plain set of pattern pieces to line the garment with.)

If you’re knitting lace, the holes or the “not-holes” correspond to knit stitches and the equivalent of yarn-overs. Trust me, this is a gross oversimplification. I haven’t tried to do any lace just yet. I’ve watched some videos and am excited to dive in, I just haven’t had a chance yet. There are all sorts of mysterious rows that seem like they aren’t making progress, but the orientation of the stitches on either side of the lace openings are manipulated somehow in this process. Like I said, “gross oversimplification”.

There are settings for “slip stitch” patterns.

The selected needles aren’t knitted, and it’s done so that it deliberately leaves floats. The positioning and size of the floats create the multitude of possible textured patterns.

Tuck stitches are a little different than slip stitches in that the tuck stitches are held in the needle hook until the pattern tells the machine to actually knit and incorporate whatever is on that hook. So you may have several passes of yarn in the hook which all get knitted at once when the machine tells it to. This also creates interesting textured patterns.

Weaving stitches give the illusion of woven fabric. The main yarn is fed through the carriage but the “weaving” yarn is held by guides on either side of the carriage respectively depending on which direction you are knitting that row. Brushes are engaged to make sure that the “weaving” yarn is held in the correct position and the pattern on the punch card determines how that “weave” appears. There is some room for additional creativity here in what yarns you choose but it will be limited by how fine the needles are on the particular machine you’re using. My machine is for finer yarns, so I’d be inclined to not go thicker than a worsted weight for the “weaving” yarn.

Patterns

I’m very excited to actually begin practicing with this feature.

There are 1/2 scale paper patterns included for basic garments. Once you have worked out your gauge for the yarn and punch card/technique you plan to use, you do a little calculating and set up the machine. The comprehensive set of gauge rulers allows you to pick the one that matches the gauge you need. There is a slot for the ruler to pop into immediately in front of the pattern piece. You cast on your appropriate number of stitches and as you knit, the pattern advances according to the gauge settings. As the pattern advances, the outline of the pattern moves in relation to the gauge ruler, indicating the number of increases or decreases you need. It just gives you a visual of where you are in the progress of that pattern piece. Once you are familiar enough with the system, you can create your own patterns.

I love fibre arts!

I love how tactile they are. I love the colours, the textures the endless creative possibilities. I love the engineering aspect of them. I love that they result in something I can touch and hold and put to practical use. I also love how the various skills often cross over from one discipline to another. No matter which discipline is our favourite, each technique we learn adds to our skills foundation and allows us to do more the next time. Each new discipline we try is enhanced by what we have gleaned in all our previous explorations. How cool is that? I’m looking forward to exploring what I can create with this new-to-me knitting machine. I’ll keep you posted!

Happy Fibre Arts Explorations!

Fair Isle: Goodbye Long Floats

I absolutely adore stranded colourwork. Fair Isle and Scandanavian knitting patterns are beautiful and satisfying to create. Managing floats (the yarn that is carried in the back of the work while you are working the other colour) can be a challenge. Handled poorly, they can result in puckered work, long finger or toe traps, or contrasting yarn showing out of place on the front. Let’s dive into this topic today.

I have posted in the past about Fair Isle techniques.

In that blog, I linked to videos that show different ways that people do this as well as how people trap floats.

It’s quite common to do colour work by using Continental (picking) to manage one colour and English (throwing) to manage the other colour. (Typically patterns only use two colours per round.) You can get pretty quick using this method and it does make it easier to keep the working yarns from tangling around each other. It’s easy to keep track of which colour yarn is dominant, since you carry each colour with left or right hand respectively and consistently. To me, trapping floats in this context feels awkward, especially with the right hand yarn.

Typically it is suggested to trap floats every 3 to 5 stitches. And if you are using fine yarn that’s great. Five stitches isn’t that long of a stretch for lace or sock weight yarn. But the thicker the yarn, the longer those three to five stitch floats become. In a sleeve knit from chunky or bulky yarn, you now have finger traps to drive you crazy every time you wear the sweater.

Puckering occurs when your floats are too tight.

As you catch the floats, it’s really important to make sure that they don’t squeeze the stitches together in your project. You want to observe as you go, always striving for consistency. I have heard of people working their project inside-out as one way of helping to manage the tension on their floats. By having the floats on the outside of the arc of the work, it naturally keeps them from getting too tight. I’ve tried doing that on socks and I found that I would always revert back to right-side-out. Hats off to you if you can do it.

Little by little I have been working on managing both colours in my left hand using continental method.

I would wrap the yarns around my pinky to tension them. I would have to stop frequently to refresh my tensioning because the second yarn would ride up the first yarn. So I would start out all on one hand and revert to using two. (In the video I have linked below, they also tension both over the pinky.) It bothered me enough that I started experimenting to find a way that was easier for me. What I found was that I could tension one yarn on my ring finger and one on my pinky. This almost eliminated the riding up and twisting of the two yarns as I worked. Getting my hand set up was a little confusing to start with but the more I did it the easier it became.

As I knit, I then focused on weaving the floats as I went along (as shown in the video I’ve linked to). I struggled to manipulate the strands of yarn with a finger on my right hand as they do. I found that I really had to use the middle finger of my left hand for this. After fighting with it for a while, I discovered that for me, the key was to focus on the fact that I was knitting the working yarn alternately one stitch with the other yarn in front of it and one stitch with it behind. Obviously the the float sits behind the stitch. When I shifted to thinking about it that way, it was easier to keep from becoming confused. I would chant, “yarn in front, yarn behind” as I knit long stretches of the same colour trapping the other yarn in this way, as I went along.

The project I’m making is definitely not perfect.

But I specifically left it like this because I want to be able to show what to watch for. When using two highly contrasting yarns, no matter what you do, there will be a shadow of the darker one behind the lighter one. You’ll see hints of it between the stitches. That’s absolutely normal. What I don’t like is when you end up with a solid vertical line of the float yarn sitting between two stitches. This seems (from my experimentation) to be a result of the tension being too soft in the float yarn. It takes a bit to get the tension of the floats consistent.

Find the Ravelry pattern here

I found that in order to minimize any trapped contrasting yarn showing through to the front of the work my tension needed to be tighter than I expected. The big downside of this is that you are left with little to no stretch in the finished project. As long as you plan for this, it doesn’t need to be a big deal. Practicing on small projects is a good way to figure out what works for you. All that said, if the contrast between my colours isn’t as extreme as in this project, I would err on the side of softer tension to allow a bit more stretch.

I like how tidy this way of catching floats is. Clearly, it’s up to you to decide, project by project, how frequently you trap the floats. I suspect that weaving them in this way is going to result in a stiffer fabric by nature. If you are only trapping on every second or third stitch it would allow you to leave the floats just a bit looser. I did find that I got a more consistent result on my high contrast project by following the method in the linked video.

Every project is a learning opportunity.

Happy Knitting!

Fixing Knitting Mistakes

I don’t know anyone who can knit a project without making a single mistake. Sometimes, it’s simply not worth fixing them. Sometimes they stand out like a neon sign — mercilessly. And sometimes they just make the whole project wrong. Today I want to focus on these situations and offer suggestions to deal with them.

Types of Mistakes

The misplaced purl: If you got a stitch wrong and quickly realize it, it doesn’t have to be a big deal. But consider fixing it as soon as you realize it’s there. The more rows or rounds you knit past the mistake, the more work it takes to fix it. Mark it if you plan to fix it in the next row.

Off to the races: I am often guilty of not reading far enough ahead in my pattern. I’ll happily carry on knitting a predictable section and then realize that I’m not sure what comes next. I discover that I completely missed a vital transition. Definitely a time to frog back to that transition and rework it from there.

Dropped stitches: As soon as you see a dropped stitch, lock it with a stitch marker or safety pin so it can’t unravel any further. If it happened many rows/rounds back, you’ll have to decide how you want to deal with it.

Oops, missed one: In projects like socks with an increase or decrease at the beginning and end of a row or needle, it’s easy to do the one at the beginning and forget the one at the end. Often, you can fudge this by doing that increase/decrease in the next row/round, or by simply dropping down to the row below, making the stitch and carrying on; provided you notice right away. Sometimes, it just isn’t worth the bother and it’s easier to just sneak an extra stitch in, or out, in a spot where it won’t show.

Whatever the mistake, you’ll need to make an assessment about whether it’s worth fixing or not.

Stepping Back

If the mistake doesn’t change your stitch count, the configuration of a pattern repeat or mess up the size or fit of what you are knitting, if it isn’t glaringly obvious, you don’t necessarily need to do anything about it.

First things first. Take a step back. Set your knitting down and walk away. Leave it for a while; come back when you are feeling calmer. Without zoning in on the mistake, lay out your project with the mistake facing. Step back a pace, and glance at it with a general gaze. No seeking it out allowed! If the mistake screams at you under this circumstance then fix it. If not (and it won’t mess up your pattern) carry on.

Note to raging perfectionists: just rip it apart and fix it already. LOL If it bugs you, you won’t be happy with the end result. We want our projects to be a source of joy and satisfaction. So, do what you need to do to that end.

Repair Methods

Tinking is what we call the process of backing off your stitches one at a time to get to the mistake. Do this when your mistake is in the current row/round and within a reasonable distance. The technique is simple. Insert the tip of the left needle into the stitch below the stitch you want to remove, release the stitch off the right needle and pull the yarn out of the stitch you are eliminating. Continue in this fashion until you make your way to the mistake. Undo the mistake, fix it and carry on. Just be careful not to twist any stitches in the process.

Laddering down refers do undoing just the stitches above where the affected stitches are.

Frogging refers to the act of removing your needles from your knitting project and ripping back to where the mistake is. (“Rip it, rip it,” like a frog croaking.) There are times when this is truly the best approach.

There are a couple important things to keep in mind before frogging.

Careful not to lose important marker information: If you have placed markers to indicate important aspects of the project, it’s important to place new locking stitch markers in the row/round that you’ll be going to. I would encourage you to put a marker through the two stitches on either side of where the marker would sit on the needle. Determining placement can be a little tricky depending on the complexity of what you are building. Do the best you can and then check against the pattern after you finish frogging.

I encourage you to use a very fine knitting needle to pick up the stitches in the row/round you want to rip to. It’s tedious but better than ripping too far, or dropping stitches as you rip it back. (It’s easy to get the odd stitch from the row above or below when picking them up.) Once the destination row is safely picked up, pull out the original needle and begin ripping out the unwanted stitches. As you approach the needle, slow down so you can prevent any stitches dropping. Put a stitch marker or holder into any stitches that are suspect to keep them from dropping as you go. Once the stitches are all securely back on your needle, replace them on the original needle, adjusting stitch orientation as necessary and positioning any stitch markers as needed.

A note about lace

Lace comes in varying degrees of complexity. For novices who are testing the waters and have not yet experience the trauma of lace gone wrong I encourage you to lay a “life-line” in your work. Thread yarn on a needle and pull it through the actual stitches of an entire row/round (ideally a “no-brainer” row) so that if you need to frog, you don’t have to start the entire project over. In a complex lace pattern it can be overwhelming to discern how to repair a mistake. Place a life line as often as you want to, to reduce the amount you need to frog should you have a dropped stitch or a mistake you can’t recover from. If you don’t absolutely have to fix a mistake in lace, don’t.

Picking back up

If you choose to simply frog back (or accidentally pulled your needle out of your work) without securing your destination stitches on a needle first, handle the work very gently. Know where the working yarn is and make sure that you are not pulling on it in any way. I recommend using a very thin knitting needle to pick up your stitches, especially if you knit tight. Take your time and be ever so careful that you catch all the stitches. If you find that some of the stitches have dropped below the row, just pick them up where they sit. Don’t try and repair them until you have all the stitches on the needle.

Carefully transfer the stitches back onto the original needle(s), being careful to check the orientation of each stitch and repairing any dropped stitches as you go. Once you are done, you’ll need to get your stitch markers back to where they belong, between the marked stitches. Once you have completed that, you can begin reworking your project again.

I hope you have found this helpful. Kudos to the You Tubers who created the videos I’ve linked to here.

Happy Knitting!

Technique: Let’s Talk Lace

For many novice knitters, the thought of knitting lace can be daunting. Intricate lace patterns create images of mandalas, flower petals, paisley or leaves simply by combining basic stitches in clever ways. It can look like magic! But take heart, with a little bit of patience and perseverance, you too can learn to knit lace. Here’s an overview to take a little bit of the mystery out of it all. If you can knit, purl, increase and decrease, you can learn to knit lace.

There are a few things that you do need to understand about knitting lace.

Working off a chart:

You will definitely be working from a chart to knit lace.

And trust me, you want to be working from a chart. A chart is a graph of what stitches make up the pattern. It’s a visual representation of what you will be knitting. As much as it can be nice to have written instructions, (and many patterns will have both) once you get accustomed to following a chart, you will likely come to prefer it over written out instructions. A chart allows you to see what went before and what is to come in the pattern, all in a glance. It removes the step of translating words into instructions and then into an image in your mind.

As you work your way through the chart it is imperative that you mark, in some way, to show where you are.

I use a pattern holder for my charts. These come in a couple sizes. They are usually a folder of sorts with a metal sheet inside so a magnet will grab onto it. This allows you to use a long skinny magnet to keep track of where you are in your pattern. I prefer to place the magnet directly above the row that I am working on. This way I can see the stitches I have already done below the current row I am working. What I see on the chart matches what I see when I look at my knitting. I also use a pencil to place a tally or a check mark beside each row as I complete it.

Working flat versus working in the round will impact how you read the chart.

Charts usually show you how the right side of the fabric is going to look. Therefore, if you are knitting flat and turning your work; alternating right side and wrong side, the wrong side rows will be read as such. Usually the legend will say what a symbol represents on the right side and what that same symbol represents on the wrong side. Generally with lace, any increasing, decreasing or other fancy work is usually done on the right side of the fabric with the wrong side simply knits and purls. I have knitted patterns in which the wrong side is always simply purled. On those charts they only showed the right side rows of the pattern on the chart because once you know to just purl the wrong side, you don’t need a chart to tell you that. If you are knitting in the round, each symbol on the chart will only have one meaning as you will only be working the right side of the fabric.

Feeling a little confused? That’s okay.

Like with most things, you really have to try it out to be able to wrap your brain around it. Hang in there. This info will settle into the back of your mind, and when you do try out some lace knitting, it will come back to you.

Lace is made up of repeating patterns.

We refer to these as, you guessed it, “pattern repeats”. When you are first learning to knit lace, I recommend that you start with a very simple pattern. I also recommend that you place a very thin stitch marker at the end of each pattern repeat in your knitting. Knitting lace does require focus, but as you work through the pattern repeats, you will start to get a sense of what needs to happen in what order. The more repeats you complete, the more you’ll begin to anticipate what comes next. By having strategically placed stitch markers, if you miss a stitch or do a wrong stitch in one section, it’s easier to figure out what you did wrong and fix it.

It is very important to take your time and double check your work as you go.

Minimize distractions as much as possible and when you start to tire mentally, set it aside and give yourself a break. When you take a break, mark your pattern clearly and carefully to indicate where you left off.

Tinking (undoing stitches one at a time to back track and fix a mistake) can be tricky when you work with lace, especially when there are a lot of yarn-overs in the pattern. Depending on what happens, it is possible to end up with an unrecoverable mistake. For instance, if you drop a stitch and it runs down through a section that was built on a stack of decreases you can end up with a big mess that you simply won’t know what to do with. Therefore, it’s a really good idea to run regular “lifelines” as you go. Using a darning needle, you run some smooth heavy thread or light yarn through your stitches and tie it off so that it can’t fall out. Do this at regular intervals so that if you make a mistake or drop a stitch you will minimize any potential trauma. If you do drop stitches, they can only go back as far as your lifeline. Make a note on your chart to indicate where that lifeline sits. Then, if you do need to go back, you will know where to start knitting. I encourage you to always place your lifelines in the same pattern row.

I’ll be offering in-house beginner lace workshops this fall. Let me know if you are interested in participating and I’ll put you on the list!

Happy Knitting!

Technique: Knitting Decreases

Knitting is such an amazing process. Learning new techniques can feel like learning to do magic. There are so many individual techniques that knitters may never encounter unless they challenge themselves to tackle advanced patterns. I love watching knitter’s expressions when they learn a new technique! Last week I discussed the variety of methods for creating increase stitches in knitting. This week, it’s all about decreasing. So here goes!

K2Tog / P2Tog

The most basic way to decrease is to simply knit two stitches together as if they are one stitch. (K2Tog) You can also purl two stitches together. (P2Tog) When you knit two together the resulting stitch will lean toward the right. This may also show up in a pattern with the specification that you are to knit them through the back loop. That would be K2TogTBL or something similar.

SSK

Knowing that K2Tog is a decrease that leans right, clearly, we must have a decrease that leans left. That is what you will see in patterns as SSK, or “slip, slip, knit”. SSK requires that you slip two stitches as if you were going to knit them. Once you have slipped them, slip them back onto the left needle and knit them both together through the back loop.

PSSO

Another common form of decrease is the PSSO and its variants. PSSO stands for “pass slipped stitch over”. I have also seen this abbreviated as PSO on occasion. This can be used to decrease one or more stitches within one “stitch”. It can also be used to create a decorative effect as you decrease. Start by slipping a stitch purlwise onto the right needle. Then you will knit the next stitch(es), or knit two together as indicated in the pattern. You then use the left needle to pass the slipped stitch over what you just knitted. Most commonly, you would slip one, knit one and then pass the slip stitch over that one knitted stitch. However, it is not uncommon to slip one, K2Tog then pass the slipped stitch over. It is also possible to slip one and knit multiple stitches before passing the slipped stitch over those multiple stitches. If you are passing it over more than two stitches it can get a little tight, though. This results in a left leaning decrease.

CDD

This next one is very cool. It allows you to decrease by two stitches, without any lean. It’s called a Central Double Decrease (CDD); I have also seen it refered to as a Centred Double Decrease. You begin by slipping two stitches together knitwise onto the right needle. Knit one stitch, and then pass both slipped stitches over the knitted stitch.

SCD

The last one I want to show you is an advanced decrease technique. It is a Single Central Decrease (SCD). It requires you to decrease using a SSK, then do a temporary increase and follow it with a K2Tog. This would be used at the top of gusset, for instance. This next video demonstrates this technique very clearly. It starts with the DCC first and you will find the SCD at 3:52.

One of the reasons I like to participate in events like Tour de Sock, and this year as a cheerleader in Sock Madness, is that it pushes me to stretch my knitting skill set. There is always some new technique or some interesting way of combining techniques that allows me to grow as a knitter. In the process, I find approaches that I really like as well as ones that I don’t care for. Of course, I wouldn’t have known either without stepping outside my comfort zone to try something new.

I hope you find this information helpful. This information will be covered in my Technique Building Series of workshops this fall. As always, I encourage you to check out the YouTube channels of the folks that I have linked to in this blog. My hat goes off to them for the work they do. We are so fortunate to have this amazing tool at our fingertips.

Happy Knitting!

Technique: Knitting Increases

Recently I have had a number of novice knitters come in for help on their projects. Each of them were working on a pattern that was stretching their skill levels. I thought it may be helpful to do a few posts with specific information regarding knitting technique. Today, I’ll focus increases.

Increases are used in most shaped knitted items: tops, hats, socks, mittens, pretty much anything that is more than just a rectangle. Yet, there are several methods of increasing. For anyone who is new to “more than just a rectangle” knitting, it can be confusing to be faced with a pattern that assumes you know what to do and how to do it. I hope to take the mystery out of it for you today.

The first thing to mention is that not all knitting terminology is fully standardized. Although it is mostly standardized, you will still see variations within patterns. This often comes down to the country where the pattern originates and/or whether the pattern has been translated from another language. Sometimes, a self-taught knitter/designer will use the terms differently than expected as well. You will always be wise to check the legend and any overview the pattern designer has given to see whether they specify how they interpret the specific terms.

Make One Increases

The “make one” increase is typically abbreviated M1, M1L or M1R. This is a very common form of increase. You will make a stitch out of the horizontal yarn between two stitches from the previous row or round (the running yarn).

If you were to simply reach your needle below that running yarn and pick up your working yarn to make a stitch, you would end up with a hole in your knitting. We generally don’t want holes in our knitting unless we are making lace. Typically, if they simply ask for an M1 stitch, they actually want an M1L stitch.

In order to make one stitch without creating a hole, essentially you want to twist that running yarn and pull your working yarn through the resulting loop. You lift the running yarn onto the left needle first. Whether you are doing an M1L or an M1R is determined by whether you pick up that running yarn with the left needle from the front or the back. One will lean toward the left and the other will lean toward the right. Thus: M1L and M1R.

To complete an M1L: direct the tip of the left needle under the running yarn from the front to the back. Knit through the resulting back loop. This will result in a left leaning bar at the base of the stitch.

To complete an M1R: direct the tip of the left needle under the running yarn from the back to the front. Knit through the front loop, as you normally would. It’s a bit awkward. It results in a right leaning bar at the base of the stitch.

Yarn Over or Yarn in Front

This increase is intended to create a hole in the work and is typically used in lace. This requires you to grab the working yarn with the right needle as if you were going to pull it through a knit stitch. It is unstable until you complete the stitch next to it.

Lifted Increases

Abbreviated as LLI and RLI, These work an additional loop into an existing stitch on the left or right side of the stitch respectively. One leans left, the other leans right.

To make an RLI, (right lifted increase) using the right needle, pick up the right leg of the stitch immediately below the stitch on the left needle. Place that leg onto the left needle, without changing its orientation. Knit it and then knit through the original stitch separately.

To make an LLI, (left lifted increase) you will be increasing into the stitch on the right needle, adding a loop to it. Knit the stitch you will be increasing into as normal. Using the left needle, pick up the left leg of the stitch a row below that last stitch on the right needle. Using the right needle, knit through the back loop of the stitch you just picked up. Make sure that you are picking up from a full row below or you will end up with a yarn over instead of a proper increase.

Here is a video that demonstrates Purled Lifted Increases.

Knit Front and Back or Purl Front and Back

The names of these describe exactly what you do to make them. For a KFB, you knit into the front of the stitch, leave it on the left needle and then knit into the back loop of the stitch, thus increasing by one stitch.

To PFB or purl front and back, you purl as you normally would, but leave the stitch on the left needle. Then purl into the back loop as well to complete the stitch.

Finally, the backward loop is yet another form of increase. It’s very easy to do. Here’s a video to show this in both Continental and English methods.

These are the most commonly used increases. As you can see, each one has its own look and “personality”. Being able to identify them and comfortably knit them makes following advanced patterns much easier.

I hope this was helpful and that it will give you the courage to take on a pattern that you might otherwise have been intimidated by. I will be offering 2 hour evening workshops and 4 hour weekend workshops beginning this fall to provide in-person technique instruction. Increases will be one of the evening workshops. I hope to have a calendar mapped out by the third week of August, 2019.

Happy Knitting!

Macrame, Anyone?

If you feel like doing something knotty, you may just fall in love with Macrame. And how in the heck do you say that? MA-crah-may, where the MA is like you would say in mast or macaroni. This textile art can be traced back to the 13th century when Arab weavers are said to have used macrame knotting techniques to finish the edges of their textiles.

It was a big thing back in the 1970’s. Plant hangers, wall hangings, bracelets and many other items were constructed or adorned with these knotting techniques. It’s a fun and easy-to-learn activity. The aesthetic is returning, and interest in macrame is on the rise.

I recently brought in Katia “Scuby Cotton” yarn for the folks showing an interest in Macrame. I’m in the process of putting together a workshop to teach the basic knots used in Macrame and this yarn will be featured. I thought I’d offer up some links to videos that teach macrame knots to give you a taste of how it works. At first you might find it a little confusing. Like anything, watching someone do it and getting your hands on it are two different things.

There are really only a few basic knots to learn in macrame. They include the Lark’s Head; the square knot; the open square knot; the picot knot; the twisting or spiral knot; and the half hitch. That may seem like a lot, but they are all pretty simple once you’ve done them a few times. No tricky stuff here.

As with so many fibre arts, seeing how it is done on a video is truly helpful and offers the opportunity to rewatch segments repeatedly as needed. Sometimes, our perception of what we watch can turn a simple thing inside-out and no matter how many times we watch that video, we just don’t quite get what it is that we’re missing. That’s where it’s really helpful to take a workshop in person, or even book a one-on-one session with a teacher to work through those things that confuse you. A teacher can watch what you’re doing and spot that one thing that has you bumping into a wall of frustration.

We are so fortunate to live in this technological era. To have instructional videos available at our fingertips is something we have come to take for granted. When I started my search for videos regarding macrame, I was delighted to see how many there are. Here are a few links for you to check out.

This video is a demonstration of the basic macrame knots:

Here is a nice basic plant hanger tutorial:

I included this next link to show some nice variations in plant hangers:

Here’s a lovely example of a macrame wall hanging. (I love this girl! Chelsea is such a hoot to watch…)

There are so many different applications for these knotting techniques. I encourage you to dive down the YouTube “rabbit-hole” and check it out. Some folks are even making jewelry using macrame knots (wrapping semi-precious stones; making beaded bracelets).

In case you’re interested, here’s a link to a history of Macrame.

And there you have it, a little taste of what you can do with macrame. I’ll have a sign up sheet in the store for anyone interested in an introductory macrame workshop. I’m imagining something simple that can be done in a single evening. If you are interested in a full on “let’s make a plant hanger” workshop; it only takes one ball of Scuby Cotton yarn to make a simple plant hanger. I would be happy to do a Sunday afternoon class for locals.

Happy Crafting!

Mysteries of Gauge

There are a number of things that affect the gauge of our knit and crochet projects. Subtle things to consider that can help you to understand how your particular nuances can affect your gauge.

The Gauge Swatch

In terms of knit and crochet, gauge translates to how many stitches across by how many rows high fit in a 10cm x 10cm (4″ x 4″) square. Typically, the expectation is that you will knit or crochet a gauge swatch to identify each yarn’s suitability to a project. You may have seen memes that declare something to the effect that swatches are for sissies. Be aware that most of the people making these declarations are highly experienced. In all fairness, they already know how those different yarns will behave in their hands on their favourite hook or needles. There are times when it’s definitely in your best interest to take the time to work up a gauge swatch. Especially if you are making a fitted garment! Making a blanket or scarf? Gauge won’t be that critical.

So here’s the thing. Each one of us handles our tools similarly, but with subtle (and sometimes not so subtle) differences. These differences ultimately result in variations in tension on our working yarn. That difference in tension subsequently affects the outcome of our gauge.

Breaking it down: Hands & Confidence

Some people have very relaxed hands and will knit with a very “soft” or “gentle” tension. On the other end of the spectrum, some work with an iron grip and stretch the yarn aggressively as they work. Their tension will be “hard” or “tight”. As you can imagine, someone with soft tension will end up with larger, softer stitches than someone with hard tension. I prefer to use the words “hard” and “soft”. Some say tight and loose. The terminology I use relates to how your resulting fabric will feel as well. Soft tension gives you soft fabric, hard tension gives you harder, denser fabric. Obviously, there is a range reflected here. Each of us is somewhere on that spectrum. Add to this that some people are naturally very coordinated and others are not. You can love to crochet or knit and not necessarily be a naturally coordinated person. If that’s you, then you will probably always work with a slightly harder/tighter tension.

It is very common for beginners to have hard tension as they develop the coordination required for either knitting or crochet. The tendency is to have a lot of physical tension in your hands (and shoulders) as you are learning. Your mind will also be working overtime. As you gain experience, most people will gradually become more relaxed both mentally and physically. As confidence grows, the mind, shoulders and hands are able to relax and tension naturally softens. Some folks will still keep a harder tension, even when they are relaxed. None of this is either good or bad, it is just information. What is important is to determine where you are on that scale and how it relates to the resulting tension on your yarn; this relates directly to the gauge you will produce. Hard tension will result in a finer gauge than suggested on a yarn label. If you know that, you can go up a needle/hook size or two to accommodate your tension and get the result that the pattern and yarn identify.

Breaking it Down: Needles & Hooks

Nowadays, you could write an encyclopedia about knitting needles and crochet hooks. You can purchase them made of a very wide range of materials. Each material has its own particular qualities. Talk to anyone who knits and crochets a lot and they will have their favourites. My go-to is generally wood. There are many brands out there. I like Knitter’s Pride Dreamz needles for most things. They are finished wood (as opposed to being raw unfinished wood). I refer to needles on a scale that has “grabby” on one end and “slick” on the other end. I refer to the difference as a range of “smoothness”. Again, that’s my own personal way of describing it. For some yarns I prefer Knitter’s Pride Nova Platina needles. These are what I would refer to as slick. Some people really like a grabby needle that will hold the yarn firmly until they decide to move it. Other people like a very slick needle that will allow the yarn to slide with no effort whatsoever. The different materials used to make the various lines of needles allow you to choose what degree of smoothness you want to work with. When I say needles, I really mean both crochet hooks and knitting needles. It truly applies to both.

In regard to needles, another thing to bear in mind is that different fibres also have varying degrees of grabbiness. This refers to the texture of the yarn and the degree to which the fibres cling to the needle material as you work the yarn. I like to use a variety of needles relative to the project and the yarn I’m using. I’ll choose a smoother needle to work with grabbier yarn, and a grabbier needle to work with smoother yarn. The smoothness of the needles can affect how much tension you hold in your body as you knit. This can subtly affect your gauge as well. You may knit tighter with chrome plated needles than you do with bamboo needles.

How it all Relates:

Each yarn will indicate the gauge you can expect, with suggested needle sizes. The more comfortable and relaxed you are, the closer to the suggested gauge you will work.

Over the next few months I’ll be setting up a permanent “yarn and needle tasting” station in the store. I’ll have a number of baskets, each with a different style of needle and yarn so you can sit down and try them out to see what feels good to you. Stay tuned for updates!

I sincerely hope this information is helpful to you.

Happy Knitting and Crocheting!

Wow! Too Easy! More Gift Ideas

Anyone who crafts or sews will likely own a rotary cutter. These handy tools come in a few different sizes ranging from 28mm to 60mm. The size I find most popular is 45mm. The round blades are razor sharp and allow for nice clean cutting of fabrics and other craft materials. The newest style of blade opens up a whole vista of crafting possibilities.

The regular rotary cutter blade is simply a razor sharp disc that makes a solid clean and straight cut. You can also purchase wave blades that give a gently zig-zagged edge, like you would expect from pinking shears.

What I am excited to tell you about is the new skip cut blade. The skip cut blade has gaps around the cutting edge of the disc. It has many short cutting edges with equal spaces between them. When you use this blade, it gives you small cuts at regular intervals. For the creative individual, the possibilities for this blade are exciting. I just want to talk about two applications.

Quick and Easy Fleece Blanket with a Crochet Border

You start with a piece of Nordic/Polar Fleece fabric. With the edges cleanly cut, corners rounded off and the selvedges removed, use a ruler and rotary cutter fitted with the skip blade and cut an inch in from the outside edge all around the piece of fabric. It’s important to do this in one pass. Press firmly so that you are sure you are cutting all the way through. You now have a series of holes evenly spaced an inch in from the edge of the fabric. This gives you a place to easily crochet into so you can create a crocheted border all around your blanket. The edge folds in half, so you have a double layer of fabric contained within the first round of your crochet edge. I found two different links that show how to do this. Both are relatively long, however they give the necessary information well. The second one is more thorough a demonstration than the first.


Fleece Lined Blanket

The next project I want to share with you is a fleece lined blanket.

You can start with either a crocheted or a knitted blanket that you have already completed. You can either measure your blanket and use those measurements as a guide, or you can lay the blanket on the fleece to mark its size instead. Either way, you want to end up with a full inch all the way around the blanket. In other words, if your blanket is 45″ x 60″, you will want to cut a piece of fleece that is 47″ x 62″. As with the example above, you will use the skip cut rotary blade to make your nice tidy row of holes around the edge. You will have to take some liberties with how you align what you are crocheting with the existing stitches in the crocheted or knitted blanket. I would personally pin the edge profusely before beginning the process of crocheting the fleece to the edge of the blanket. Below is a link to a video in which this technique is demonstrated. This video is very thorough and assumes that you are a beginner.

I was introduced to skip cut blades by a customer who was traveling through Revelstoke. She stopped in my yarn shop and asked whether I carried them. I had never heard of them. While we chatted, I looked it up online through my supplier and found them. I brought them in for her and mailed them to her when they arrived. At the time, I brought in the packs of 5 as they are more cost effective than the individual blades. I have a couple packs still in stock. My next notions order will include some singles, so that if people want to try one out without committing to 5 of them, they have that option. I have a variety of solid colours of fleece in stock and many options for yarn that could be combined with it to make it special. What a great, easy gift to make someone’s life just a little more cozy.

As always, if you like the videos I have linked to and you want to see more from the folks who took the time, effort and care to create them, show them some love. Give them your likes, share the link or subscribe to their channel. Let’s support those amazing creative people in our world. 🙂

Happy Crocheting!