Socktober: Week 5… FrankenSocks!

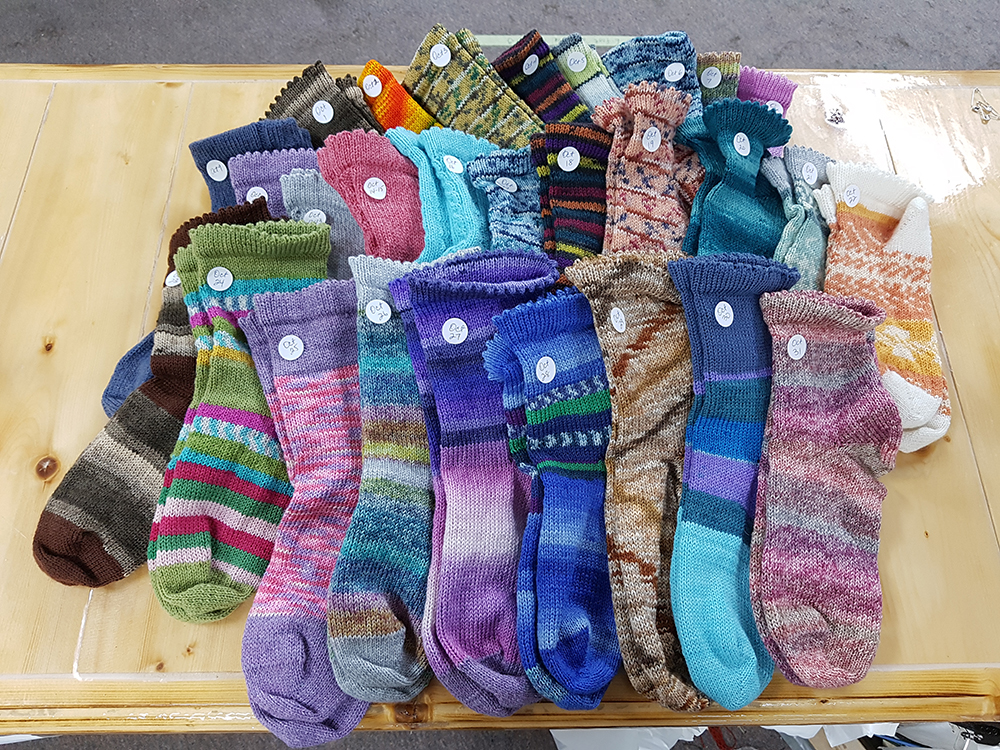
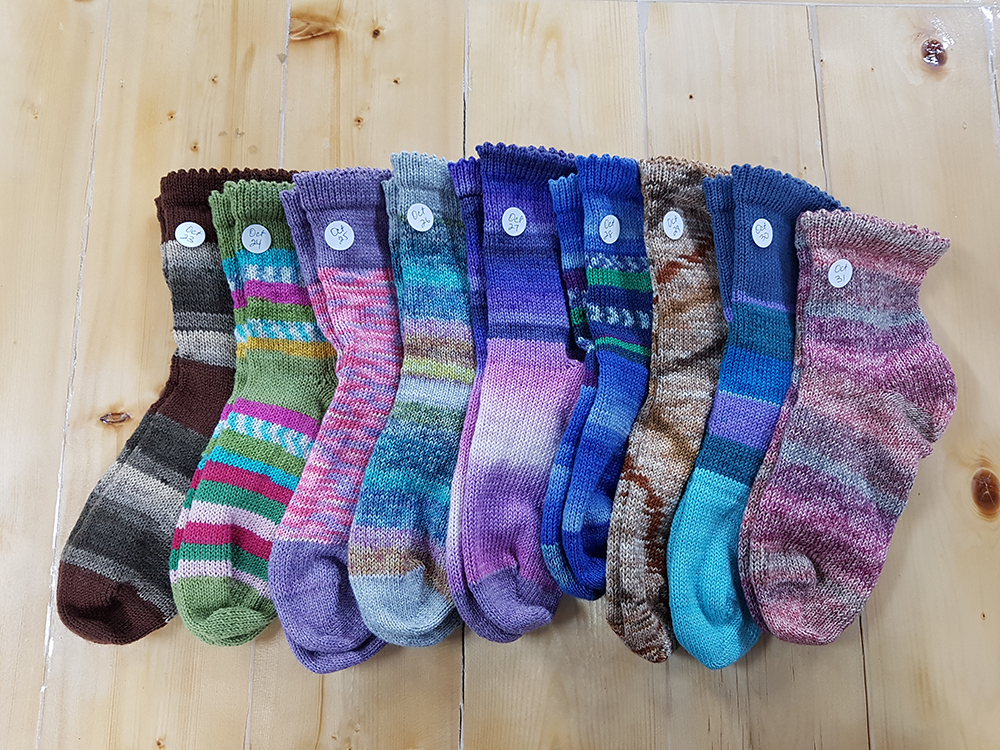
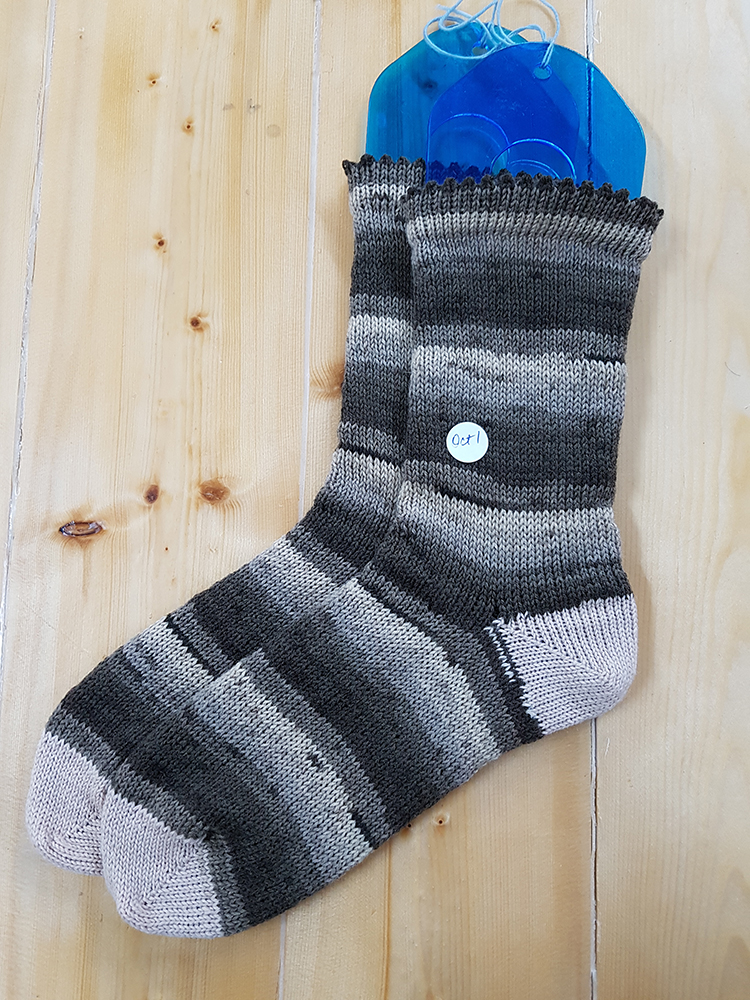
Wowzers! The store was incredibly busy this week. Between the sewing techs being here to service machines, Halloween coming up and the cooler weather inspiring more knitting projects, we definitely saw more folks this week. I assure you that I am celebrating that fact and not complaining. I’m so glad that I took the time to organize my leftover yarns right away. This is my Frankensocks week. My immediate inspiration was obviously Frankenstein’s Monster since I would be cobbling socks together using leftovers. However, as I was imagining my kids choosing which ones they want for Christmas, it occurred to me that it could also reference Frankincense and gift giving. So there we go! Two for one! I like it.

As the sewing work floods in, I have been very happy to keep the socks fairly simple this week. However, my Yarn Chicken exploits have simply continued from last week. There won’t be much of anything left in my bin when I’m all done. That’s excellent. That takes away any twinges of guilt I might have felt in expanding my stash again.

Despite keeping the socks simple, I had some mishaps.

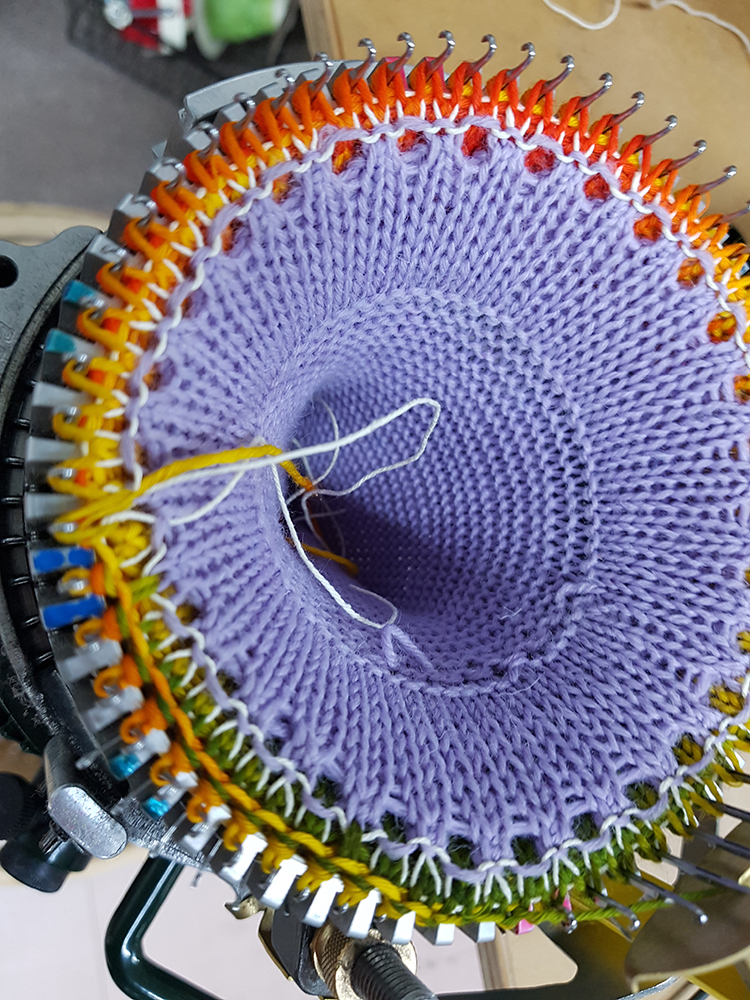
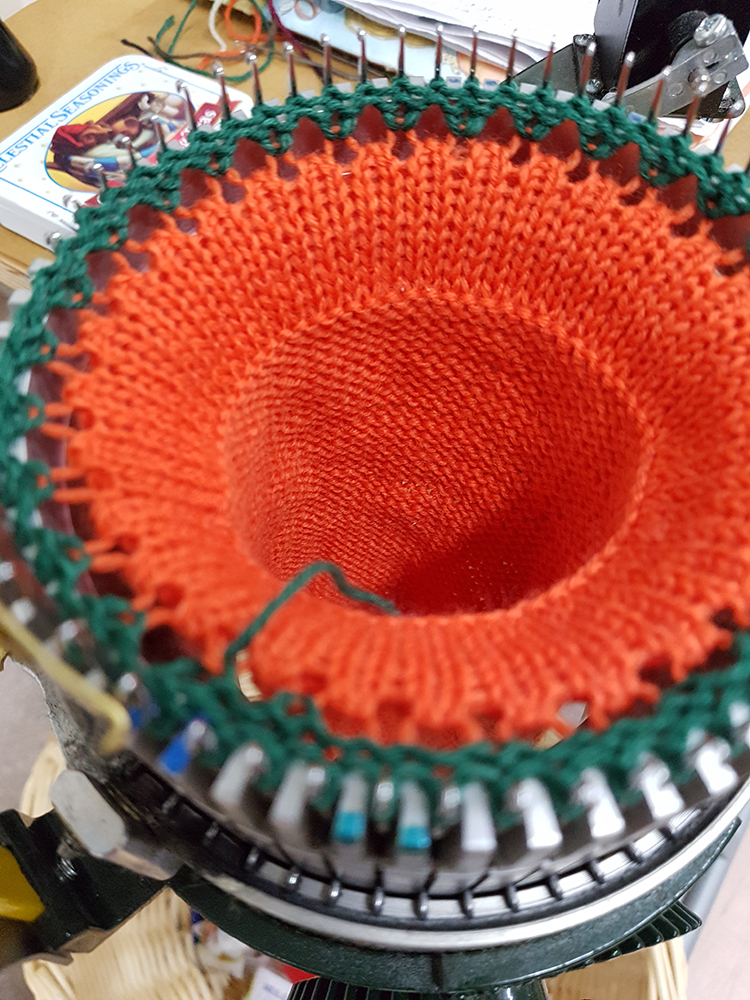
I’ve been knitting each pair of socks and leaving them on the machine until the week’s worth are done, to close all the toes in the evening afterward. Because I had all those other socks attached to the machine, I was loath to start any socks over when things went sideways.

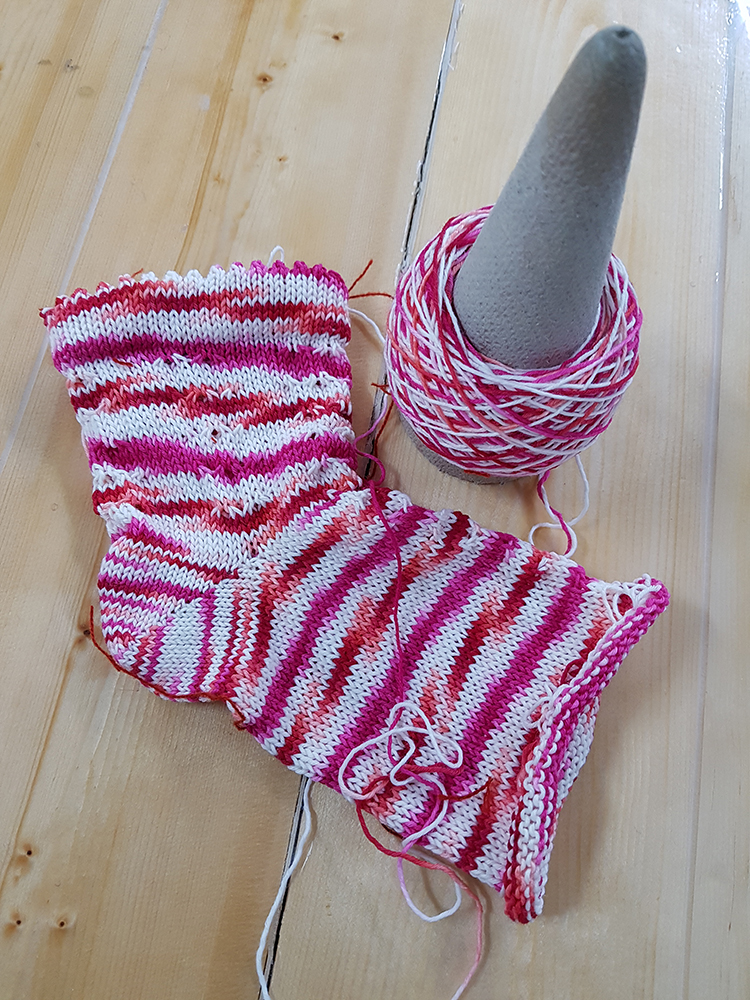
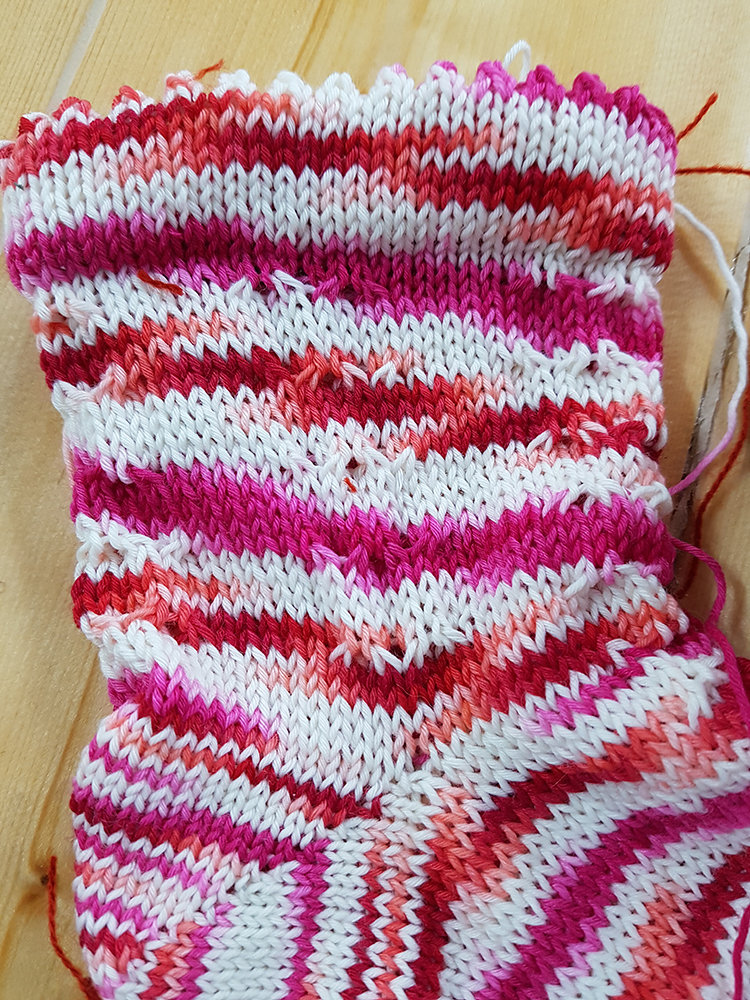
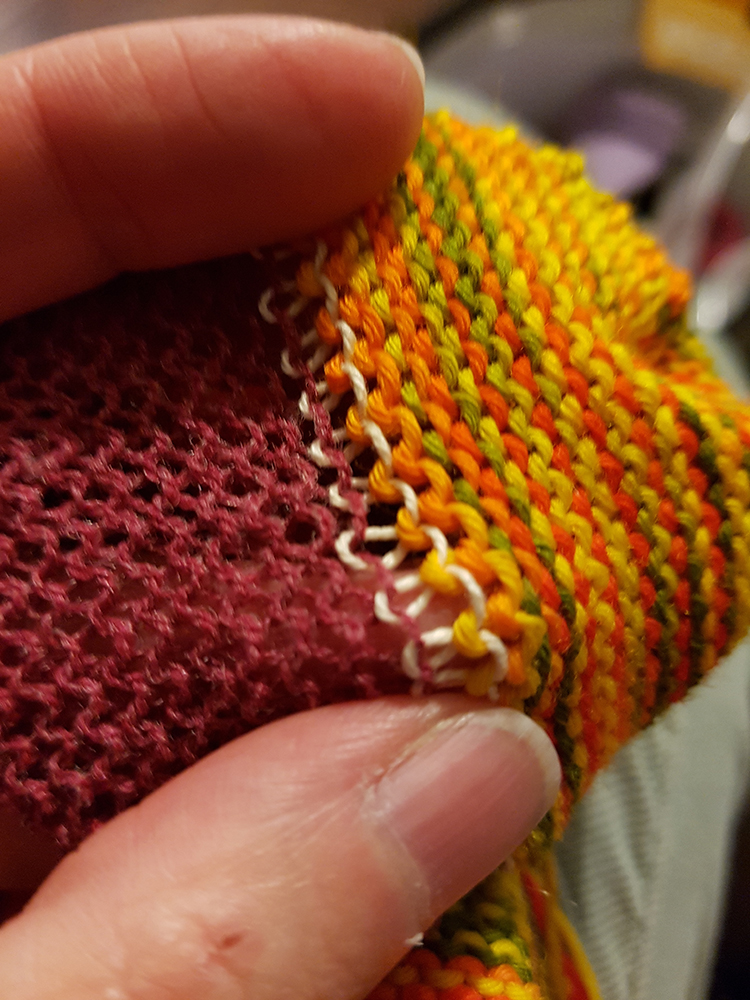
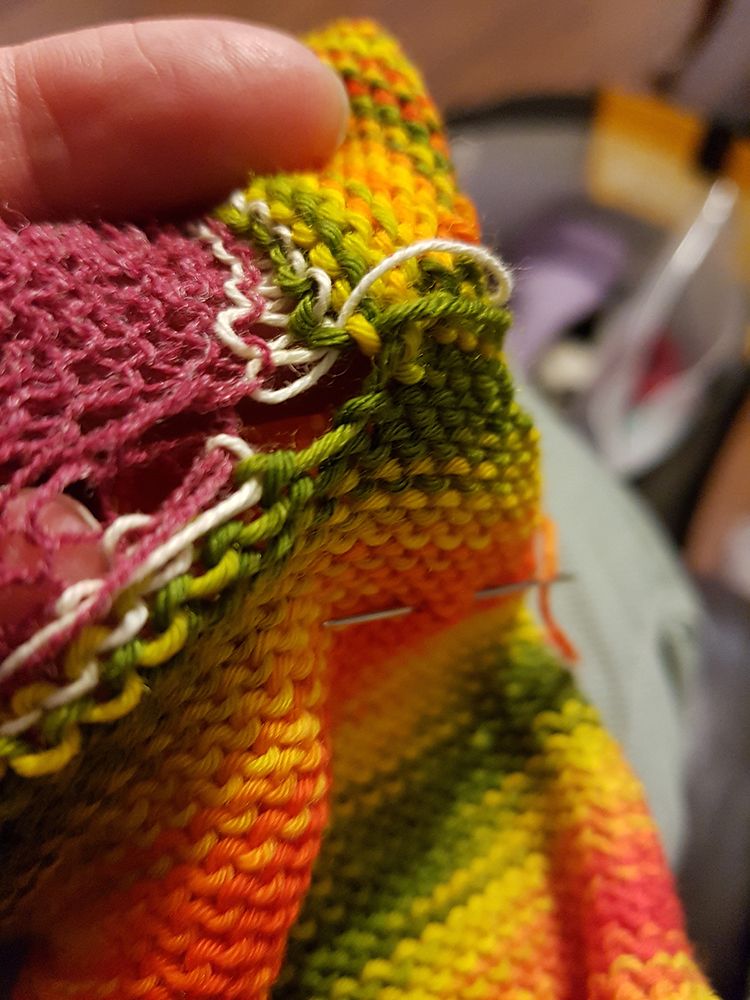
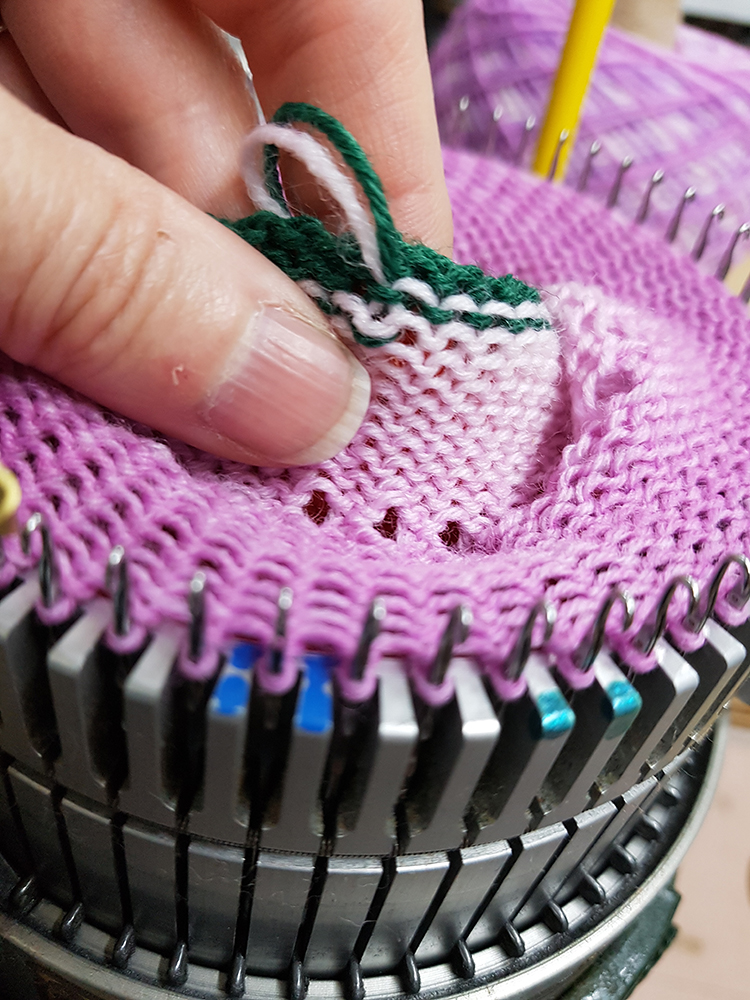
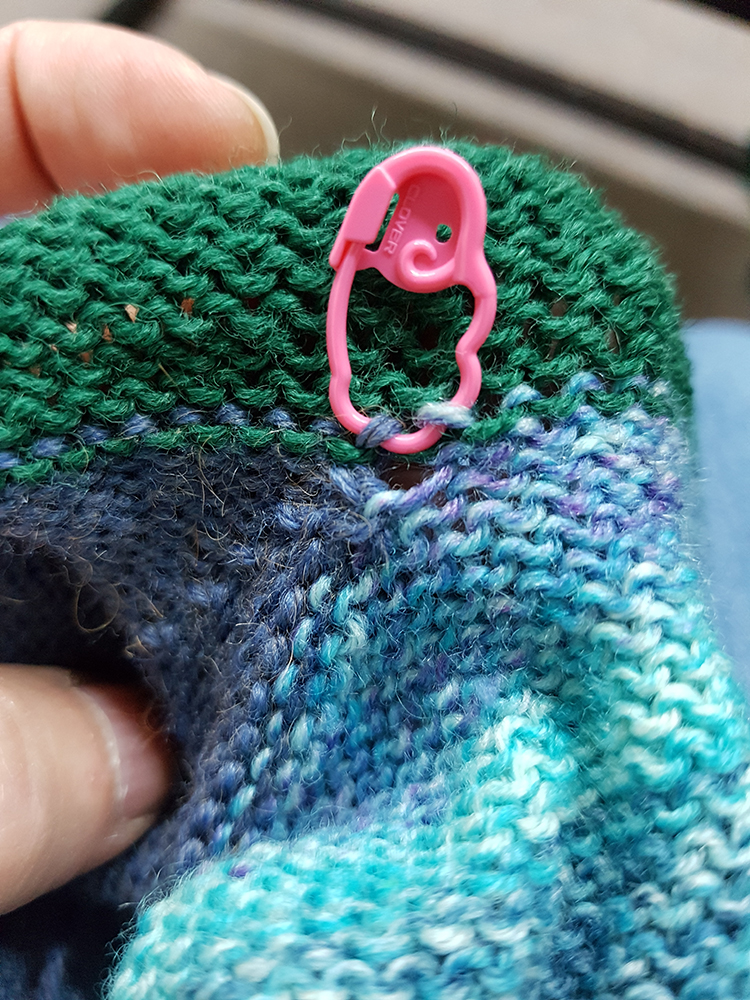
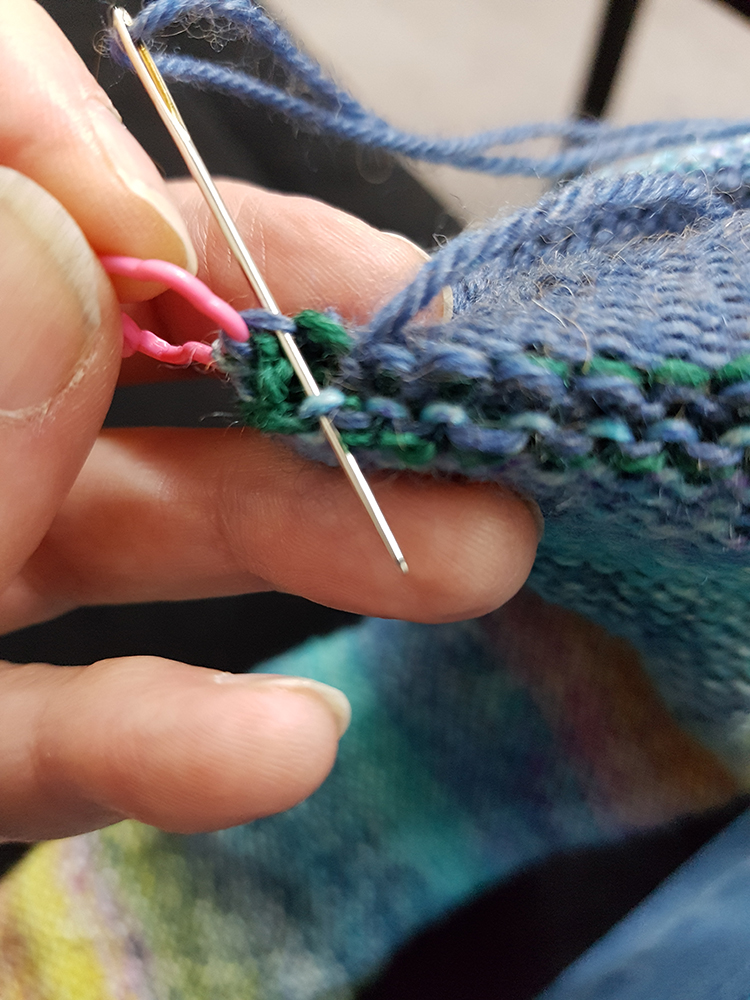
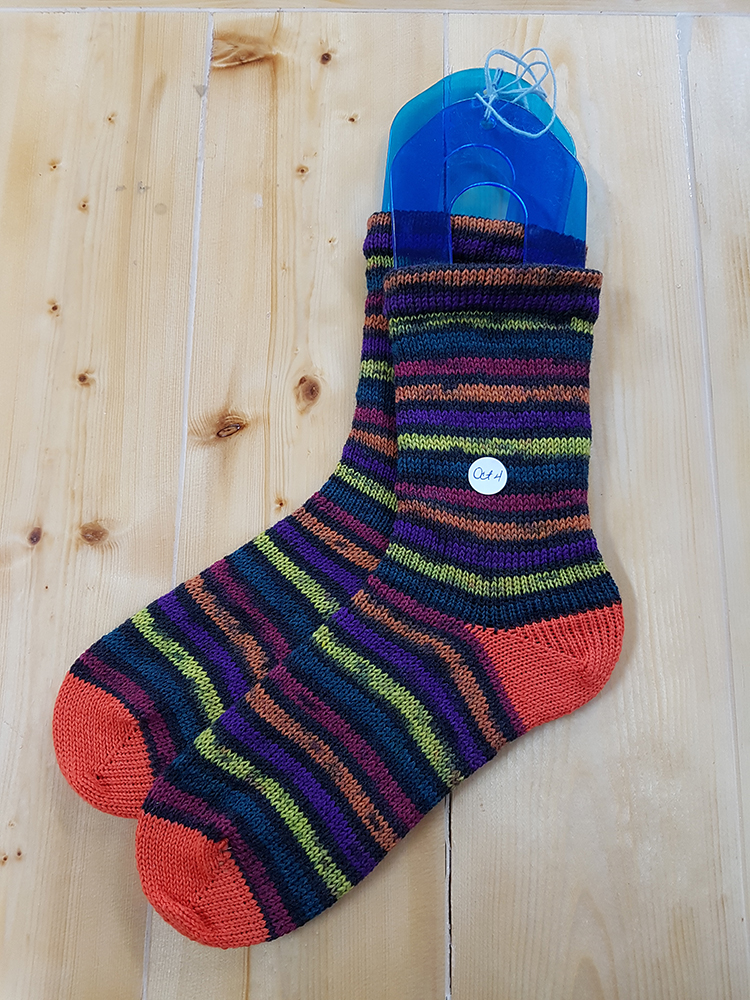
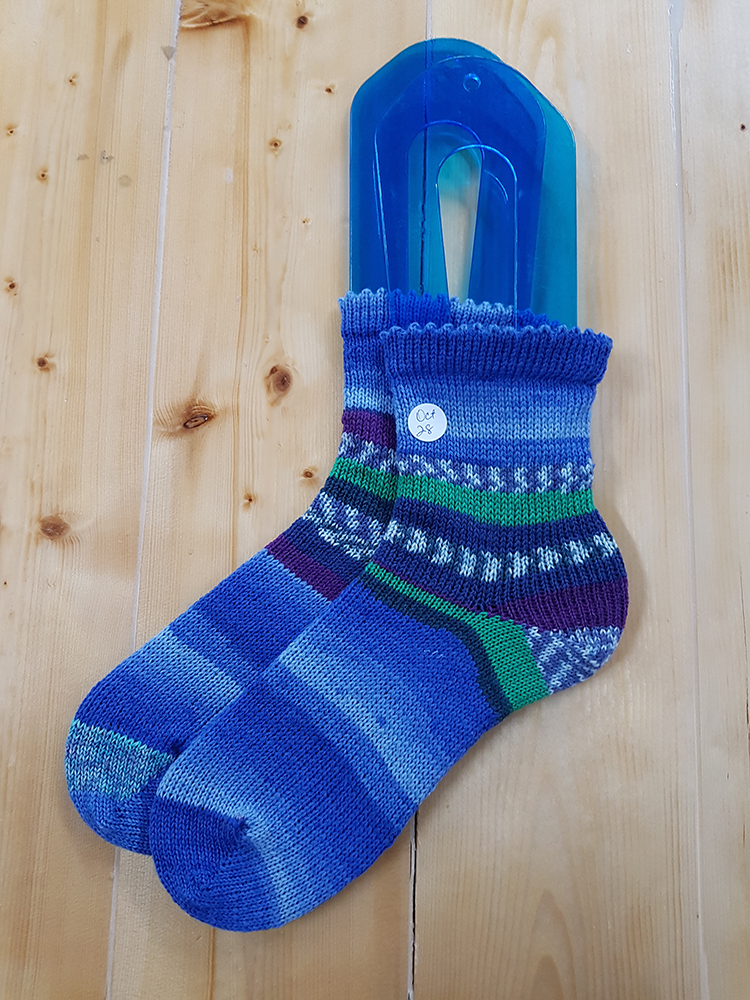
One of the stripey pairs of socks gave me some trouble. I finished the first sock just fine. In the second sock, when I switched from the first stripey yarn to the second one, I discovered that not only was there a knot, but they didn’t bother to make sure that the colour transitions were right when they tied the new section on. Ugh. The knot was messy and caused a bunch of stitches to drop. The combination of that and the wrong stripes just wasn’t what I wanted. I started to tink, but we’re talking about 8 rounds. Instead I dropped the whole sock off and unraveled the last batch of yarn. I took it back to the previous transition and rehung the stitches. Since I had marked the number of rounds when I switched yarns, I knew what to reset my counter to, thankfully. Good heavens! It took me about an hour to get it back on the correct needles and all the stitches knitted up to where they needed to be. Then I removed the offensive section of yarn from the ball so I could make my stripes match the first sock and finished the 20 or so rounds of the foot and the toe and knitted off the waste yarn. Unfortunately there was a twisted stitch or two that I didn’t notice until later. By that point, I simply didn’t care any more. I just left it.

That was painful! But I managed to get it all done. Hurray!

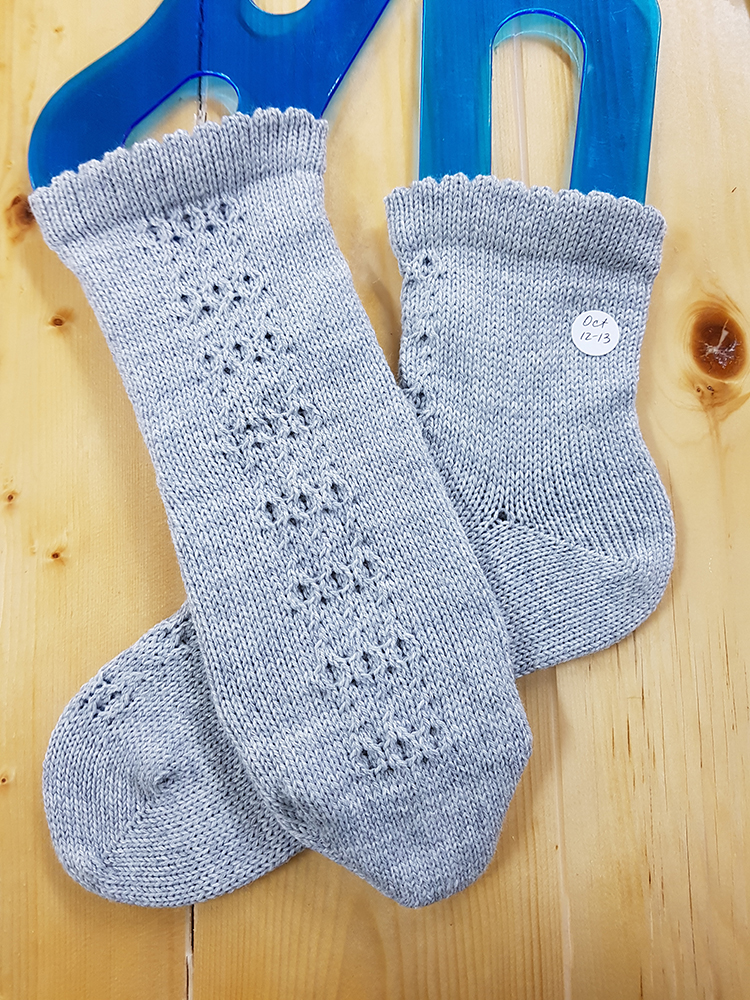
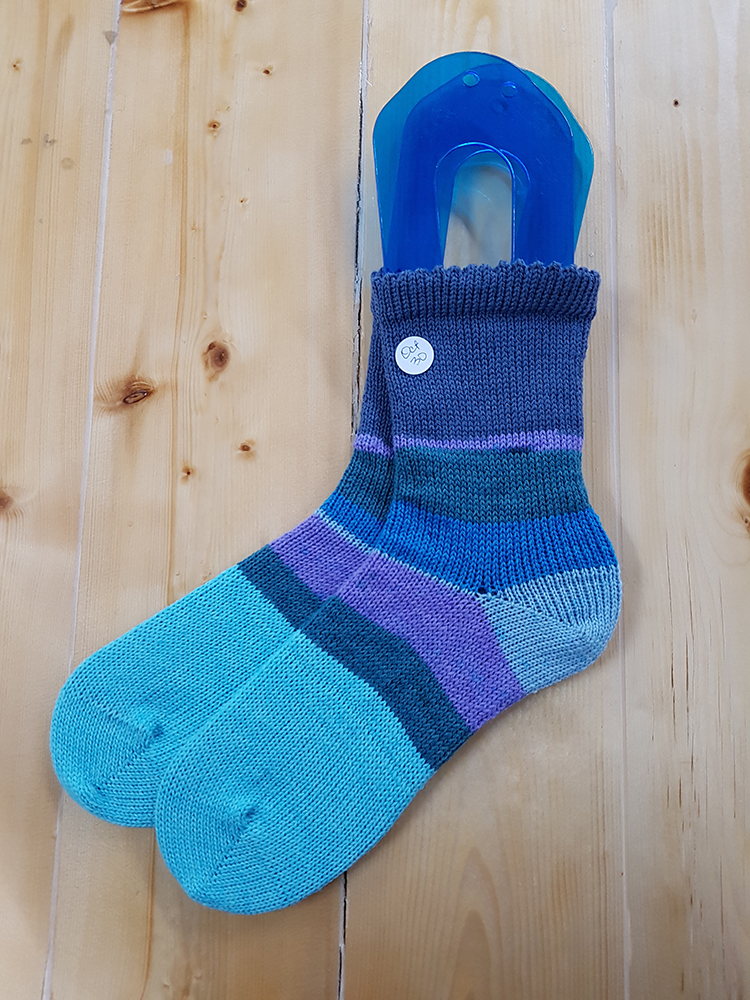
At the beginning of each pair of socks, I weighed each of the balls of yarn, of each of the colours, to determine which were the smaller ones respectively. I made the first sock using the smaller balls so I wouldn’t be as worried about running out on the second sock. I still ended up running out on the second half of the toe on one pair. Let’s face it. Those digital kitchen scales are great, but weighing yarn as you are removing yarn from the ball is a subtle operation. The weight changes by fractions of a gram as you go. With the balls weighing in at 12 or 13g, it may be unrealistic to think you can truly trust the scale to be accurate enough. So it’s close, but even thinking I was starting with the smaller ball, I had some surprises.

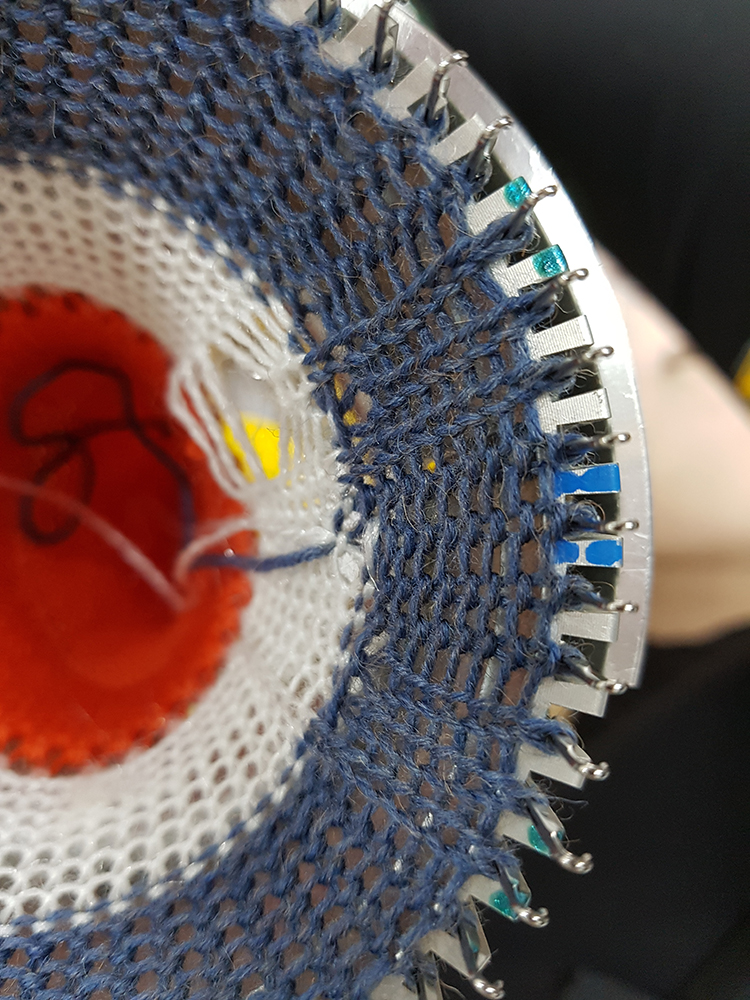
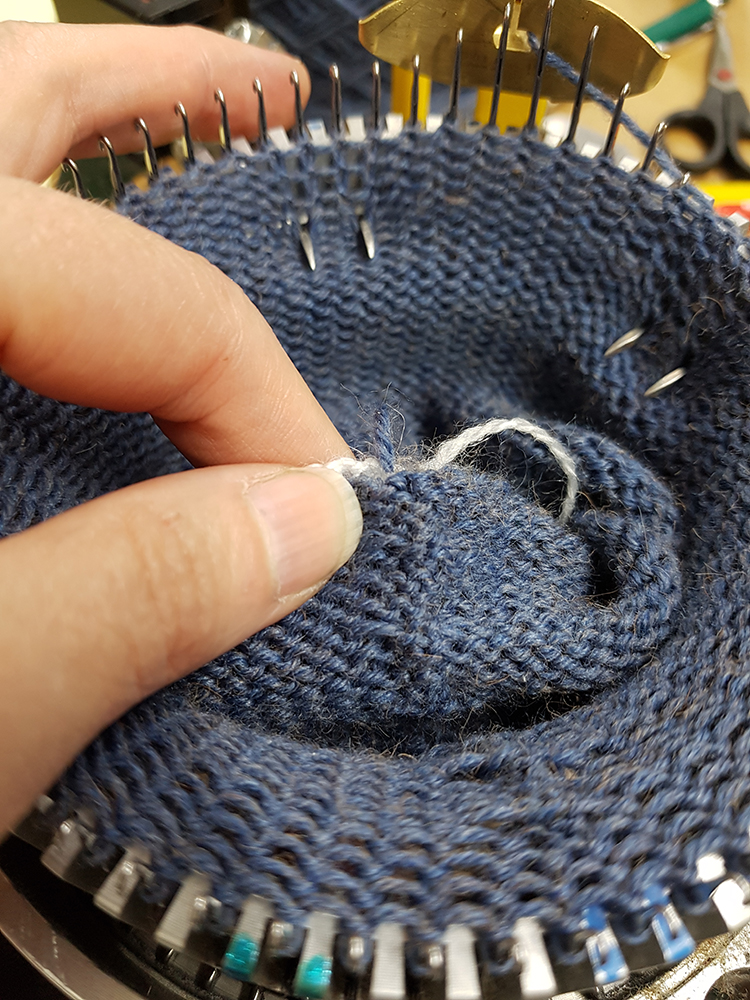
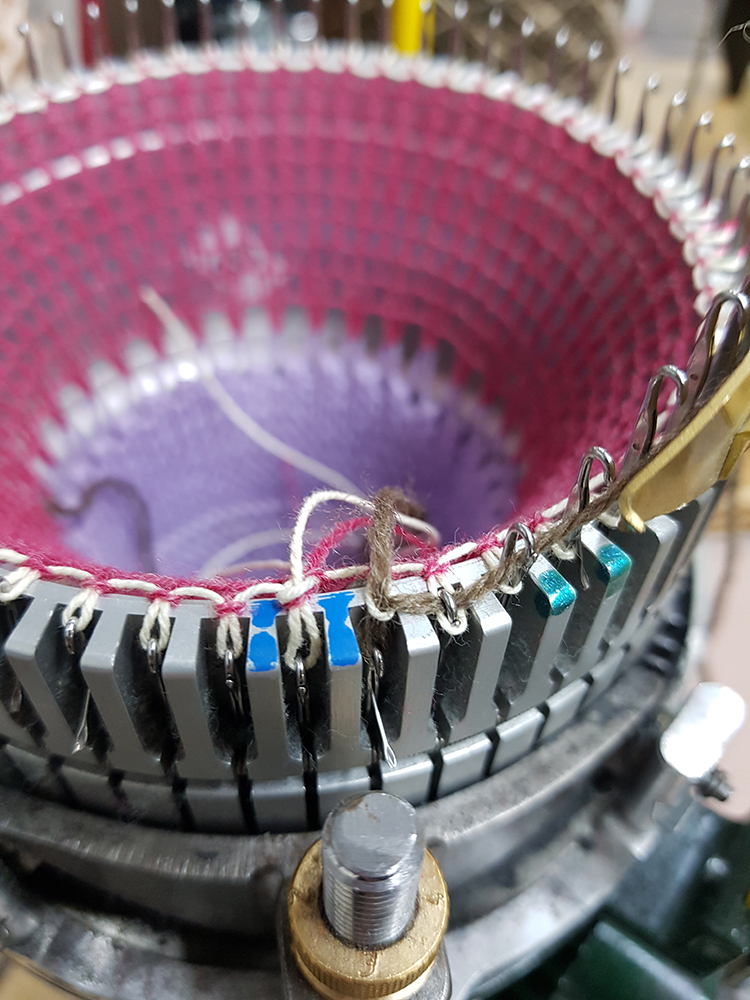
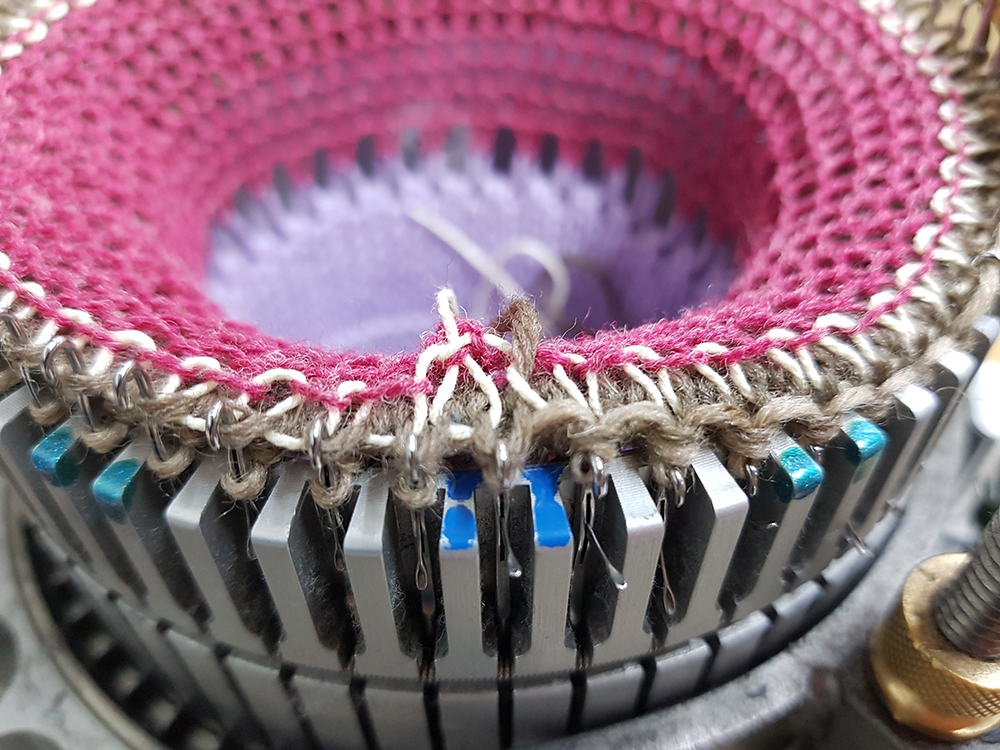
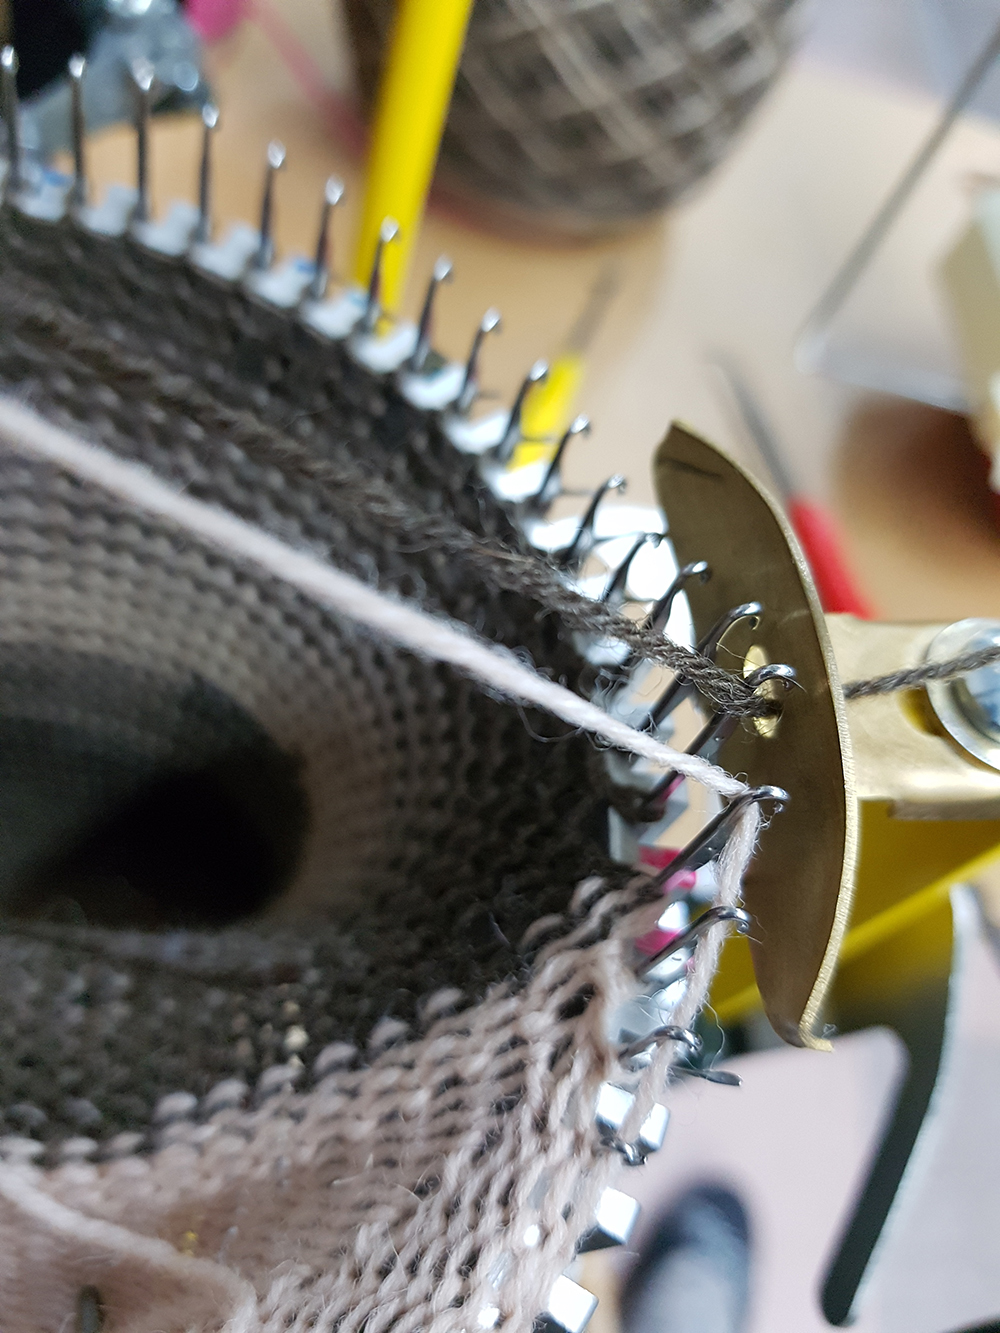
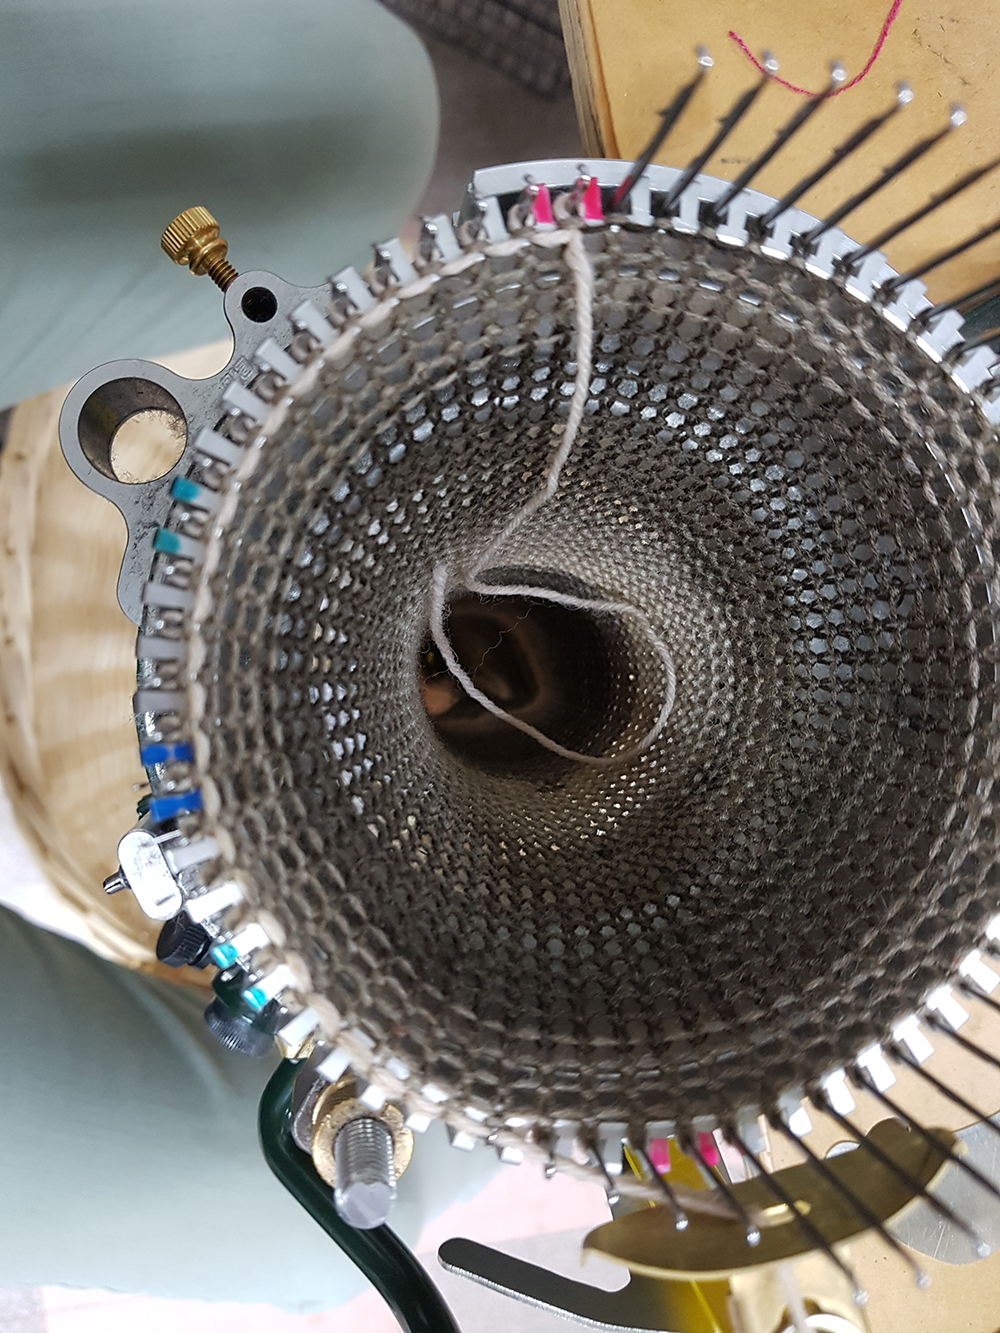
There was one issue that occurred a couple times that I thought I would mention. I was knitting along and found that suddenly the yarn felt really tight. It took a bit to realize that the yarn had hooked itself around one of the guides in the threading assembly. So words to the wise: if you feel resistance, be sure to stop right away and check the threading assembly to be sure that nothing has gone awry.

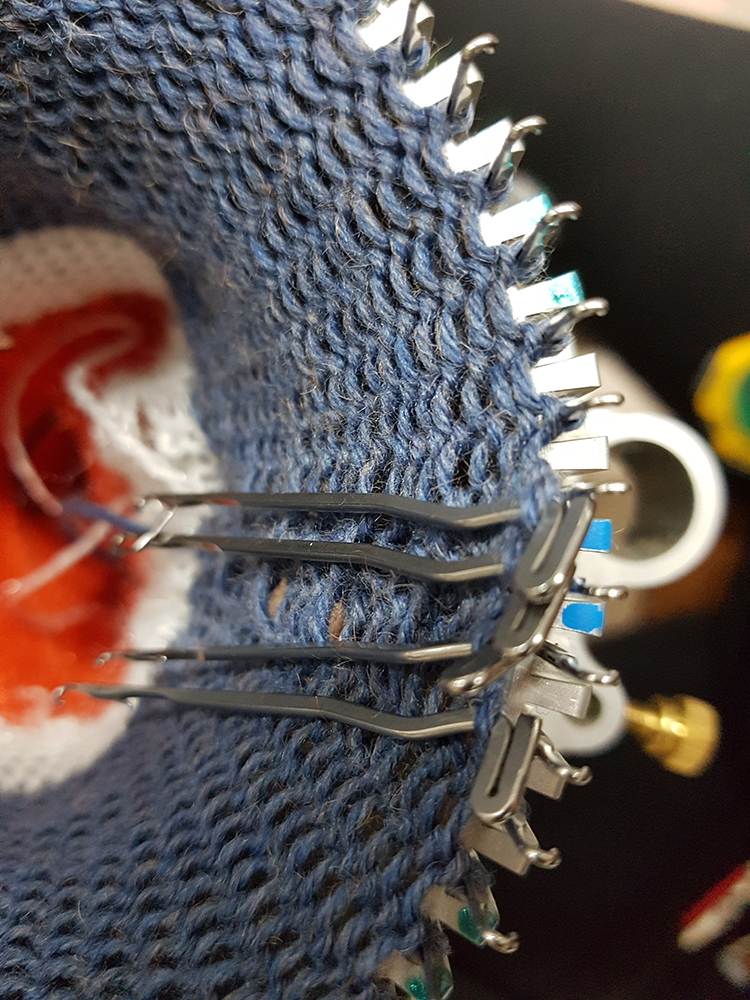
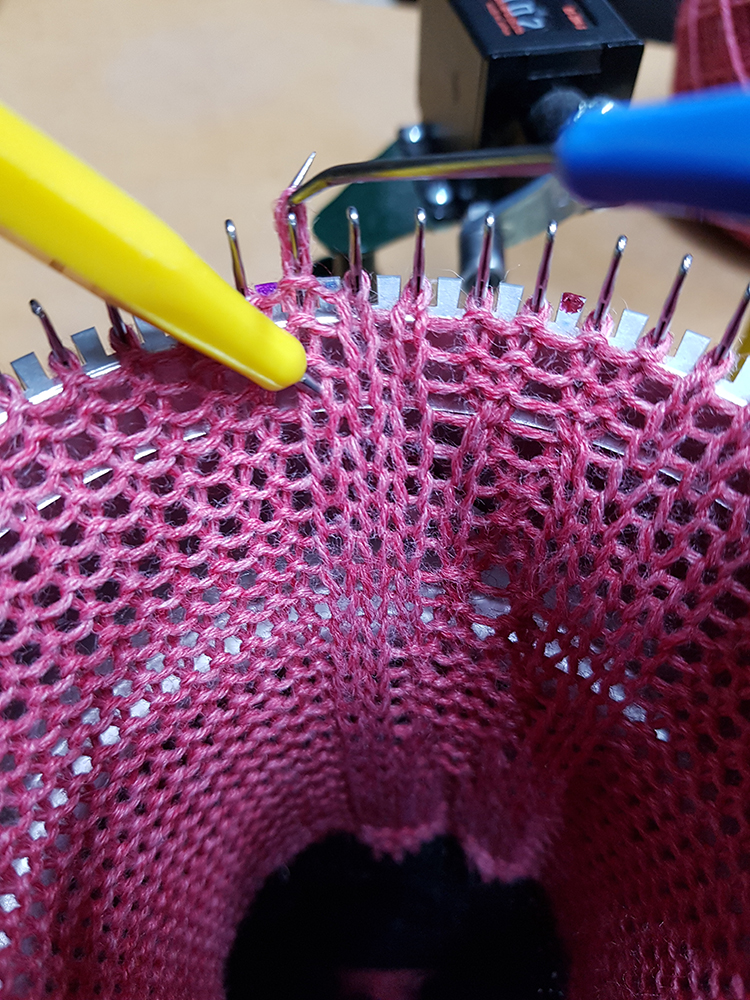
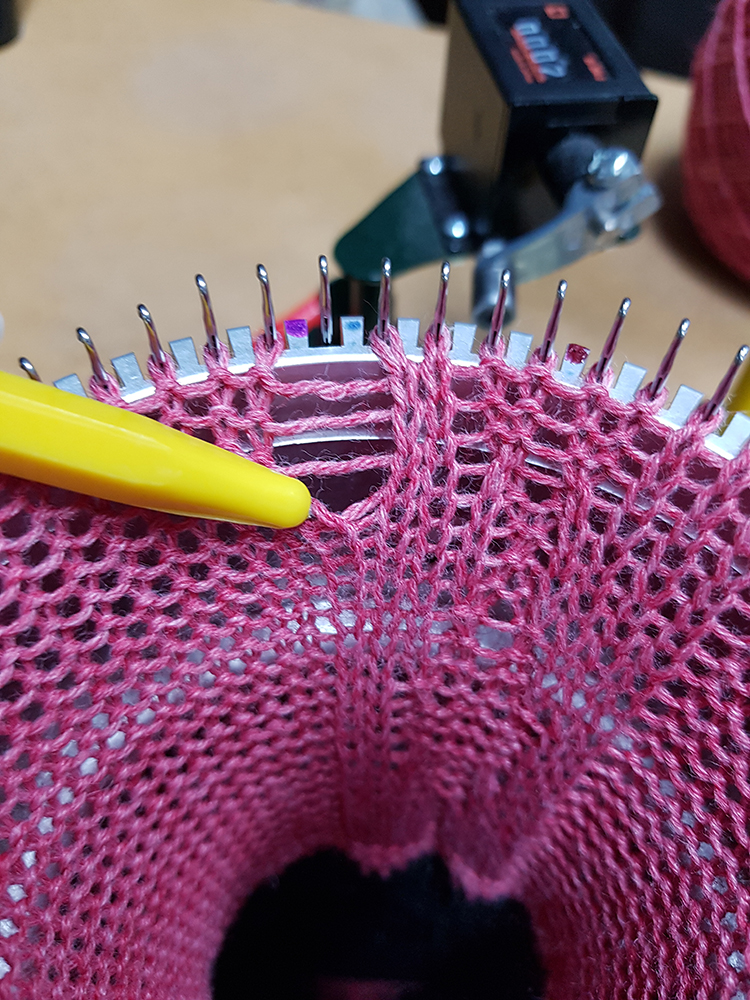
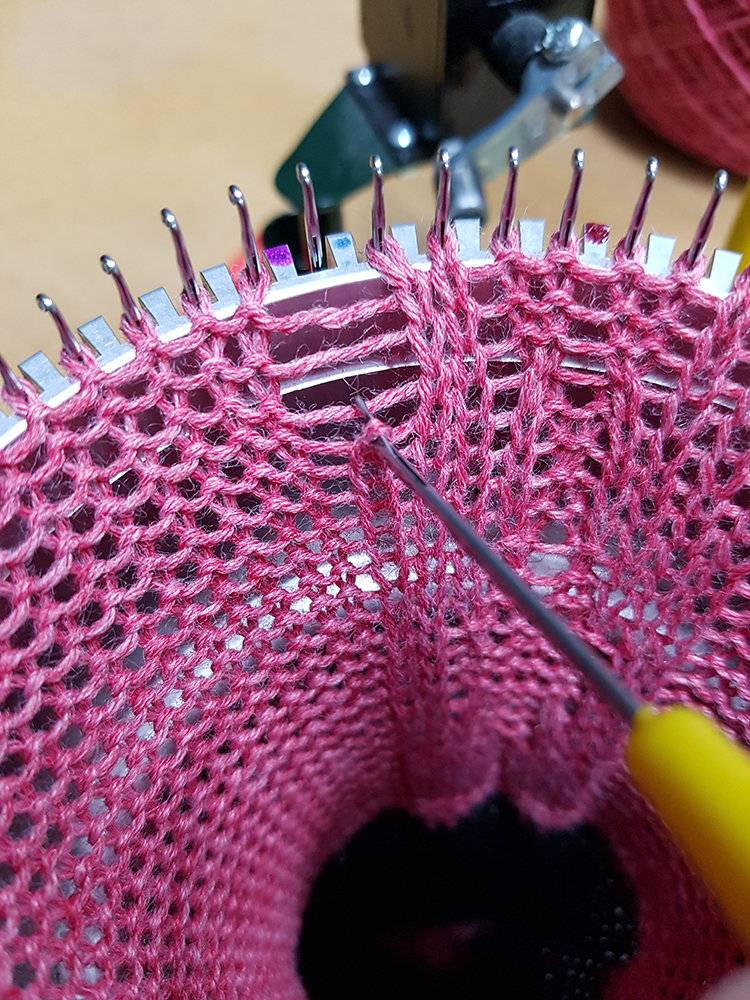
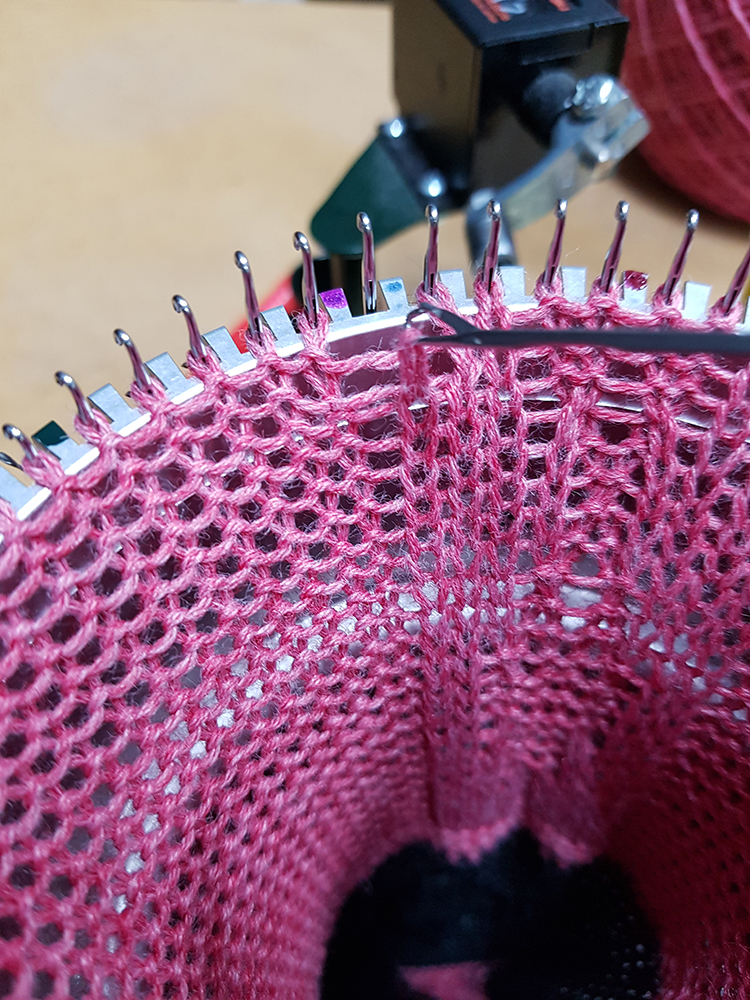
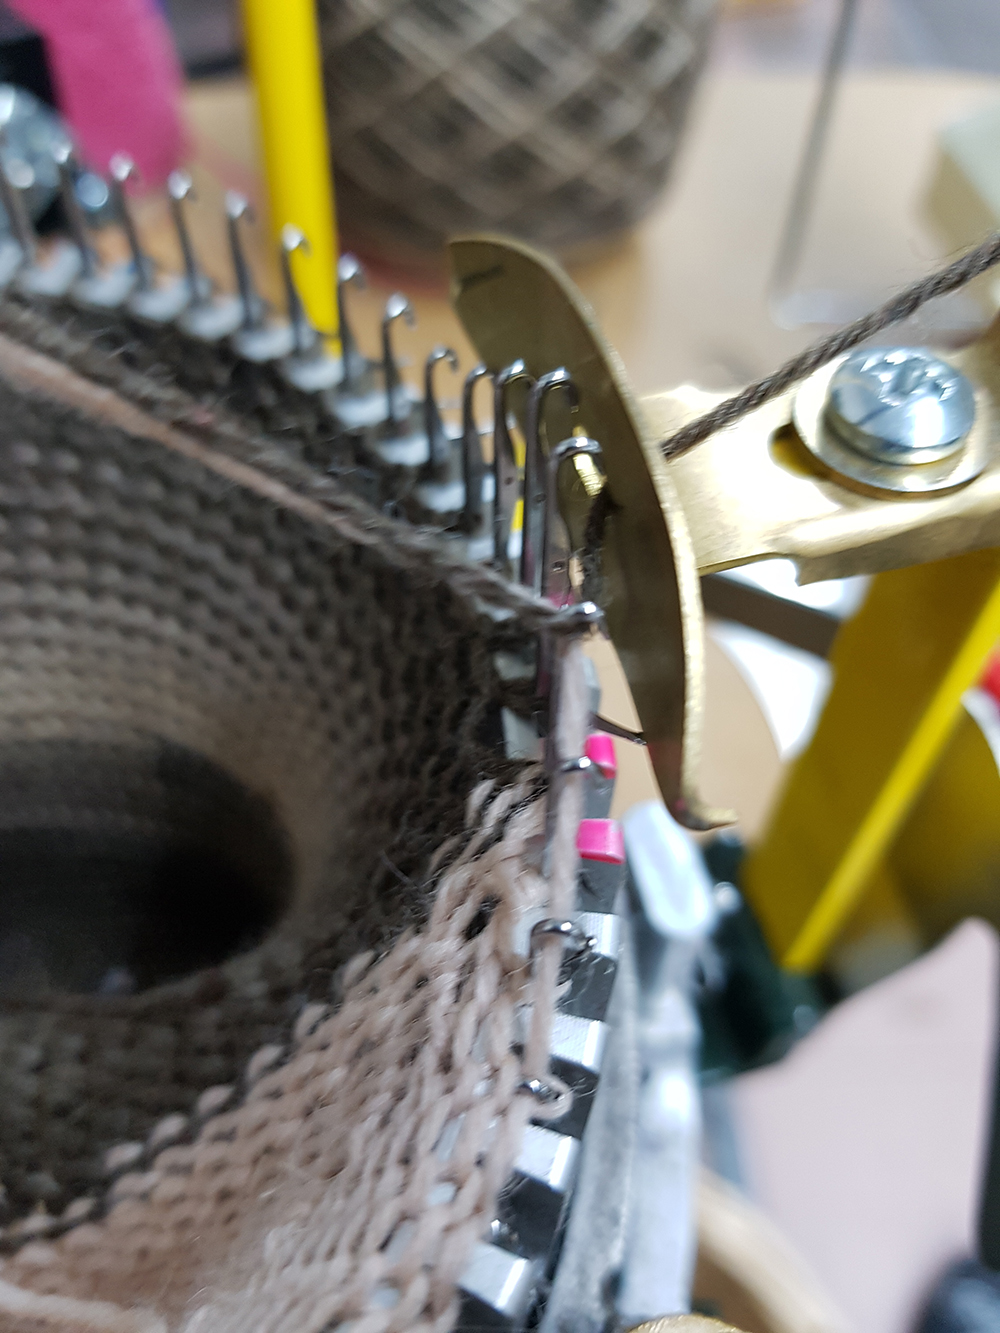
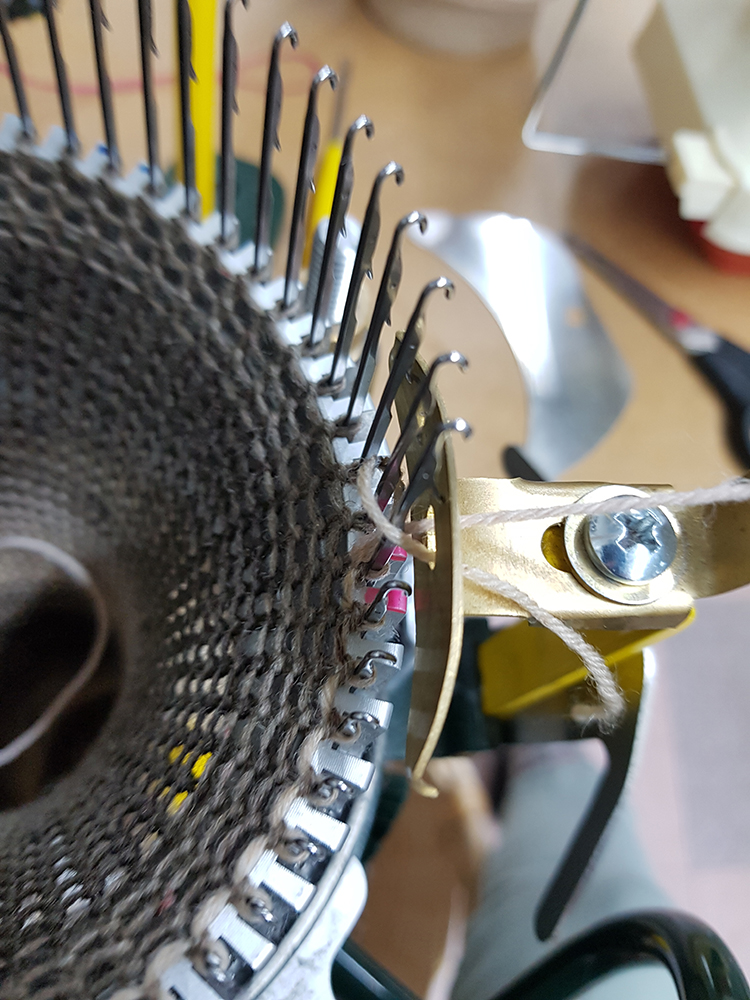
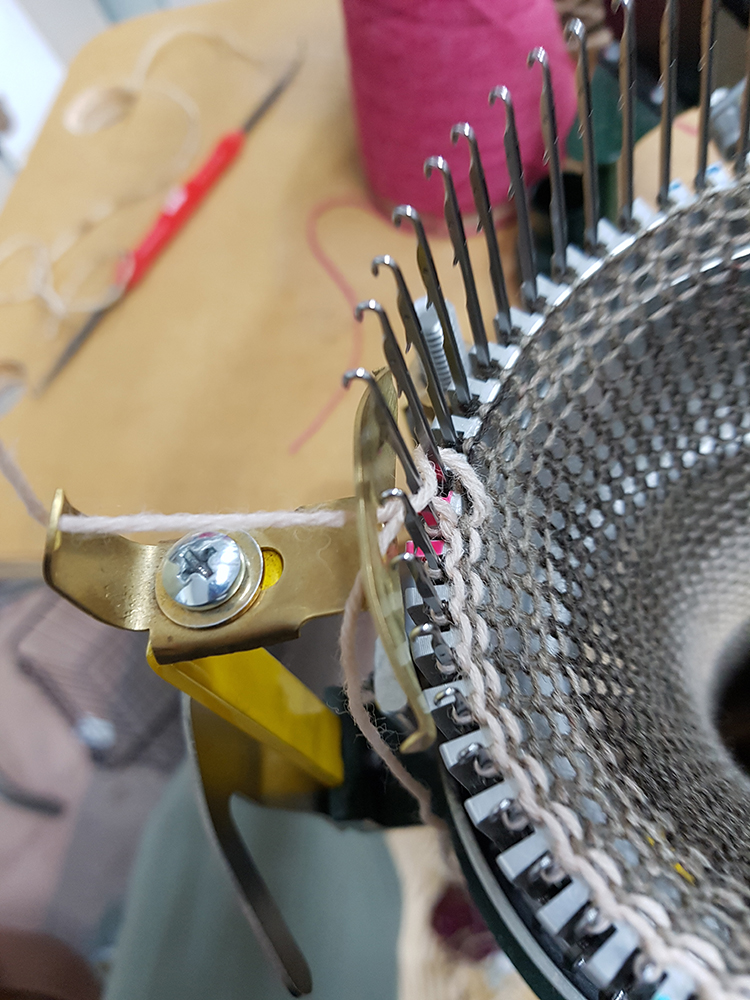
I ended up breaking the latch off one of the needles. It took about three rounds before I actually clued in as to what was happening. It was creating a lot of resistance because the yarn was accumulating loops (like a slip stitch to the back) behind the needle. I suspect that the latch broke because of how tight the yarn became when it was caught in the threading assembly. When I discovered the missing latch, I was able to simply replace the needle. I used the needle to latch up those three or four stitches and carried on.

I found a couple balls of yarn that were almost a full measure.

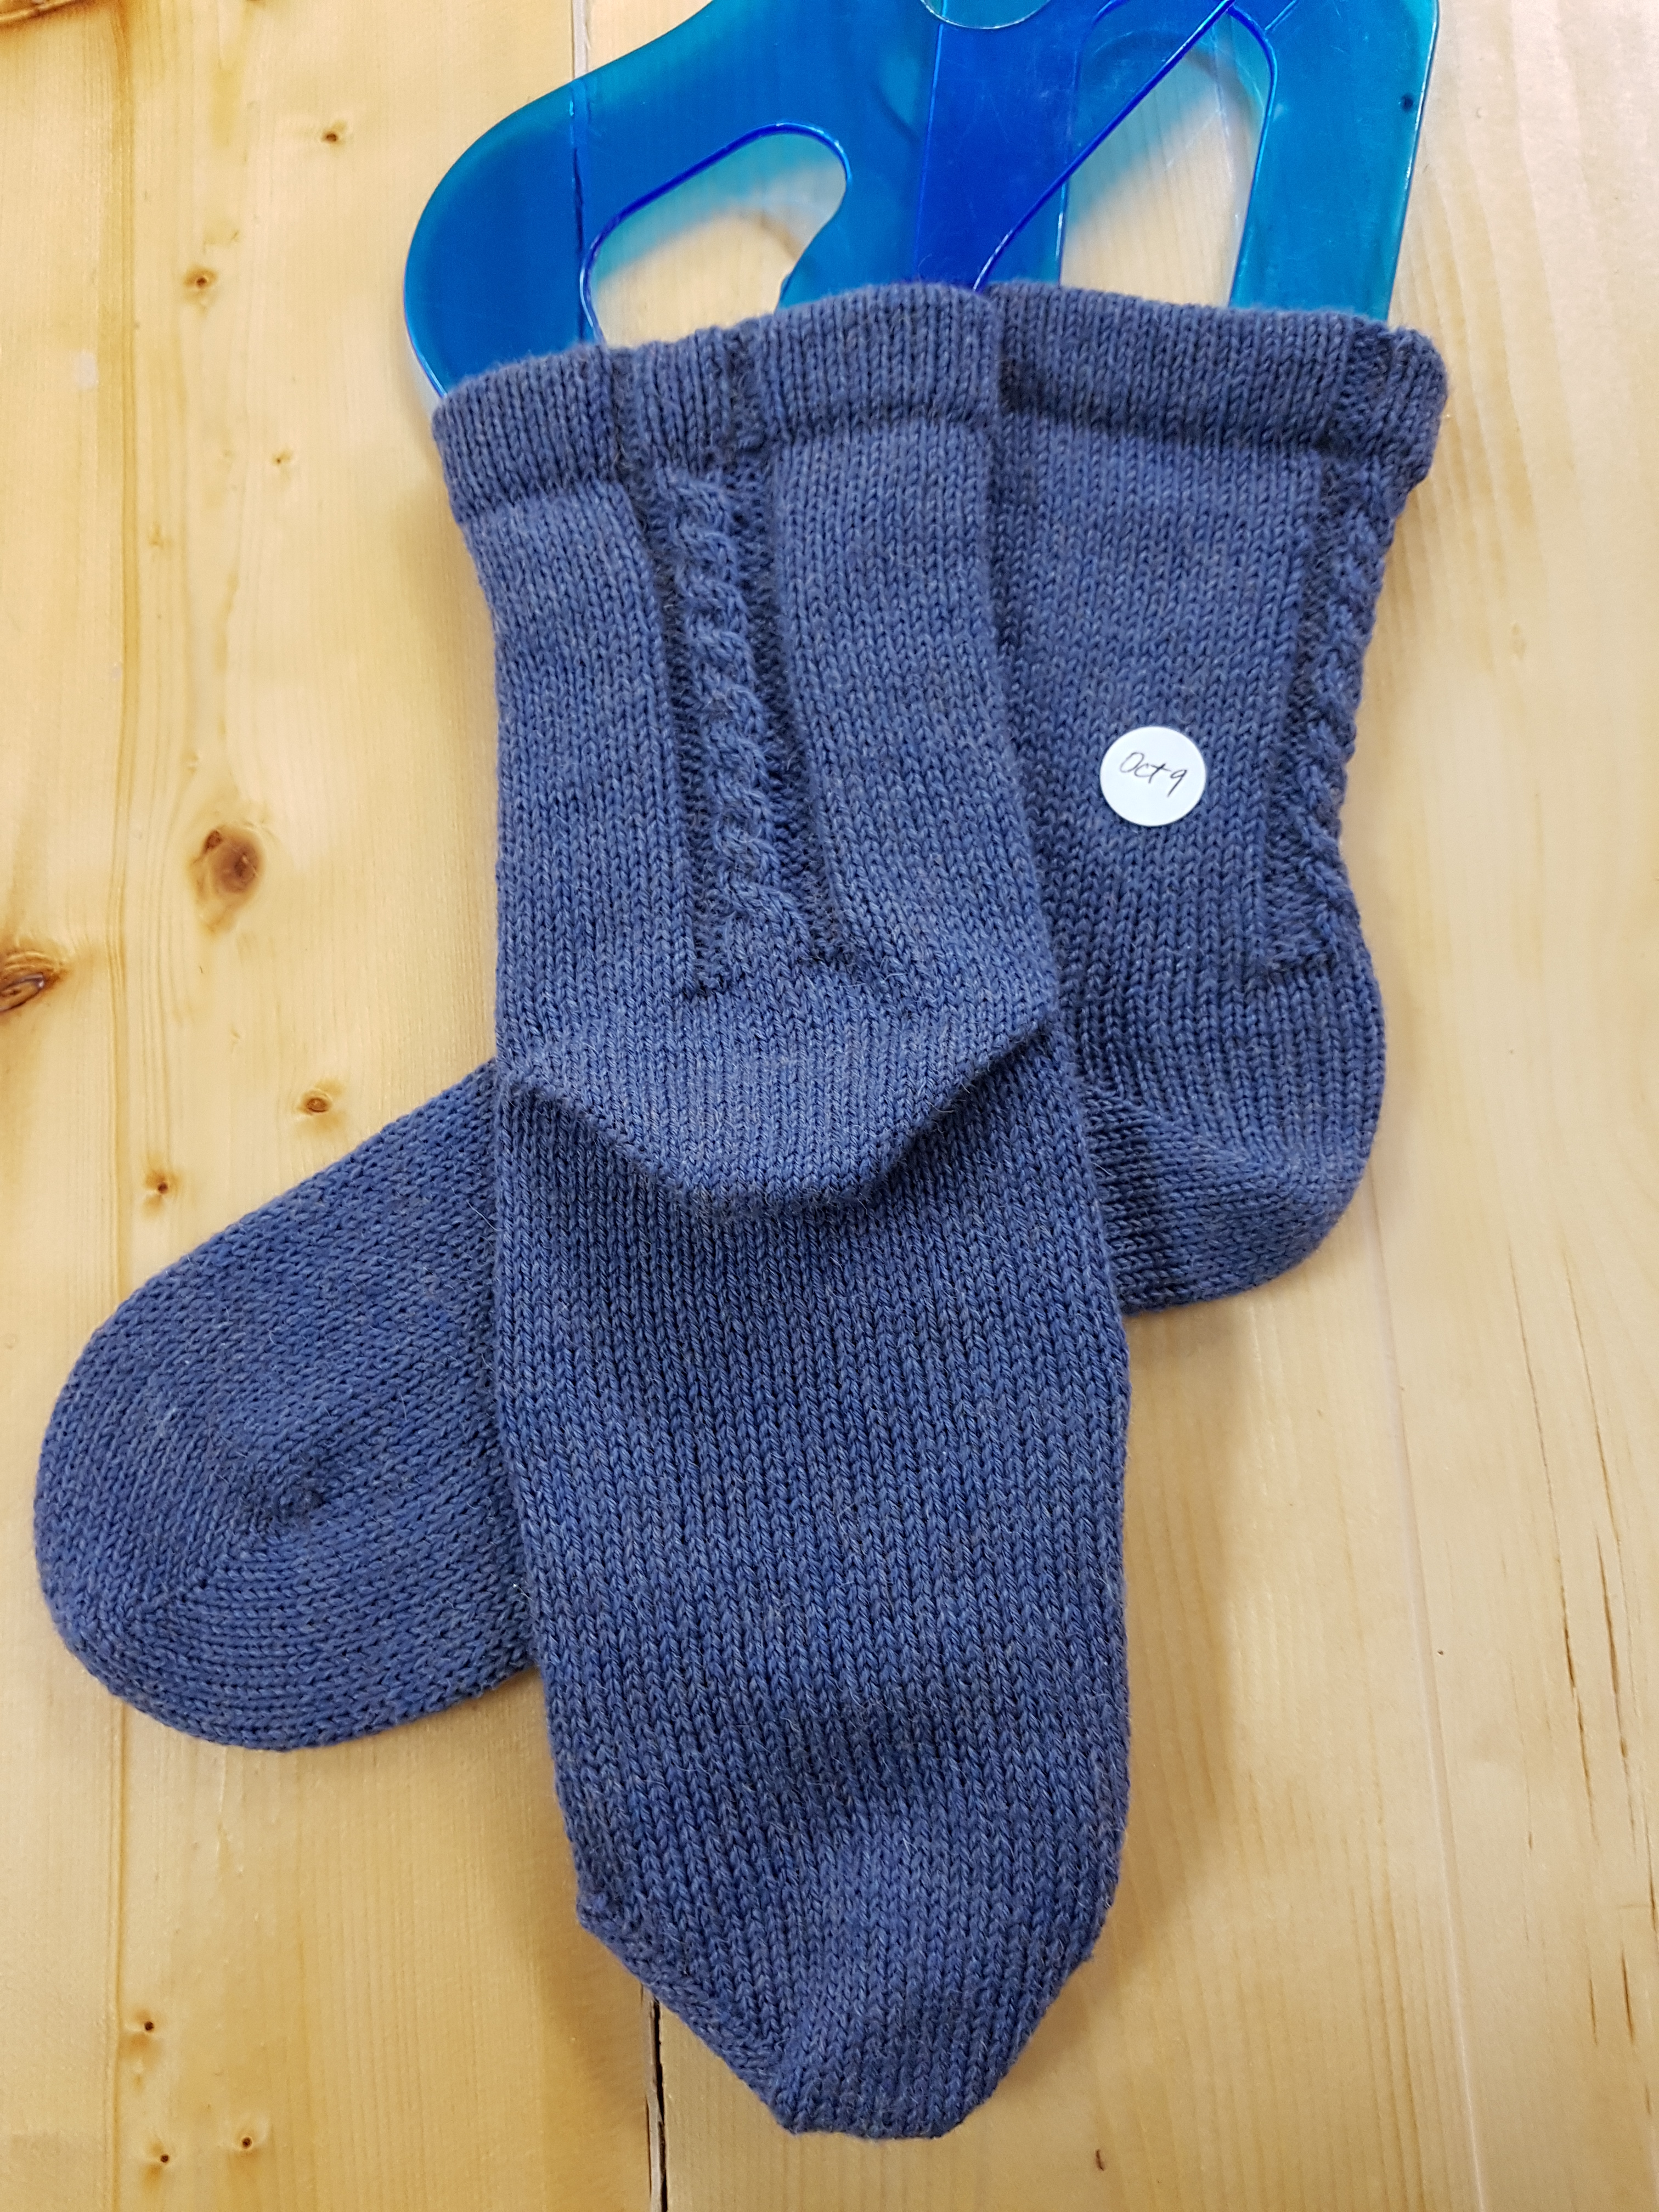
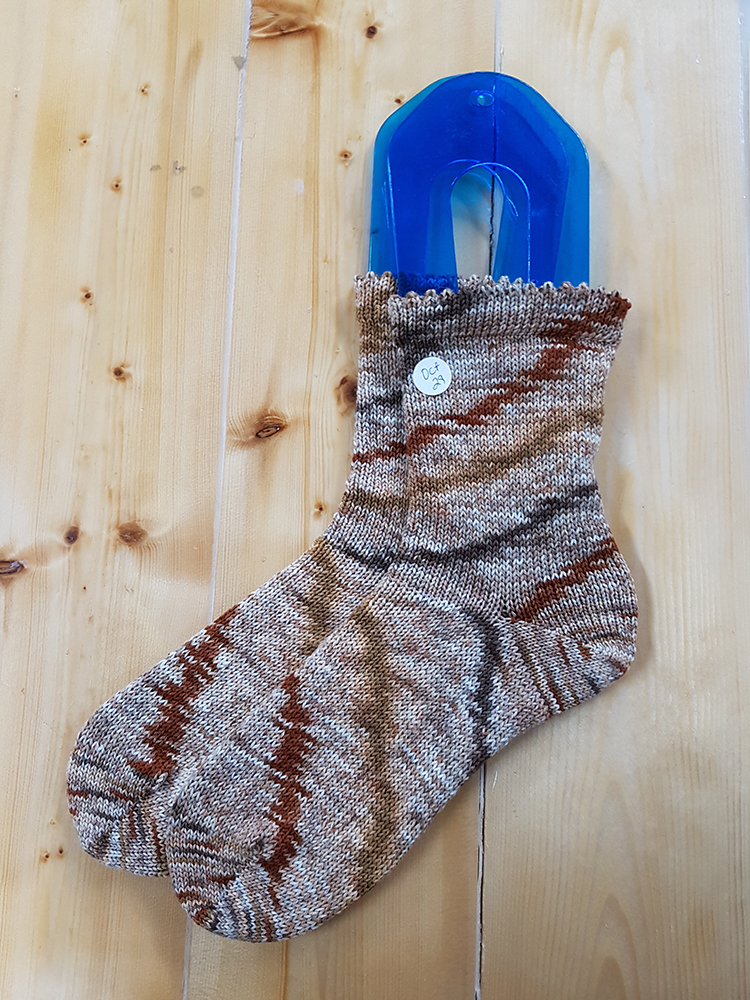
After two weeks of yarn chicken, it was so nice to just make the socks and not worry about how far I’d get before I would have to incorporate yet another colour of yarn.

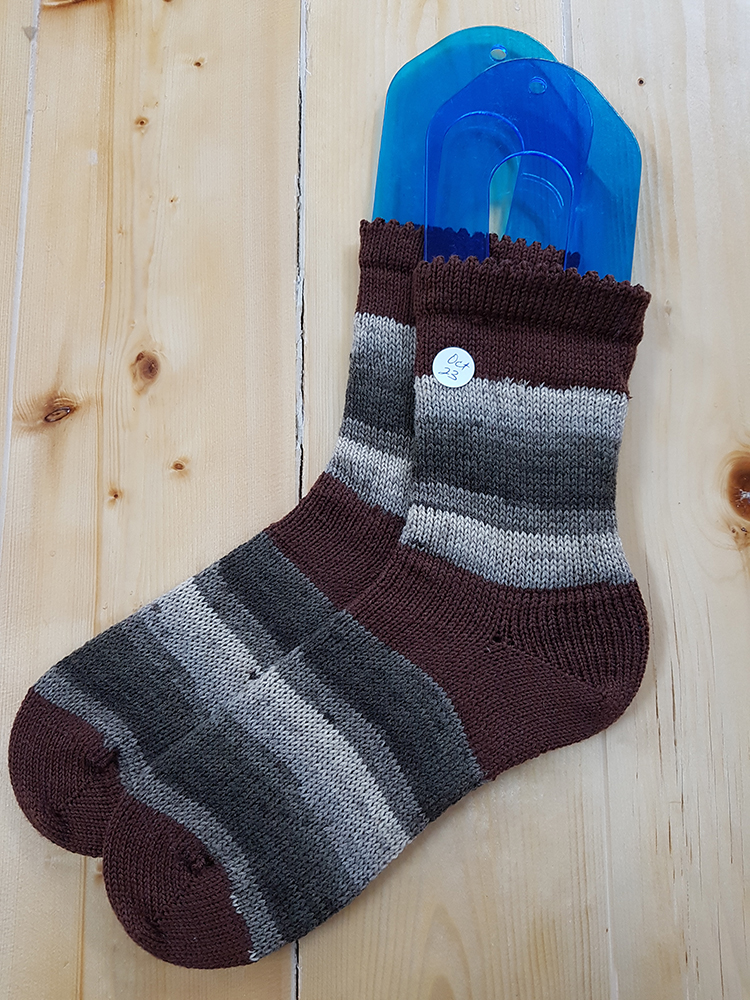
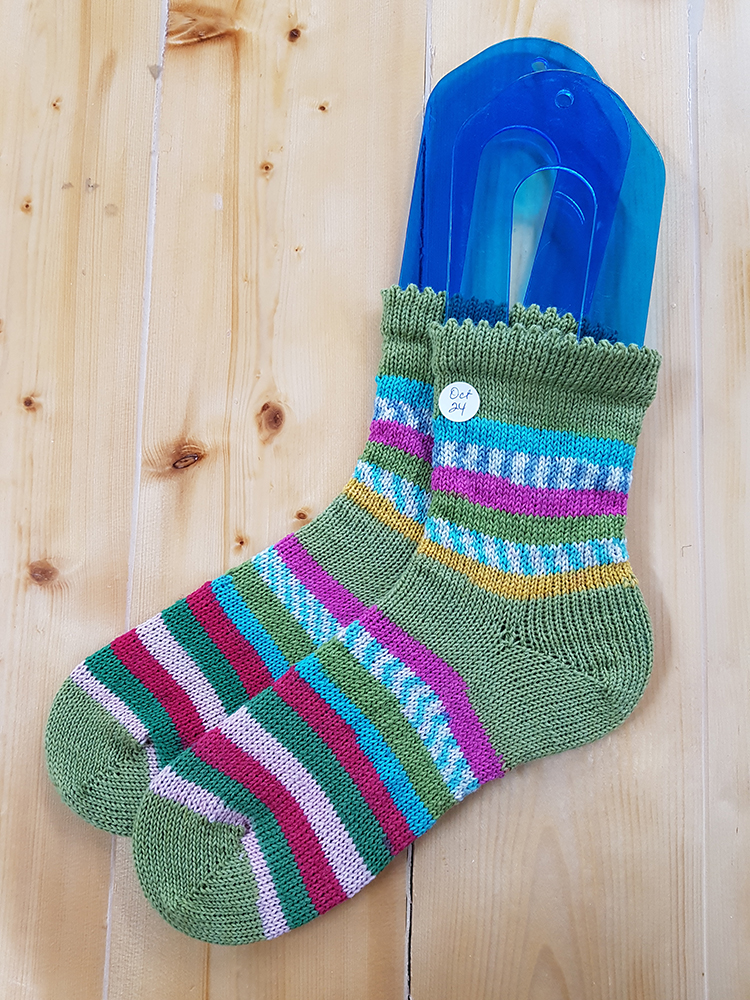
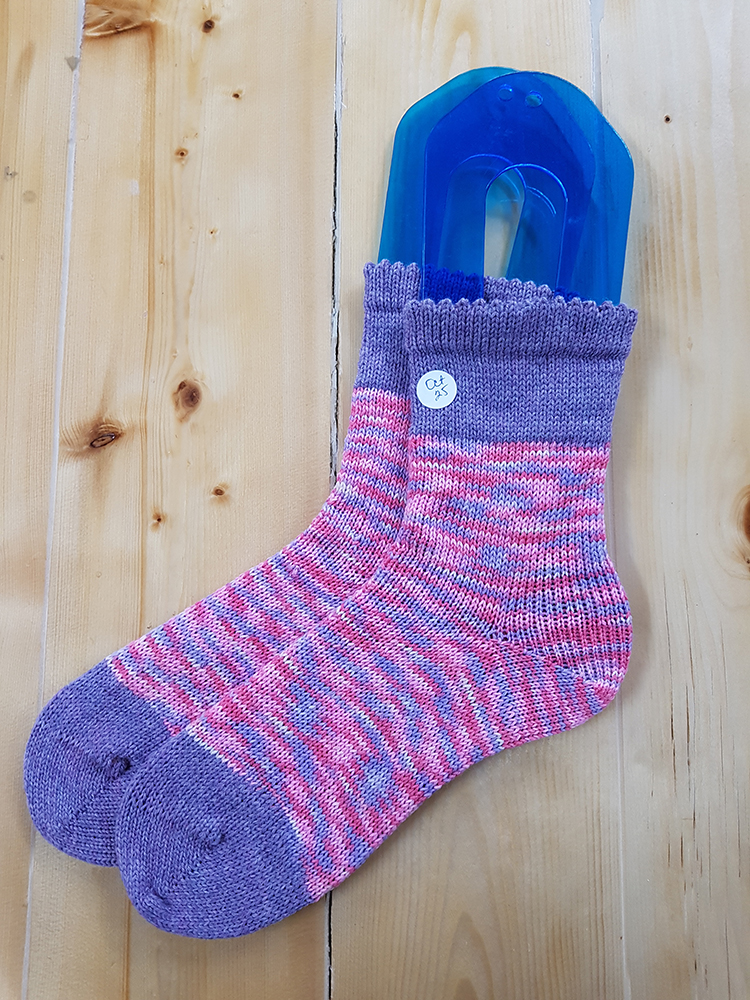
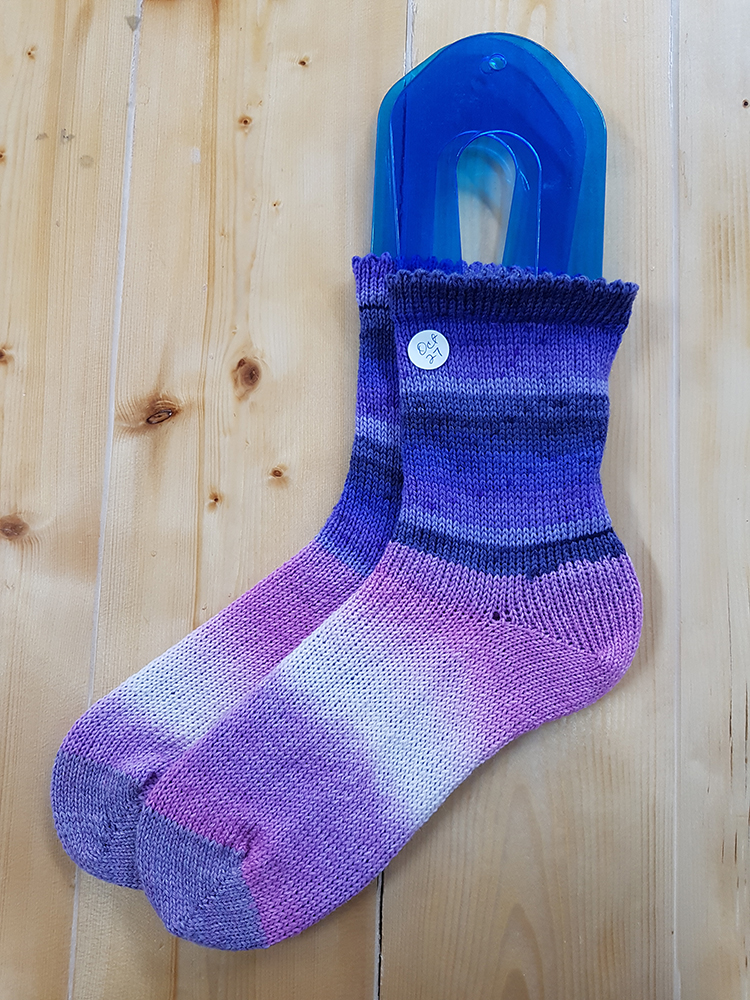
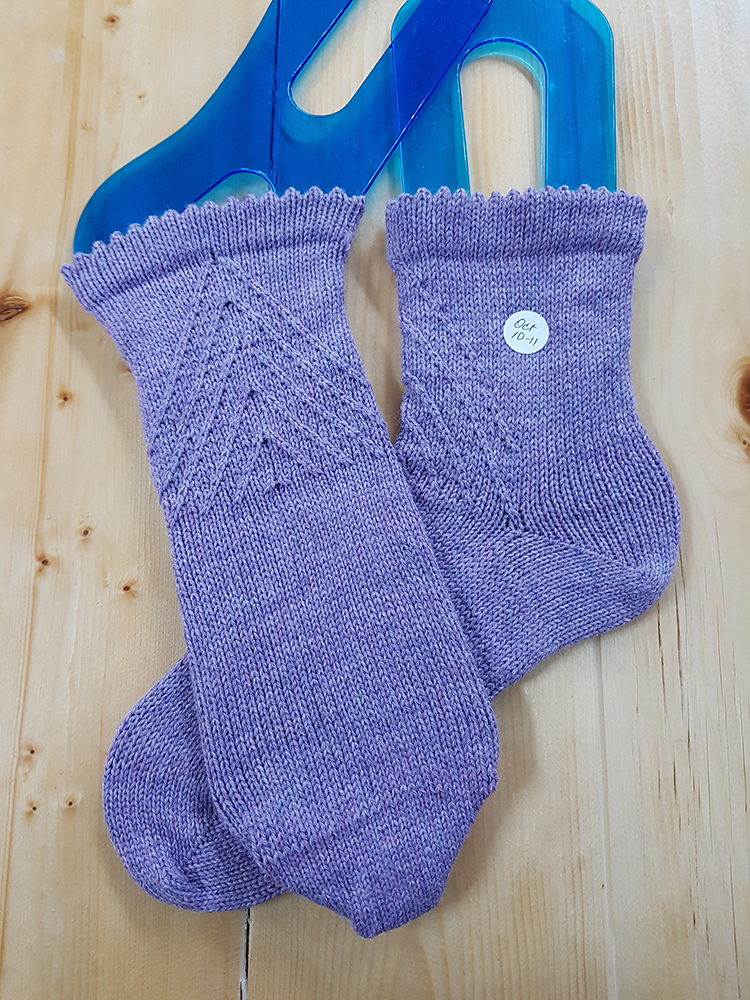
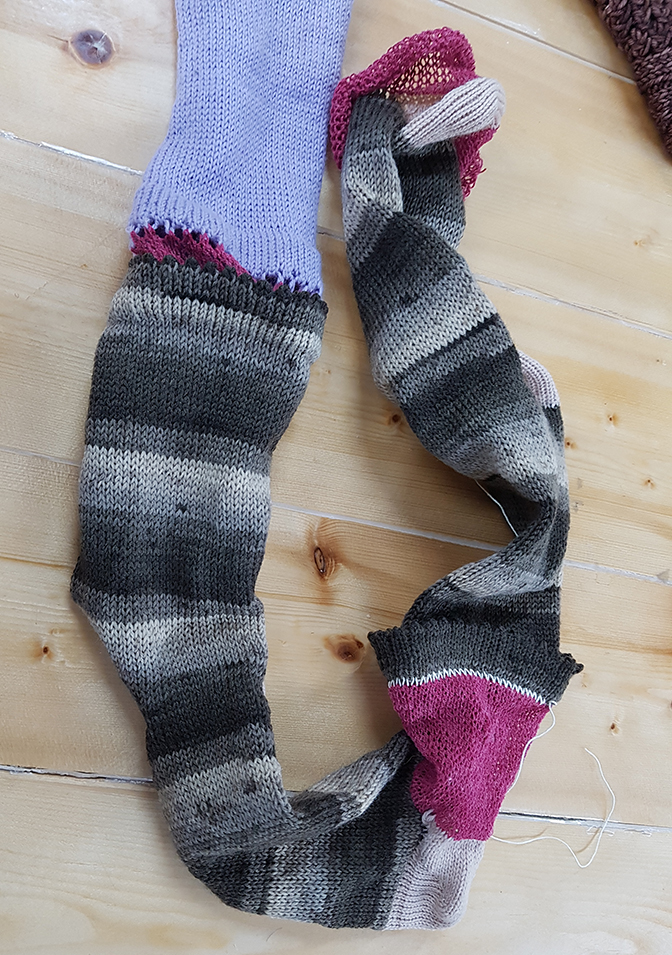
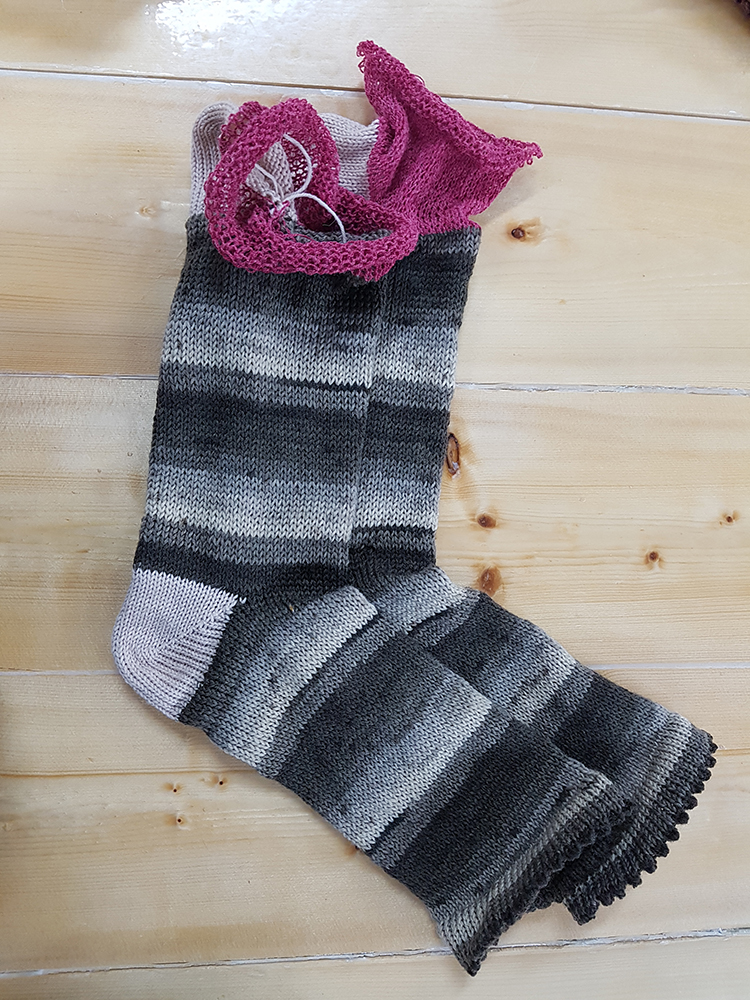
It’s been really fun to see how the socks turned out these past two weeks. As much as there is a part of me that really likes the patterns in the yarn to match up on both socks, I really had to let go of that during this process. Because it was down to inches of extra yarn in some cases, I didn’t have the luxury of aligning everything to make them all matchy-matchy. But it turned out okay. It’s really obvious that I used the same yarns on each of the socks in each pair. Just because the patterns don’t match up exactly doesn’t mean that they don’t still look like they belong together. That was actually a lot of fun. It took away any pressure to make them perfect. That’s a good thing.

Happy Socktober!

Socktober: Week 3

Cables on the circular sock knitting machine… ACK!

My mission this week was to explore cables and twists. Sound fiddly? Holy Moley, no kidding! There was just no realistic way to get seven pairs of cabled socks done. But I did manage four.

I thought I would start simply. A single 2×2 cable up the center back of each sock. I just wanted to dip my toes in the pond. After all, no need to turn my brain inside out, right? I did all the cables in the same direction and it went well enough that it gave me some courage to try something else.

Next I tried some symmetrical rows of traveling stitches. I started with two side by side at center front and moved them outward. Because I wasn’t really sure what to look for, I honestly didn’t even know how to take notes for this. I finished up the first sock, did my best to peek at it to see if there were glaring mistakes and moved on to the second. There were a few twists that I had done in the wrong direction, but since this was all about learning, I left them. I thought I was doing the second sock the same as the first but I wasn’t. There was less space between the rows on the second sock.

What I found with the traveling stitches (twists) was that using two hook-tools was easiest. The stitch that travels has to be placed first. So if the traveling stitch goes to the right, you place that stitch from the left to the right first and then cross the one from the right over it to the left. It’s a little confusing since you look at some of the stitches from the inside and some from the outside. It’s in the round… yeah, it kinda made my head hurt. With one hook, I took the stitch off the target needle first, then with the second hook, I moved the other stitch directly onto the target needle before crossing that first one onto its respective needle.

What I learned from that second pair of socks is that you really want to work from a chart. Even if you think it’s simple, by the time you place the stitches, it’s inevitable that you’ll get lost. I use a program called Envisioknit to draft charts. It’s a fantastic program and it’s so much easier and cleaner than mapping things out on graph paper. I thought I’d play around with some ideas and then try them out just to see what happened. I’d done a lot of cabling by hand, but never on the machine. If you need to make purl stitches to create definition, you have to reform those stitches manually. I did that on the first pair after I had the cables done to the top of the heel. I then placed a stitch marker into the first stitch I was purling from. That way, I couldn’t accidentally unravel it all the way. I then unraveled one column at a time and immediately (using my latch tool, though you could use a cylinder needle) reknit them as purl stitches. They then (of course) look like knit stitches on the inside of the sock.

I made up some charts and figured I’d dive in.

I had some Wollmeise Twin yarn leftover from a pair of socks I had made by hand and I figured if I just made the leg short I should be able to get two socks out of that ball. I was so excited that I had the cuff done before I thought about gauge. That was dumb. Especially knowing that this yarn tends to be thicker than other sock yarns. I got to the toe and realized that this sock would fit a Sasquatch. I walked away in disgust; I knew better; I was just being lazy. (Gauge testing is actually important.) In that chart, I had a whole bunch of twists all around the leg and down the center of the foot. I was honestly just curious how well it would show up without any purl stitches. It gave a subtle lacy effect.

When you have vertical columns of purl stitches to add in to your pattern, it’s really easy to drop those stitches down and reform them once the leg is done. A caution though, if you are doing traveling stitches that weave in and out of purl sections, you must do them as you go. That in itself is tricky. Your chart is your friend! You seriously don’t want to have to unravel and relatch this stuff! OMG! NO!

It is extremely tedious to do intricate cable patterns on the machine; it requires unimaginable focus; it’s still quicker than knitting it by hand. It’s a very different experience than hand knitting cables. It takes some practice to get accustomed to what you need to look for as you go. Because you are looking at the knit side of the stitches at the front of the machine and the purl stitches at the back of the machine, you do need to take the time to double check that you have moved those stitches correctly. Once you have prepped all those cables, they have to be knitted still. The temptation is to count that prepping round as done. All you did was place the stitches where they need to be to receive the yarn for that cable round to knit. Having a chart with row numbers on it is essential. You can’t see the finished fabric until you knit a zillion rounds of waste yarn or remove it from the CSM. There is no checking it. Keep an eye on the row counter to be sure you are on track. This has a significant learning curve, but it’s very satisfying to see the results. I found it mentally exhausting. I trust that with practice (and without any deadlines looming) it will get easier.

Happy Knitting!

Socktober: Week 2

During my second week of Socktober I focused on changing colours on toes and heels in the most efficient, yet structurally sound way. There are so many subtle things to think about. Funny how things that are normally completely automatic fall out of your head when you change things up.

The first major thing I changed was to replace my original yarn guide. I am now using one with slots rather than holes. That came with its own learning curve. If you aren’t careful during transitions, the yarn can pop out and suddenly your work just dropped off half a dozen needles! All in all it’s a lot easier once you get used to it.

The first contrasting heels and toes, I joined the new yarn immediately at the colour change.

That meant I had tails for both, on either side of the heel. That might seem like a no-brainer, but I was concerned about the stability of those joins that take a lot of stress. I didn’t want to create a failure point, or a hot spot against the ankle either. I tried to imagine a way that I could incorporate enough stitches with both colours of yarn to allow me to simply cut off the yarn I’m done with and feel confident that everything will be solid.

I ended up adding the heel colour to the base colour carrying the two together from the 9:00 position to the 6:00 position, lifting my rear needles to prepare for the heel and then continued with both yarns to the 3:00 position. I allowed about 4 inches of the new colour and cut the base colour once I got to the 3:00 position. I start my heel at 3:00. I lift the first target needle and then crank back. When I got back to 9:00, I added the tail to the working yarn and knit them together. I built my heel and on my last pass of the heel from the 9:00 position, I reintroduced the base colour and knitted it along to the end of the heel. I cut the heel yarn. I made sure the base colour was threaded through the yarn assembly (not in the heel spring). I incorporated the base colour tail into as many stitches as possible on the next round.

I started the toe in the same way, incorporating the second colour from the 9:00 position, pausing at 6:00 to lift the rear needles and continuing on to the 3:00 position. Obviously once the toe was finished I worked several rounds of waste yarn to prep for the next sock.

When working on a heel or toe on a sock machine, you alternate cranking forward and back as you build the short rows. The back half of your needles are in the non-working position as you focus just on the working needles at the front. As you deal with all the little things like lifting or wrapping needles, cranking, adjusting the fork weights and keeping the yarn moving smoothly through the assembly, it’s easy to go into a sort of auto-pilot. The more you do it, the more automatic it becomes. Unfortunately, as soon as you add one new thing, auto-pilot is no longer your friend.

At one point, I discovered I had a broken needle.

I picked up the resulting dropped stitches and replaced the needle. Without taking a moment to check, I started cranking and quickly realized that I had cranked in the wrong direction. My working thread was wrapped around the back needles. UGH! I tinked it back and recovered. In the next round I realized that I had broken another needle in trying to get that all sorted. I fixed those dropped stitches, switched out the second broken needle and carried on.

When I wound the dark green yarn onto a cone, it wound very tight. I probably should have rewound it looser a second time, but I was too lazy. No excuses; I did notice ahead of time. Between that yarn having a bit of tooth and grabbing onto itself and getting caught underneath the “ball” on the cone, I ended up with that heel knitting much tighter than I actually wanted it to. This led to one of the broken needles I mentioned. Because the orange yarn I used for a subsequent pair was the same yarn as the green, I took the time to wind it twice. It moved through the assembly much more smoothly.

I ended up giving up on the ravel cord thing for this week. I tried to use ravel cord directly on my cast on bonnet as the separation to the first sock. Unfortunately, I ended up with two or three stitches from my cast on bonnet being knitted into the first sock. I sacrificed the bonnet in the process. I made a new bright orange one though. I’ll go into the details another day.

When I Kitchener the toes closed, I typically will put a stitch marker through the two final stitches at the end of the row. By the time you get there, what with the waste yarn underneath, it can be really tough to see. It’s really easy to miss one stitch. It’s a pain to have to recover that after you have woven your ends in. It was a good reminder why skipping this step is just a bad idea.

Because I was using several different yarns this week I was also reminded of the importance of actually thinking about the colour, weight and texture of the waste yarn. Doing the Kitcheners was challenging!

I feel really good about what I learned and accomplished this week. I have made a lot of socks on my machine since I got it last January. I built up a solid routine that minimizes my mistakes. This week offered a very clear view of how easily a routine can be upset by new parameters. It take focus to try new things.

I wish you happy explorations!

Socktober: Week One

Welcome to my Socktober!

There are so many ways that you can personalize your Socktober. I don’t know many people who can either knit fast enough or find the time to knit an entire pair of socks by hand each day of the month for 31 days in a row. If that’s you, I bow to your superpowers! I thought I would embrace Socktober this year and use it to motivate me to learn new techniques on my sock knitting machine.

I was thinking about how I could make my Socktober manageable.

After all, I still have a business to run and we’re leaping headlong into the busy season for both sewing and yarn sales. Using a sock knitting machine means that it is definitely within the realm of possibility to knit a pair of socks each day. But I want to be realistic so that I don’t end up burning myself out on something that I want to be fun and skill-building. I hope to average one pair per day, but I reserve the right to consider it seven per week rather than one per day. I’ll include photos of all the socks I have done each week and talk about the new skills I worked on mastering. The blogs themselves may end up being a bit shorter than usual. (I typically try to write 1K words.) I’ll just see how it goes.

So leading up to the first week of October, I was watching some CSM videos. One of the knitters uses a ravel cord. I knew about ravel cords but had never used one. When you use a sock knitting machine, you use waste yarn to start out the project. It also acts as a divider between items. This is especially great on a sock machine because it means you don’t have to do a full set up for every sock. You just keep starting new ones after making a dividing strip of waste yarn. So a ravel cord is typically something that has a stiffer texture. You only knit it into one row or round of stitches and you don’t overlap any of them. In other words you don’t knit any of the needles more than once with it. So the idea is that you knit your waste yarn, the ravel cord and then start your actual project yarn. When you are finished, you simply find the middle point of the ravel cord, draw one of the loops of it out of its stitch and gently pull it out of the knitting. Presto, the project is separated from the waste yarn! WOW!

That was the first new thing I tried.

I only tried it on the very beginning of the socks because I was a little scared to do it on the toes. I used a fairly stiff crochet cotton. I think it was South Maid #10. It feels almost like it’s starched. I put it through the yarn guide assemble and pulled enough off the ball so it wouldn’t bind once I started cranking the machine. I very carefully started it on the needle just past my six o’clock needle mark. I knitted that around to the needle in the six o’clock position and then trimmed it off with about 4 inches to spare. I plan to reuse these ravel cords.

It actually went really well!

It worked exactly as it should. It also had the added benefit that it was super easy to see where the loops of the first round sat. The texture of it is very different than the sock yarn which also helped with that. So when I put the first round stitches over the needles for the hung hem, it was easier to see them.

Well, I had been planning to try making a pair of socks with contrasting heel and toe for some time. I already had the yarn wound onto cones and ready to go. Since it was sitting there, ready to go, I figured I would go ahead and try that on my October 1st socks as well. (Mostly because I was too lazy to wind another cone with different yarn.)

I must say that I really hate weaving in ends. So I very clumsily fought with those ends to try and get them knitted into the heels and toes as I went along. It went okay, but the key word here was definitely “clumsy” (although lumpy might also apply… LOL). I want to try that again, maybe a few times, to see if I can’t come up with a method that will be easier and give a really smooth result without having to hand weave the ends in.

I suppose having only one pair to show for my blog this week is a little underwhelming, but it will have to do. Now to decide what I want to try for the next ones.

If you decide to do some sort of Socktober, I’d love to hear what that looks like for you.

Happy Sock Knitting!

The Switch was Flipped

We were in the thick of a heatwave with chokingly thick wildfire smoke, and Mother Nature flipped a switch. The most welcomed rains have cooled things down and cleared the air. It’s been about a week of easier breathing; I’m so grateful. I left the window open and woke up in the middle of the night freezing cold. I got up and pulled out the feather duvet to throw over our summertime collection of sheets and crawled back into bed. When DH got up, the weather report predicted a high of 15 degrees Celsius for the day. Brrrrr! (Of course, wait 5 minutes and that can change.) After all that hot weather, it truly feels like fall today.

And fall means it’s time for warm and cozy things like sweaters and wooly socks and knitting and crochet! Hurray! (Judy does a happy dance!)

When I first started selling yarn almost seven years ago, I had no idea what would sell or how much to buy. I also had no idea how often new colourways of sock yarn are released each year. In my naivete, I not only reordered sock yarns but I reordered full bags of sock yarns. (This is one of the few types of yarns they allow you to purchase half bags of. There’s a reason for that.) As the new yarns come and go, these overstocked yarns patiently wait for their turn to become socks.

Especially with self patterning sock yarn, it’s challenging to imagine how the yarn will knit up.

Some labels offer a small photo of the knitted colourway, which is wonderful. But many don’t. Often people struggle with the decision to purchase a yarn because unless there are samples knit up, it can be nearly impossible to visualize what the socks will look like once they’re done. Of course, for some people, that’s half the fun. Knitting up samples is time consuming, especially hand knitting socks to keep up with all the constantly changing sock yarns. I love hand knitting socks, but not for samples that will hang in the store.

Last winter I purchased an Erlbacher Gearhart circular sock knitting machine. Yes, it’s a knitting machine and yes it definitely speeds up the process of knitting socks. You still have to manually make the socks with the machine, but it means that selling hand made socks is within the realm of reason. It still takes time and you’ll never get rich doing it. But for me, it means that knitting sock samples doesn’t consume all my evenings and that some of those sock yarns that I ordered way too much of (and that get overlooked by folks shopping for yarn) can become socks for those who don’t knit… or don’t knit socks… or want to give socks as gifts without the time commitment to knit them.

I pulled one line of sock yarn that has long since been discontinued and started making it into socks earlier in the summer. They look fantastic. It’s exciting to know that I’ll be able to offer ready to wear socks for sale. The first of these are officially on display. My fingers are crossed that people will want to buy them. With the summer heat and all the wildfire smoke we had in the air, I had lost my enthusiasm for working on these socks. But today, I’m feeling all fired up to get back at them. I have a number of yarns in mind to knit up. My fabulous graphics gal designed labels that I can easily print up on cardstock for when they’re ready and I’m chomping at the bit.

So far, as of today, I have been knitting up a line of cotton blend yarns.

I brought them in as an alternative for folks who don’t like (or can’t wear) wool. I want to finish up the rest of this particular “family” of yarns before I move on to the wool blends that I want to knit up.

The second half of August and most of September are usually fairly quiet for me. The flower garden is well established and the seasonal rains are doing the watering for us. The sewing department is usually quiet until the frost hits. I hope to take advantage of this shoulder season to put together a nice inventory of ready to wear hand made socks to sell in the store. Hopefully they will be well received. I don’t see myself doing custom socks at this time, since this is something I’m doing in between all my other work and I’m not charging enough to justify the extra work involved in customizing them. Perhaps once I have sizes well established I might consider it, but I’m definitely not there yet. We’ll see; never say never.

In the meantime, I’ll keep plugging away. With new sock yarns already on their way, and more to arrive in October, I need to make some room on the shelves. We certainly have a lot of variety of sock yarns on hand to choose from and that isn’t likely to change (since sock knitting is my happy place).

I’ve had some people ask whether I will start up Social Saturdays Stitching Circle again. I am taking a wait-and-see approach to this. What with the Delta variant moving through our province I want to be sure that we are not putting anyone at risk. For now, I just don’t feel comfortable starting it back up. When the time comes, I’ll definitely put the word out though.

Happy Crafting!

Unwinding

Wowzers. After lockdowns and multiple covid waves, then a heatwave and a Delta variant, forest fires (just in time to impact our summer tourist trade) and now a thick blanket of smoke that just wants to hang out and be friends with us: I’m tired. I know I’m not alone. I think most of us here in BC are tired. In all fairness, probably everyone in the world is just tired of it all right now… I understand that there are areas elsewhere with flooding! With so much stuff dragging us down it’s so important that we find ways to take care of ourselves. We need to unwind. As a knitter, knitting is one of the ways that I am able to unwind. Lately in more ways than one.

I knit the samples that hang in my store. Over the years I have made all sorts of things.

Sometimes I just make things up as I knit them. Sometimes I make up items from German patterns. Of course the downside of that has been the fact that when a customer comes in and likes it, I can’t offer them the pattern to make it. So I thought I should probably use patterns that I have on hand for sale so that when someone sees a sample and loves it, I can actually provide them with what they need to make it for themselves.

I like to try out patterns using yarns that are different than what the pattern was tested with. More often than not, people substitute the original yarn with what is either in their stash, easily available or the yarn they fell in love with. Of course this can lead to some challenges. Gauge is really the biggest challenge in this process. Although yarn manufacturers do their best to offer a gauge on their yarn labels, there are so many variables that you can’t even really be sure of that. Every knitter has their own particular tension, and often that can change with the weight and texture of the yarn and needles. Last week I started a cardigan. I thought I would use some discontinued yarn that I still have a lot of stock of. It’s so pretty and I thought that perhaps if I did up a cool modern styled garment that people might be inspired. I would love to sell that yarn so I can bring in something new to take its place.

I checked the label and the gauge of the yarn I chose looked like it should match the pattern just fine. Both were marked as “Chunky”. My gut feeling was that I should use a finer needle. Instead of a 6.5mm, I used a 6mm. Now the pattern doesn’t show photos of the back of it, so I wasn’t sure how full it was meant to be. Although there were a lot of stitches to cast on, I figured it was probably just meant to be a full swing style back. There were a lot of decreases leading up to the armpits on the back so I just went with it. I decreased for the armpits and began the raglan decreases. After about 8 rows I realized that this was going to be Sasquatch-worthy in size. (And this is why good little knitters swatch. LOL) When I measured the actual knitting I realized that the texture of the yarn makes the fabric relax and expand. A small swatch wouldn’t have really even shown me the extent to which it relaxes.

Unwinding was my next step.

At first, I felt disappointed that the size was so off. The reality is that while I was knitting it, I was giving myself permission to simply enjoy that process. I wasn’t thinking about how long it would take to complete the sweater; I was just enjoying the texture of the yarn and the gentle rhythm of the knitting. There was no reason to feel bad about frogging it and starting over. When I began unraveling it, I focused on the feeling of the stitches releasing and unwinding, one by one, from the project. It was mesmerizing. With each unwinding stitch I found myself unwinding too. I placed the end of the yarn into my ball winder and wound it as I went. I unraveled a few rows and then wound it onto the ball. The winding had its own rhythm too. It felt good to just focus on that feeling. By the time I was finished, I had three freshly wound balls ready for a fresh start. More than that, I felt relaxed and calm. The project was unwound and so was I.

I took some time and played around with smaller needles. I was a little surprised at how worn out I felt once I finished my new cast on and got the first row completed. I’m not sure where my head was on the second row though. I was supposed to be doing garter stitch. You can’t get much more simple than that. And yet, on row three I was quite astonished to realize that half of stitches were actually stockinette. I took my time, carefully reworking the stitches as I came to them. By the time I finished the mere six rows of garter stitch I was ready for a nap.

With the garter stitch hem completed, the next section is stockinette and I find myself looking forward to when I can curl up with this project again. I’m determined to simply allow myself to be mesmerized by the texture of the yarn and the rhythm of the knitting. Sometimes a project just needs to be about unwinding.

Happy Knitting

Waste Yarn Wisdom

If you are a hand knitter, you have probably rarely or never needed waste yarn. When you knit by hand, your stitches are securely held on your knitting needles (barring unfortunate pet incidents). When you are ready to bind off, or graft your final row or round of stitches, you simply do that with your knitting needles or a crochet hook. It’s all right there and convenient. But when you machine knit, your stitches are on individual needles (latch hooks) on your knitting machine. Simply dropping that project off the machine would leave you with a whole lot of live stitches that are likely to unravel before the piece hits the ground. Here is some helpful information about waste yarn.

Raw Edges

Let’s say you are machine knitting a raglan sweater. You knit two sleeves, the front and the back of the sweater. Yes, you could certainly bind each off directly from the knitting machine. When you have assembled the pieces and you’re ready to knit the neck band, you could pick up stitches from the bound off edges. But it is so much nicer to just knit that neck band from live stitches. In this case, once the piece is completed, you would switch out your project yarn with waste yarn. Knit a whole bunch of rows. You want plenty of them so that if it unravels, there is no risk of your actual stitches dropping.

Hung Hems

When you know you’ll be using a hung hem on your garment, you can begin with what is called a cast on rag. This is a piece of knitting that you hang from every other needle. You then use waste yarn to create a removeable base. (Don’t worry, once you have knit a few rows, the “every other” missing stitches fill in automatically). Once you have a good base of waste yarn, you knit the rows you need for your hung hem. (If you are doing a picot edge, do half the rows, do your picot row and then do the other half.) You then pick up the first row purl bumps and hang them onto the corresponding needles. Knit one row and you have competed your hung hem. This gives a really nice finish.

As a Separator

If you are knitting socks on a circular sock knitting machine the waste yarn can have a few purposes. First of all, it is typical to use a cast on bonnet to start your first sock. You hang the bonnet using every other needle and then knit several rounds with waste yarn. Knit a sock. Once you complete the sock, you’ll knit a bunch of rounds of waste yarn. This allows you to safely remove the sock from the knitting machine. But… wait just a tick. Let’s face it, most of us need two socks. Don’t spend a bunch of time removing that sock and starting the process all over. Use that waste yarn that protects that previous toe as the foundation for your next sock, and so on. I have done as many as 18 socks all in one stretch before removing them from the machine.

Waste Yarn Tips

I typically try to use up leftover yarns I have kicking around. And that’s okay, you can definitely do that. Knowing what will work best can definitely minimize headaches though.

Weight

Using a waste yarn that is a different weight than your project yarn can make it really tricky to identify where your stitches are. It can result in missed stitches when you pick up for a hung hem and it can make it difficult to see all your stitches when you are grafting toes on socks. By using a yarn that is the same weight, it will be a zillion times easier to identify what you are looking at and knowing that you are grabbing the right stitch when you need to.

Colour

Yes, colour matters! I have all sorts of leftover sock yarn. Much of it is self patterning. I love me some self patterning sock yarn! Using this as waste yarn can be tricky; but you can, in a pinch. Avoid using colours that contain those similar to your project yarn. Also having multiple colours can be confusing; when it comes time to graft, it can really slow you down. I find it much easier when I use a solid colour. Ideally, use something that has a different colour value than your project yarn. If you don’t really understand colour values, take a black and white photo of the two yarns side by side. If they look the same in black and white, then they are the same colour value. They may seem like significantly different colours, but in poor lighting conditions, similar colour values will be tougher to distinguish from one another. As someone who typically grafts toes in the evening, I am speaking from experience.

Texture

I am not talking about nubbly textured yarns like boucle. Definitely avoid those. What I’m referring to here is the difference in texture that you get when one yarn is wool and the other is cotton, or acrylic. The truth is that these differences in texture can be your friend. Having distinct texture differences can make it so much easier to identify which yarn is which.

Reuse

Yes, you can reuse waste yarn. You will lose some length each time. You always end up trimming some of it away. So the first time you use it, be generous. And when you take it off, wind it up neatly. Keep it tidy. A Ziploc style bag can be good for storage. Keep these away from your cat! When you start a project with a previously used piece of waste yarn, be aware of where the end is. If you get carried away with the rhythm of the knitting machine, it’s easy to end up knitting it right off. Next thing you know, it’s on the floor!

And there you have it!

Happy Knitting!

Taking it up a Notch

I have this terrible habit. When learning something new, I fully intend to start off with simple projects. But I just can’t resist diving into the deep end. Since my last blog post I learned a lot by setting the bar high. Yup. Knit radar, my new ribber, punch cards and long floats on Fair Isle. Yup. That’s me keeping it simple. Here’s what I learned!

I am so grateful for all the people who post stuff on the internet so that I can find reference when I need it. I was able to download and print the full manual for my knitting machine ribber. That gave me clear guidelines for casting on and knitting a simple rib to start off the sweater I intended to knit. (Yeah, that reflects how it went.) Gotta say, the ribbing went fabulously. That was pretty exciting. There are so many steps involved just to cast on a rib that I doubt I’ll ever memorize the process so it’s good I printed out the manual.

I have a tendency to be ambitious. Sometimes that results in a completed project and sometimes it results in insights toward future projects. My most recent explorations definitely resulted in the latter! I figured I would make a child sized cardigan using three colours and a pattern that I thought resembled ice cream cones when you looked at it upside down. (Welcome to the way my mind works…)

Sweater Back

First Attempt

I got the knit radar all set up. Got my ribbing all done and felt like a rock star. Next I the punch card with my inverted ice cream cones. Thing is, you can’t see the progress in your knitting very easily because you are looking at the wrong side of the fabric as you knit. I painstakingly caught the long floats on the needles as I went… though inconsistently. It took about 50 rows before I realized I had my punch card in upside down. Also, the floats looked great on the back, but on the good side, you could see their placement was inconsistent. Sigh… ripped it out, wound it all back onto the cones and started again.

Second Attempt

I reset my pattern in the knit radar. Got my ribbing all done and felt relieved that at least I was getting that right. Set up the punch card; took it back out; put it back in; wondered whether I got it right; took it back out; put it back in (by now I was on the verge of hyper-ventilation) started knitting. Got all the way to the armpit shaping and took a well earned break. Continued on to the neck shaping and completed the right side shoulder. Then I realized that I had not paid any attention to what row the punch card was on when I started the shoulder shaping. I had no idea where to set it to carry on with the other shoulder in the proper pattern sequence… I also had no idea whether I should be starting on the right or left side with the carriage. Hmmmmm. I figured that it was such a small piece I didn’t care and just let it do whatever it wanted for the left shoulder. Bound off and set that aside. One striped sweater back completed! YAY!

Sweater Front

Before the First Attempt

It occurred to me that those stripes could make life pretty challenging on the sweater fronts, what with neck and armhole shaping. So I went ahead and made the back again, but with just two colours.

First Attempt

Set it all up, got the ribbing done, set up the punch card, knit a bunch of rows and realized I forgot to switch it from stockinette to the “knit-in” setting. Tried to take it back to the ribbing and failed miserably. It really is just quicker to start over.

Second Attempt

Got well underway and then realized that there was something really wrong with my knit in pattern. I started on the right side of zero and every time I drew the carriage to the left, I only went a few inches past my zero. That was the edge of my work. BUT, that didn’t take the carriage far enough to the left to actually read the punch card. So, I ripped it out again.

Third Attempt

Man, the ribbing was just not working for me. It took me a full-on forty minutes to realize that one of the locking levers that holds the ribber in the right position on the table had flipped down. I won’t make that mistake again.

Fourth Attempt:

Man, I was cooking with gas on this. I got all the way to the armpit and then realized that I was supposed to shape the neckline first. I tried to take it back but got seriously confused about what row the punch card should be on in order to get the correct pattern. You see, the line that is indicated on the front of the machine is not the row that is being read. So you can’t just look at the pattern on the garment and say oh that corresponds to row such and such. And my brain was going inside-out trying to discern how to know which row to go back to. I gave up. I walked away, grabbed me some Reese’s ice cream and when I was done licking out my bowl I decided to machine knit a pair of socks instead. Those came out perfectly. That was just the boost I needed after crashing on my learning curve.

And now, this little sweater project is sitting in time out. Since it was really intended to be used as an opportunity to explore the features on the knitting machine, I’m not sure whether I will actually complete it; time will tell. I have no regrets.

Here’s to swinging for the fences and letting the missteps be our teachers.

Happy exploring!

First Round with Knit Radar

“What is Knit Radar”, you ask?

Kind of sounds like a device that the police use to catch you knitting in your car, right? Or maybe how fast you’re knitting in your car? It’s a feature on my Singer 360K studio knitting machine that makes it easier to shape and size pattern pieces as you knit. Although I haven’t had as much time (energy, really) as I hoped to play with my knitting machines since my last blogpost, I have attempted my first garment using knit-radar.

I thought I would make myself a sleeveless top to start out with. The Singer machines with the knit-radar feature come with basic garment patterns on long narrow sheets of paper. You feed one through the knit-radar to keep track of where you are on that pattern piece as you knit. When I looked through the patterns, I thought I’d actually use the dress pattern and just shorten it to a good length; it had the shape I was looking for. Although I didn’t really have expectations of making anything actually wearable on my first try, I thought I’d choose my pattern and yarn in hopes that if the planets were to align, that I’d actually want to wear the resulting garment.

Step One: The gauge swatch

I started out by making a gauge swatch with the yarn. I followed the instructions in the manual. Essentially, you knit a bunch of rows, strategically placing contrasting rows and stitches.

The machine comes with a bundle of gauge rulers; each is marked with numbers in the corner to identify it. Among those is one ruler that looks a little different. One side has an R, the other side has an S. Using the R side, you align the edge where the R is with the bottom of the lonely contrasting stitch and measure to the top of the contrasting stripe below it. At the point where the ruler meets the top of that stitch, you identify the number on the ruler. That is your row count for your gauge. Flip that ruler over to the S side. You measure between the two contrasting stitches to determining your stitch count.

Step Two: Set up the knit-radar

There is a dial on the machine, in front of the knit radar with numbers on it. This is how you set the number of rows in your gauge. (Mine was seized so I had to disassemble it all, get it unseized and put it back together again.) Set this to the correct number. In my case, it was 40 rows.

Now dig through all those rulers and find the one that has the same number as the number of stitches you determined with that S side of the ruler. There are a lot of rulers to dig through! Making sure that you have the correct stitch number in the upper left hand corner of that ruler, place it in the front of the knit radar behind the metal clips.

Using the sizing grid on the pattern, choose your size. The pattern pieces are drawn sort of nesting on each other by size. So figure out which one is the one you need. (It doesn’t hurt to put a sticky note on the knitting machine to remind you!) You feed the pattern sheet into the knit radar and use the vertical and horizontal lines to make sure you have it aligned perfectly. Then engage the lever so it “grabs” the paper and allows you to advance the pattern piece using the appropriate dial. Line it up with the bottom of the pattern piece you’ll be following. Now make sure that the zero on your gauge ruler lines up perfectly with the left hand side of the pattern piece you are following.

Cast it on, Baby!

You figure out how many stitches to cast on by looking at the intersection point of the pattern with the stitch count ruler. For the back or the sleeve, it will have half of the pattern, so the zero line is at the center of the machine. You cast on equally on either side of center, the number of stitches indicated on the knit radar. There are a lot of ways to cast on but that’s for another day.

Once you have those stitches cast on, start knitting. You increase or decrease the number of stitches according to how the outline of the pattern piece moves relative to the stitch count ruler. It will likely take a few projects to get good at this process. There were times I probably should have shaped both sides of the piece on the same row; you live and learn.

Shaping it up!

I was grateful that I watched a lot of videos before I attempted this process. It’s recommended (and I wholeheartedly agree!) to do what is called “fully fashioned” increases and decreases. What this means is that you move either two or three stitches in our out from the knitting to either create a new stitch or reduce the number of stitches. Without getting into gory details, this basically means that the increases happen within the fabric rather than on the edge of the garment. This gives a really nice clean edge and makes it much nicer to join the pieces to each other to finish the garment.

I made the back first. When I finished it I figured it would have been easier to do a nicer finish on it if I had used short rows. So I used short rows on the front. I then did a bunch of rows of waste yarn… although I should have done a lot more of them! Once you assemble it all and finish off the live stitches, you pull off the waste yarn.

I got it all stitched up; I didn’t hide my ends yet since it turned out quite big. Now I have the information I need to plan my next project a little better. Success!

Happy Making!

Looming Joy!

Man, what with Covid-19 cases rising… it’s easy for life to feel really heavy right now. It puts such a strain on everyone’s mental health and emotional well-being. It’s so important during stressful times, that we take charge and make sure we have ways to de-stress. Whether that looks like long walks, yoga, meditation, fibre arts or some other activity, it’s up to us each to reach for what will keep us feeling balanced.

My kids’ paternal grandmother was a weaver. Rag rugs were her thing. She had two looms that were usually loaded with projects at all times. She passed away, years ago (within months of my own mother’s passing). Recently, I was entrusted with one of her looms. Her husband built it for her in the 1990’s. It had been in storage and although the structure of it was in good condition, the heddles and the cording that supported the harnesses, treadles and shafts didn’t fare as well.

I was so excited to be able to bring this loom back to life. I had observed my mother-in-law using the looms, but had never used them myself. Weeks before I received it, I began researching. Once we had it all structurally set up, I ordered heddles for it and restrung the rotted out cording.

My sweetheart built me a warping board, which I found leaning up against the loom on a Sunday morning. I felt like a five year old child waking up to shiny things on Christmas morning. By the end of the day I was well into my first project (despite having to work part of the day).

It was wonderful. I felt so much joy measuring the warp, sleying the reed, threading the heddles and anchoring that yarn to the apron rods. Every step felt so satisfying. I filled my bobbins for my shiny new shuttle and began weaving. The joy welled up in me so much that at one point I had to just sit back and weep. Perhaps that sounds melodramatic, but it didn’t feel that way. It just felt wonderful. Since the pandemic began back in early spring, there has been so much emotional and mental stress building up everywhere. I feel like this was an opening of the gates that allowed me to release a big wave of emotion that was stuffed down and out of the way so I could keep on keeping on. I didn’t realize how much I needed that.

Over the next three days, I sat down and wove whenever I had a chance. Ten minutes here, thirty minutes there. By the time I opened the store that Wednesday morning, I had finished the entire warp. I made 3 dish cloths, 3 table runners and 2 scrubby cloths (I used Rico Creative Bubble for those, it’s the yarn you use to make scrubbies for your dishes). When I got a chance throughout the day, I finished up the ends of those items on the sewing machine, serger and ultimately with some twill binding. It was so satisfying. I learned a lot in doing that first warp’s worth of weaving. The most important thing I learned was that I love to weave. It also really impressed upon me how important it is that I make the time to do things that bring me joy, that pull me away from the stress inducing aspects of life.

Since then I’ve completed another warp’s worth of weaving projects and I’m now on my third one. This batch will be placemats. It’s proving to be very satisfying. I have a couple of knitting projects on the go, but they are both pretty complex and require a degree of focus that I just haven’t been able to sustain for the past month. I’m picking away at them and I’ll get them done, little by little. The loom is (for now) taking over the place that I usually fill with a “no-brainer” knitting project. It’s nice to have options.

For me, fibre arts offer a healthy way to release the mental and emotional stress that (daily life, let alone) the pandemic has us all under. Dr. Bonnie Henry’s mantra of “Be Calm, Be Kind, Be Safe” is not just about how we are with others, but about how we are to ourselves too. If crochet, or knitting, or embroidery, or felting, or weaving help you to cope with all… well… that stuff… you are in good company. And it’s a bonus is that you end up with something tangible out of the deal when the crafting is done. A hat, a pair of socks, a dishcloth, a sweater, a Christmas ornament… all happy results of a fibre arts hobby. But the best side effect of all is the joy.

And with that in mind, I wish you JOY!

Happy crafting!