Socktober: Week 4

Things have been picking up in the sewing department of the store and I had to think about how to approach this week of sock knitting in a way that didn’t pull the rug out from under me. After looking through my bin of leftover sock yarn it occurred to me that this would be a great time to use up a bunch of those leftovers. There wasn’t enough of anything to make full sized socks, but ankle socks… yeah. I figured I could do that. So needless to say, I spent my week playing yarn chicken.

Yarn Chicken! I assume most everyone knows what this is. If you don’t, then let me clarify.

It references the game of chicken that is played in cars. Understand that I do not in any way recommend playing this game with a car. The idea is that two drivers drive their cars toward each other as if to have a head on collision. The first one to turn away loses. If you are into 80’s movies, think Footloose, where they played it with tractors. So that’s the reference. Clearly, when you have some yarn and you think it’s enough for your project but you aren’t sure… you begin a round of Yarn Chicken. (Epecially when the yarn is discontinued and you can’t get any more.) You get within sight of the end and you watch each meter of yarn disappear into your project and you pray that you’ll get to the last stitch before you run out. That was my week!

I still had one chart from the previous week that I wanted to work up. I started the week by finishing that. The big take away from that project was that it’s exceedingly helpful to make sure that in the very first round that you have purl stitches, to immediately reform those stitches, especially when you have a round or two after the hung hem before the pattern begins. It’s so tricky to figure out which stitch to start your purls in. This is especially true if you wait until you’ve done over 15 rounds. Putting a stitch marker into it is all good and fine, but the stitch marker tends to get in the way. So I would definitely encourage that. Also, I found that reforming the purl stitches in a simple column is best done every eight to ten rounds. If you leave it longer, you run the risk of dropping stitches in the process. This way, it’s pretty efficient. Keep the cable to 2×2 at the most and if you want them side by side, definitely put a column or two of purls in between. This will prevent needle breakage.

Back to the leftovers.

I weighed out all my leftover balls of sock yarn. Well, not all of them, but many of them. I had one that I thought should be enough and I figured I would start with that. It weighed about 40g. I got to the toe on the second sock and ran out. I figured, “hey, it’s just socks!” and I found some other yarn that matched and finished the toe with that. It’ll still fulfill its function.

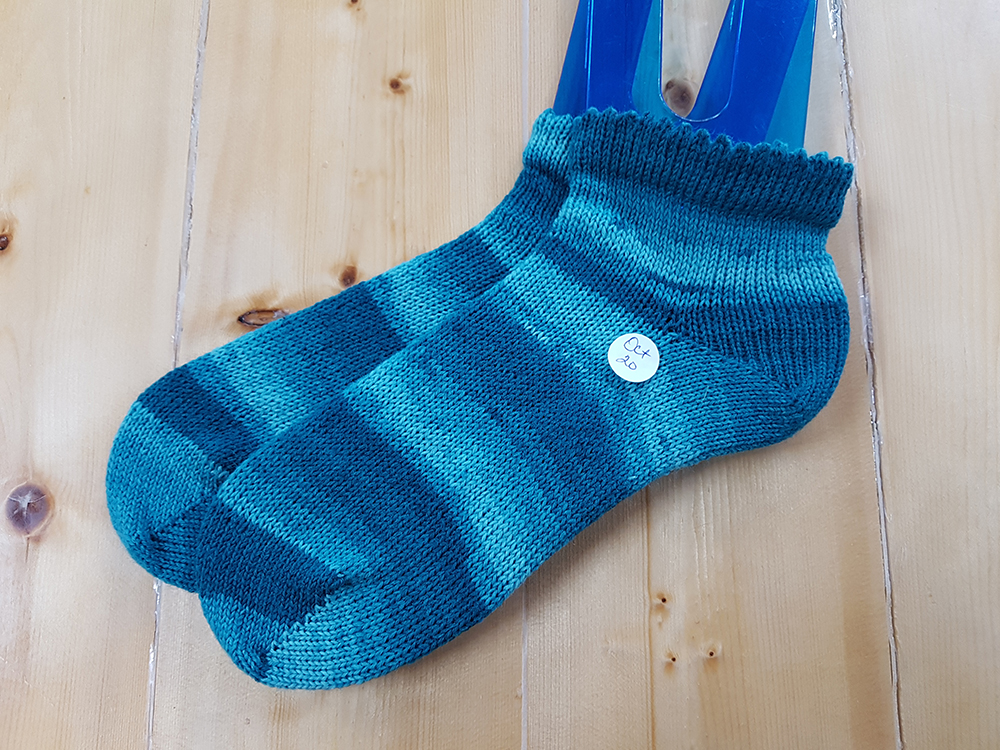
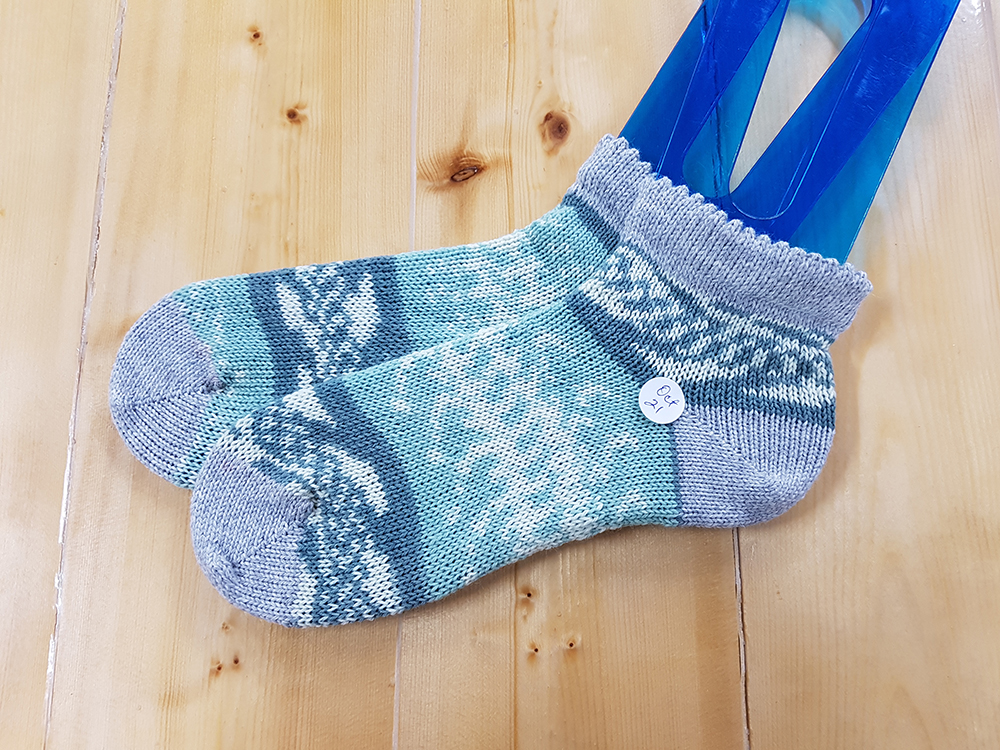
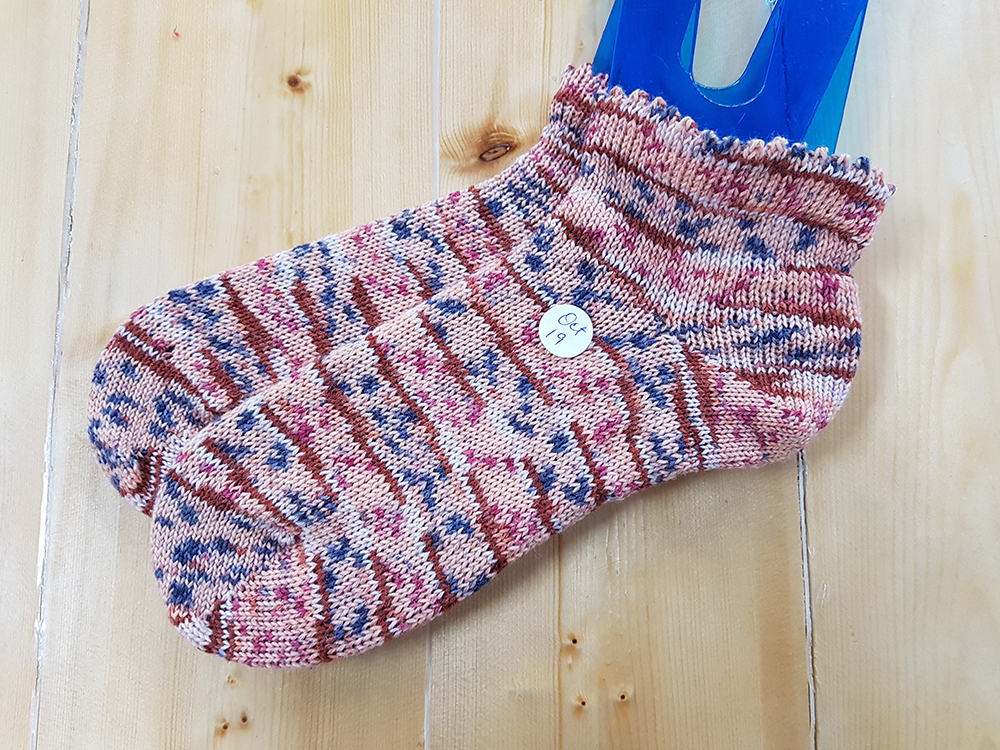
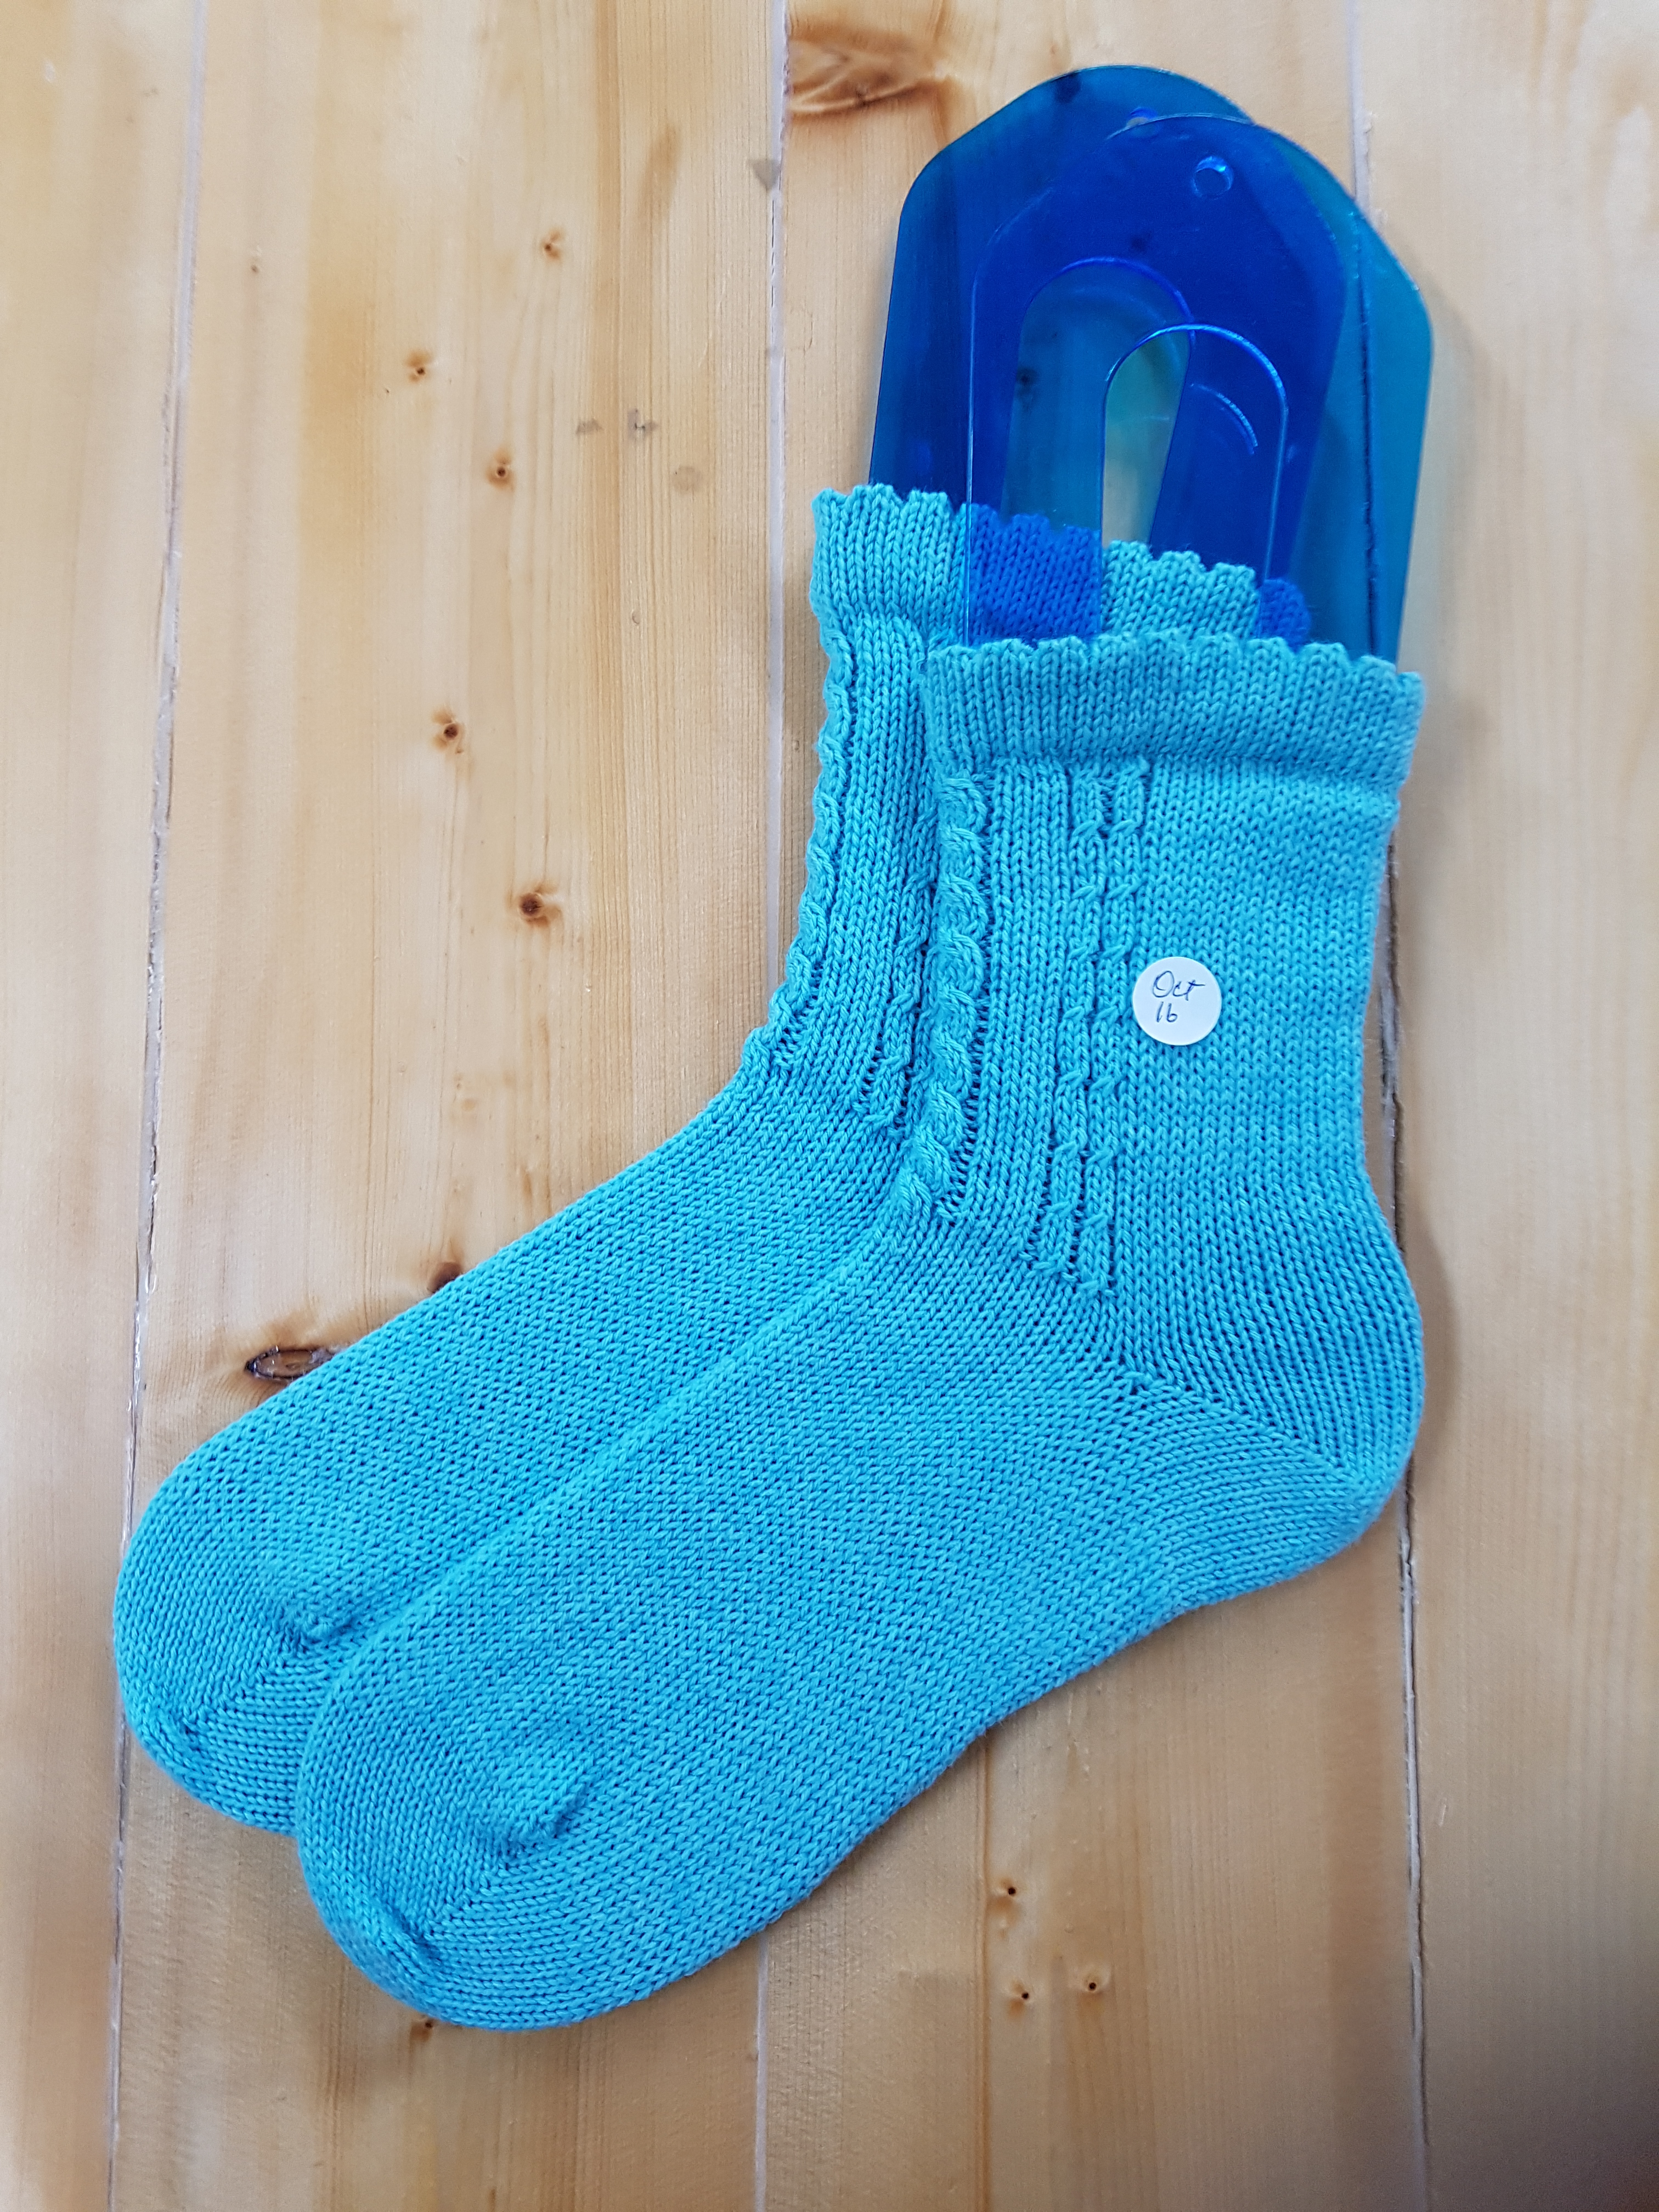
A number of the other balls had only in the neighbourhood of 30g. I gauged that by starting the cuff in a contrasting colour, if I also contrasted the heels and toes, I might just squeak by with some of the smaller balls. Even doing that, it was really close! There were literally only meters of yarn left after finishing a couple of the pairs. Then I stumbled on a ball that had been hiding from me. It was 46g so I thought I would take a chance. I managed to complete both socks. There was literally nothing left; I had exactly enough. I actually was so excited I got up and did a little happy dance!

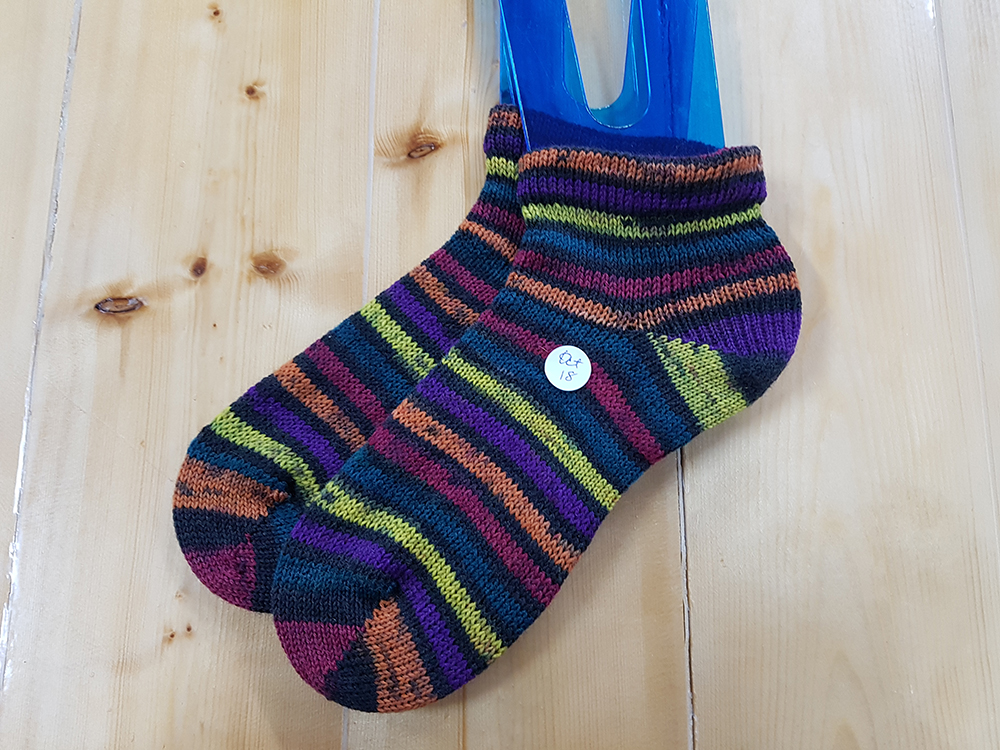
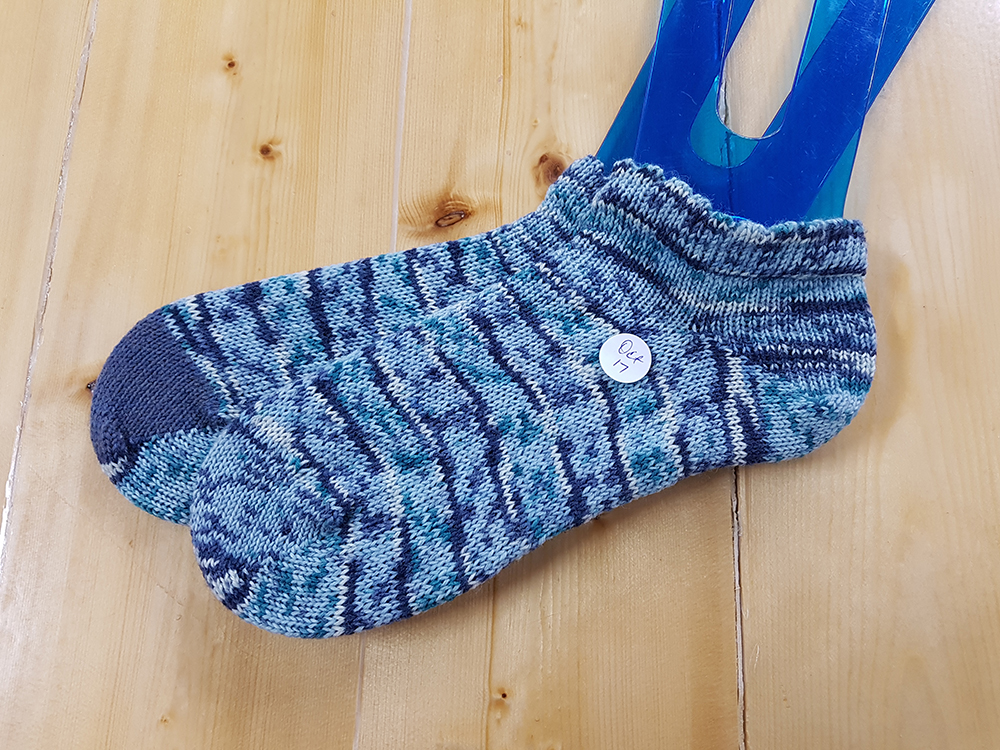
It was interesting that the ankle socks with contrasting yarns took me longer to knit than a full sized pair in a single colour. I suppose it makes sense. You do have to take time to switch out each time you change the colour. The plain coloured ones went fairly quickly, which was nice. I really didn’t have a lot of spare time this week.

I’m very curious to play around with lace techniques.

When you knit lace by hand, you switch up whether you “knit two together” or do a “slip, slip, knit” before and after your “yarn-overs”. This affects the directions of the lines that are created in the fabric as you knit. I’m curious to play around with how to do this to get the same affects using the knitting machine. I suspect that when you double up stitches on one needle to create your yarn-over, that you might have to lift the stitch off the target needle before you place the other stitch that empties the adjacent needle. Hmmmm… I wish I would have the time to explore this fully in the coming week. With all the sewing jobs that have come in, I am going to have to be careful that I don’t burn myself out on this. So, maybe next Socktober.

I still have a lot of leftover yarn. What with Halloween coming up, I was thinking that maybe what I could do is make what I lovingly call “Frankensocks”. What I would be inclined to do, is weigh out my leftovers, divide each ball in two equal smaller balls and then use up any yarns that look relatively good together. They might turn out to be monstrous, but it could be really fun. I also would love to be able to use up more of my leftover sock yarn. There’s a lot of it. Yeah, I think that’s what I’ll do. If I take the time to sort out the yarn all at once it should be manageable. Lace techniques are going to have to wait… sadly.

Happy Socking!

Cross Stitch Tips: Before You Start

Cross stitch is growing in popularity. I’m seeing more and more people in my store, looking for supplies to get started. I’m seeing more kits available through my suppliers, and although it never fully went away, there is definitely renewed interest in this beautiful form of fibre art. If it’s new to you, it can be hard to know where to start. Hopefully I can help you with that.

Purchasing a kit

You can purchase kits that provide you with everything you need from Aida cloth through all the many colours of floss and a needle. Some kits will have the floss separated out and labeled with the colour numbers, some will come with a bundle of floss tied together and you’ll have to sort it all out and figure out which is which. That can be a challenge if there are many shades of any particular colour. So if you are getting a kit with a lot of different colours, be aware that you may need to spend some time separating out and sorting the colours before you get started. Some kits include a hoop, some don’t. If you are a beginner, look for a smaller kit that comes with everything you need to complete the project.

Purchasing a pattern

When you purchase a cross stitch pattern, be aware that the pattern is all you get. You will need to purchase all the floss and fabric separately. That doesn’t have to be an issue. Allow yourself lots of time when you go to purchase your floss. It won’t be a quick process. You’ll want to use tapestry needles sized for the fabric gauge.

Purchasing Floss

Be aware that DMC makes a gazillion colours of floss and it’s pretty rare for any craft store to have all the colours on hand. When purchasing the floss, you will want a list of colour numbers and if they give you the names, that is very helpful to have on hand. Ask the store owner to guide you through how they organize their floss. You may want to purchase bobbins to wind the floss on as a way to keep it organized. Be sure to label the bobbins! Ask whether the store is willing to bring in the colours you need that they don’t have on hand.

Purchasing Fabric

There are a number of fabrics you can use for cross stitch projects. The most commonly used is called Aida. You can also use Hardanger. Both of these have clear little holes at the corners of where your stitches will sit. This makes it easy to see where to pull your needle through as you stitch. There are also even-weave fabrics like Lugana cloth or Belfast Linen. These are woven so that the warp and weft are perfectly even. On even-weave fabrics, you count the threads to determine where to place your stitches. If you are just beginning, look for Aida cloth.

The next thing you need to know about Aida is that it comes in different gauges. The gauge is measured as a stitch count. The stitch count is in reference to inches. So, if you are getting 14 count Aida, you will have 14 stitches to every inch. Typically we see 11, 14, 18 and 28 ct. The higher the number, the finer the stitching. It comes in different colours as well. For a beginner, I would urge you to choose a light colour such as white or ivory. I would discourage working with black or navy blue until you have some confidence with this discipline.

You will need to know how many stitches there are across the width and the height of your pattern before you purchase the fabric. Some stores carry Aida cloth on a roll and some carry “quarters”. Quarters measure 19″ x 27″, and you can turn them either way to suit your pattern. Obviously the number of stitches you can fit on a quarter will vary depending on the stitch count. The higher the number in the stitch count, the smaller the completed design will be. Be sure to allow enough fabric around the outside of the stitched pattern so that you can mount the finished work. How much you leave will depend on how you want to mount it.

Hoops

Hoops are available in wood or plastic. Some are “locking” hoops and others are not. Which type you choose to use will be a question of personal preference. Wood hoops are generally cheaper to purchase. Choose a hoop size based on the size of your project. If your project is small, use a small hoop. I personally don’t like to use a hoop that is more than 9 inches in diameter, even on large projects.

Stretchers

Hoops are not the only way to hold the fabric while you stitch. Stretchers can be purchased in a few ways. You can purchase ones that lock into each other. You buy two sets of two pieces, based on the measurements of the width and height of the fabric. Typically you would use your office stapler and staple the fabric onto this and work on it this way. Not everyone likes this, especially on a larger size. These can also be used as a mounting structure to go inside a frame when the project is done. Adjustable stretchers usually have flat sides and round spanners that go across the width of the project. Often they have fabric on the round spanners so you can baste your Aida cloth onto it on either end. You then roll it to the place you want to work and tighten the spanners onto the sides with wingnuts. You can buy stretchers in sets with varying lengths of sides to accommodate most any size of project. Stretchers work well with floor frames. Floor frames just allow you to have both hands free to work.

Next time, I’ll go into how to actually prepare your fabric and pattern, and what to watch out for.

Happy Crafting!

Happy Easter

It’s wonderful to see the crocuses, daffodils and tulips begin to emerge through the soil as the snow melts away. Although this winter was mild as our winters go, I’m very happy to have blue skies and sunshine and the promise of warm weather again. I find that the first quarter of the year always flies right by for me. Here it is, the beginning of April already. Easter is this weekend; how did that come so fast? We find ourselves in that “in-between” time when it just seems too nice to stay indoors, but isn’t really warm enough to get busy in the garden. What to do? Well there’s always more knitting, or crochet, or embroidery, or felting, or quilting… (shhhhh…. I don’t want to hear you say spring cleaning!)

I thought I would write a quick blogpost just to say hello and happy Easter. I was looking through Ravelry.com and found a few really sweet Easter patterns. I thought I’d share them and hopefully they’ll make you smile the way they made me smile.

Easter bunny!

Sweet little chick!

And Easter eggs!

Once the Easter weekend is over, it’ll be time to book in for our vaccinations. That feels like a light at the end of the tunnel to me. And in the meantime, I hope you have a lovely weekend as we hang in there through what I truly hope will be our last provincial lock-down. The store will be closed from Good Friday until the following Wednesday and then we’ll be back to regular hours.

Happy Crafting and Happy Easter!

For the Love of Socks

For anyone who follows my blog, you will know that I love sock knitting.

Anyone who knows my store will know that I have a weakness for sock yarn. Skeins and balls of sock yarn must easily outnumber all the other yarns in the shop. One of the things that has been a little frustrating for me is that there aren’t enough hours in my evenings to knit samples of the sock yarns so people can get a visual on how they knit up. For a long time, I was drooling over Erlbacher Gearhart circular sock knitting machines. This winter, my DH finally got fed up listening to me go on about it. “Just order one already!” He said. So I did!

My brand new CSM arrived early in January. The folks at Erlbacher were lovely; their service was excellent. These machines are custom built to order. I purchased two cylinders and two ribbers, 60’s and 72’s respectively (that’s the number of stitches). They sent me links to lots of YouTube videos and cautioned me to expect it to take about three weeks to begin to feel like I was getting the hang of it. They were right! It’s been quite the learning curve.

An overview

The way this works is that you attach stitches from a “cast on bonnet” onto the needles of the machine. You cast on with a waste yarn. (I learned the hard way why it is really important to use a solid colour yarn that is a dramatic contrast to your working yarn.) you knit a bunch of rounds to create a separation from the bonnet, and then bring in your working yarn. You knit however many rounds you want for your hung hem (I use 10) if you want a picot edge you do that and then another multiple of your original half of the hung hem (10 for me). Then you pick up the original first round stitches and pop them onto the needles that correspond to that column of stitches. Once those are picked up, you keep knitting around for the leg. Next comes a short row heel, then the foot, then you make the toe exactly the same way you did the short row heel. Once the toe is done, you switch to the contrast waste yarn again and knit about 8 or 10 rounds. You can then start the next sock or you can remove it from the machine. Close up the toes using Kitchener, remove the waste yarn and “Ta-DAH”! You have yourself a sock.

I found the videos and advice from Steve Ashton (the Wizard of BC) incredibly helpful. I messaged him and he immediately responded with a video call to me. He asked me to show him how I had set up the machine and then offered me guidance on what to change to make it work better. What a kind, generous and lovely man! He’s got a wealth of knowledge of these machines and it shows. When I contacted him I was trying to use the ribber for the first time and was getting very frustrated. He explained what I needed to take into consideration and how to set it all up. He also suggested that I take some more time to get really comfortable with just knitting stockinette socks until I felt more confident before tackling the ribber. So that’s what I’ve been doing. I’ve got to the point where it only takes me about half an hour to complete one sock now. Doing the heels and toes is almost automatic. I’ve had a pile of socks that were ready to have the toes closed up so I curled up at the TV and finished them all off in one evening. These will be displayed in the store; they are samples of yarns I have in stock. Time to cut up some cardboard to make me some sock blockers to display them on.

I truly love this machine.

Don’t get me wrong, I’ll still knit socks by hand too. But I can see that it will be worth the investment in the long haul. Being able to knit up samples of the new sock yarns as they come in alone will make it worth it. Eventually, once I am more confident, I will likely make socks to sell. But that’s down the road a ways… perhaps if things are quieter in the summer, I may play with that possibility then. It will take some doing to determine what sizes I want to make up and what I need to do to be sure that those sizes will be consistent.

There are a lot of videos on CSM’s when you start looking. Many of them suggest doing toe-up to avoid the Kitchener stitch closure of the toes. What I found was that it means you have to make the stitches bigger for the toes so that you can pick up the stitches and stretch them across the cylinder once the toe is complete. Otherwise they just don’t reach and you have to start over. I really hate a sloppy, loose fitting toe. Also, if you do that, you have to take a lot of energy to bind off the cuff. I find it far quicker to close the toe with Kitchener stitch than to bind off the cuff. Using a hung hem, you don’t have to do anything fussy with the top of the sock. Steve advised me that he even uses a 2 round hung hem on ribbed socks. It’s really quick and easy to do. It does take a bit of practice to be able to see which loops are the right ones to pick up to do that hung hem, but practice makes that easier. Using a highly contrasting waste yarn in a solid colour makes it easy to see the stitches for this.

Perhaps in another month or so I’ll revisit the ribber and face that learning curve. As samples go, it’s nice for them to be stockinette so you can see the patterns in the fabric easier. For now, I’m happy making up my stockinette samples. I like the feeling of satisfaction that comes with a successful pair of socks.

Happy Crafting!

Knitting Machine Shenanigans (or: Being a Newbie Can Kinda Suck)

In my last blog I talked about some of my first (fumbling) experiences with my antique knitting machine. Since then, I made a baby sweater on it. Today, I want to talk about what I learned in making that baby sweater.

Even more, I want to talk about how hard it can be to be an adult Newbie.

If you’ve followed my blog long enough, you’ll have a pretty good idea that I was raised in a household that valued productivity and efficiency above all else. I live with the pros and cons of that childhood environment for good or bad or both. Typically, I like to see results, yesterday!

Starting any new hobby (or skill, really), you do actually have to give yourself permission to be a beginner. Well, that is, if you don’t want to feel like an abject failure before you even know what you’re doing. It requires an appropriate mindset. I have to deliberately remind myself that I don’t know WTF I’m doing yet… and that it’s okay.

I run a small business so, I have plenty to do. And any sort of hobby I spend time on tends to be a bit sporadic since I don’t always have the mental energy to focus on something new in the evenings. I’m pretty stoked to become proficient using my knitting machine, but yeah. There’s only so much energy to go around. I’m determined to be gentler with myself. There are days when my inner newbie wants to forge ahead but my “it’s been a long day” self says, “uh, yeah, not right now”. I take a lot of long deep breaths to exorcise that productivity gnome that natters on, in the back of my mind. Mostly it’s shaming me for not feeling up to doing this new thing in that moment. (I imagine I’m not the only person that experiences this.)

That’s been the biggest battle in all of this, to be honest.

The way I’m trying to approach this (and maybe set up a new habit in regard to learning new things), is to be really deliberate about my mindset. I take a few deep breaths just to settle myself in. I close my eyes and I focus on the feeling of “child-like wonder”. I sit with that feeling and I name it for what it is. When I am filled up with that sense of wonder and any remnants of hurry, impatience or mind chatter have been set to the side, I begin. Over the course of the project, I’ll notice those things creeping back in. When they do, I close my eyes and bring my focus back to that sense of wonder and curiosity. It’s really helping to make the learning process a zillion times more fun and relaxing.

As for the baby sweater. I took a basic cardigan pattern in the smallest size and adapted it as I went along. This was an exercise in how to think about existing hand-knitting patterns and transferring them to be used on the machine.

Here’s what I learned

DK yarn needs more room than sock yarn. You only cast on every other needle. The tension has to be set softer. On this machine that means a higher number on the dial. When it knits, the cross threads spanning the knit stitches make it look weird. After you finish knitting, you pull it and stretch it and all those cross threads become incorporated into the stitches and disappear. The knitting looks normal.

The needles on a knitting machine are actually latch hooks. If you’ve never seen a knitting machine up close, it really is pretty cool. Once set up, the existing stitches sit just behind the latch of the open hook. You lay the yarn across the open hooks and draw the cam across the hooks. The cam’s job is to move those hooks so that the latch closes over the new yarn, pulls it through the existing stitch and places it back in the ready position with the stitch behind the open latch. If you feel resistance in the cam, you need to check the needles. Make sure that all those stitches are behind the latches and that none have dropped. The end stitches on the right and left are more likely to have issues than any of the others. If you’re doing a pattern, then anywhere the pattern transitions should be checked on each row.

You can knit multiple pieces at the same time. I did the fronts and the sleeves together respectively. What I learned here is that the tension dial on the cam isn’t the only thing that determines the actual tension of the stitches. When you draw the cam across the needles, you are holding the working yarn in the other hand. It takes a bit of practice to get a feel for how firmly to hold the yarn. Even though you are knitting two pieces (using two yarn sources, obviously), the tension can end up different on each if you vary how you hold the yarn. Consistency is key.

I am still unhappy with my machine bind off. I took to simply removing the pieces and binding them off by hand to control how tight or loose that bind off is.

Last but not least, I think it’s time for me to concede that it’s better to finish knitted garments with yarn by hand. I would likely still seam mittens on the sewing machine. But this little sweater, as cute as it is, is pretty much unwearable because the seams are too rigid. It’s time for me to put some energy into becoming proficient at hand seaming my garments with yarn. Stay tuned for that!

I haven’t done the neck and button band on this little sweater yet. It’s just going to be a display piece for on the wall. Still, I’m happy with what this little sweater taught me about my knitting machine and more so, about myself.

Happy Crafting!

Covid-19 Stuff

Hey folks; strange and challenging times right now, eh? I want to connect with you about what is happening here and how I’m responding to the current situation in regard to Covid-19 and the current British Columbia state of emergency.

Yes, the store is open. For the time being, I will do my best to have the store open regular hours, however, I may shorten my days to allow myself time for the extra cleaning and disinfecting that I will be doing and to be sure that I am able to get enough rest. I will post any temporary changes to our schedule on my website judysdesigns.ca, as well as on Google and Facebook. I’ll also put a sign up on the shop window.

What I need from my customers:

As recommended by the Minister of Health, I ask that anyone coming into the store during this time allow appropriate space between them and others. …Sorry, no hugs until further notice. (You know who you are! And you know that we love you!)

I have hand sanitizer at both counters; please use it when you enter the store to protect yourself and to protect me and Irene. I have an autoimmune disease that does put me in a higher risk category and Irene is over 80 years old. I need to be able to keep my store open and stay healthy. I appreciate your cooperation in this regard.

If you have symptoms that look anything like a respiratory issue, I respectfully ask that you not come into the store. If you need something, call me. I can put your order together for you, take your payment by e-transfer or credit card and you can have someone pick it up for you. If you don’t have anyone to pick it up for you, we can figure something out.

If you are one of the people who will have to return to your home country in the next ten days and there is sewing work here for you, call me. If it isn’t done yet, I can get it done for you right away so you can have it in time for your flight home.

What I will be doing:

I will be disinfecting the doors, counters, debit machine and other surfaces typically touched by people frequently throughout the day.

The virus only lasts for a few days on soft surfaces. Because of my backlog of work, by the time I work on garments or gear, even if they were contaminated when dropped off, any risk to me will be gone.

I will continue to sanitize my hands and the counter after handling each new job that comes in. Those will be stored away from any areas the public can access long enough that they will not present any risk. I will be using hand sanitizer between each sewing job, just to be safe.

If you need a fitting, I would like to do this by appointment only until further notice. Please call ahead. Also, if you feel ill in any way, please postpone your appointment. I will be sanitizing my hands before and after each fitting.

We are doing our best to keep a positive attitude and outlook. However we also want to do our part to reduce the spread of Covid-19. If you are sick, please stay home. These are trying times. We need to look out for each other.

Judy

Review: ChiaoGoo part 2 and a Slouchy Colour Story too!

Have you ever stood by a wall of hand dyed skeins of yarn and found yourself staring at one skein, thinking “Wow, that’s kinda ugly.” I probably shouldn’t be admitting this, but that’s how I felt about one of the Estelle Colour Story colourways when they first arrived in my store. And you know when your parents told you not to judge a book by its cover? Yeah… I’m going to talk about that today.

And, as promised, here is part two of my ChiaoGoo review!

So let’s start with the ChiaoGoo premium stainless steel 40cm x 2.5mm circular knitting needles. I was very excited to try these out. I allowed myself a little extra time for this one because I wanted to knit a toque with sock weight yarn on this needle. I used the Sockhead Slouch hat pattern by Kelly McClure, downloaded free on revelry. The yarn is Estelle Colour Story in Bubblegum.

I cast on 160 stitches since I was using a finer needle than recommended in the pattern. I wanted something denser than the suggested gauge. I’m not accustomed to working with bent circular needle tips, so it did feel a little strange at first. The cast on was fine, nothing out of the ordinary. I found the nylon coated cord a little grabby when I was sliding the cast on along it. Joining in the round was a little awkward and I found myself fighting with the reach a little bit. However, knowing that the first few rounds are typically awkward, I persisted and tried to reserve judgment. By about round four the resistance from the needle stopped and it felt good. I did find that I had to stop frequently to move the stitches out of the way on the cord on the right hand side. If I were competing, this would bother me. That bit of resistance from the slightly grabby cord is not necessarily a bad thing. Your work is not going to slide off when you don’t want it to. With a larger gauge needle this would be a non issue.

Once I got accustomed to them, I liked the fact that these needle tips are on the longer side for this short of a circular.

It gives you something to anchor your hand to as you knit. For some people this can minimize fatigue. It didn’t take long until I stopped being aware of the bend in the tips. The tips are nice and sharp; this wasn’t really an issue for this yarn or the pattern. I personally like them this way; I feel like it gives me better control. Also, I usually grab a handful of the left hand stitches and slide them along the needle to progress my work. I don’t typically use my fingertip to push the needle further into the left hand stitches to do so. Therefore, a sharp tip doesn’t give me a sore finger as it does for other knitters.

I really enjoyed this needle.

I typically knit a lot of socks, so I am happy using fine needle and yarn gauges. I love that the work slides effortlessly over the junction between the needle and the cord. Catching stitches on a dying junction point is something that irritates me when my needles begin to show their wear. It will be interesting to see how the junction stands up over the long haul. I definitely recommend this line of needles. They are pretty darn fabulous. I probably wouldn’t use them for all my knitting, but I will definitely be using them in my complex fine gauge pattern work.

So, on to the pattern and the yarn.

Sockhead Slouch Hat by Kelly McClure of Boho Knits was my pattern of choice for this test. I wanted an easy, straightforward hat pattern in sock weight yarn. The pattern was super easy to follow. I’m not a huge fan of the slouchy hat, so I didn’t make it as long as the pattern suggested. I love that there was a quick start pattern option with very brief instructions for those impatient experienced knitters who want to just get down to it. It’s a great basic pattern. Kudos to whoever formatted the pattern. Nice job! If you have a gorgeous skein of hand dyed sock yarn that you can’t bear to make into socks because no one will get to see how pretty the yarn is, this is a great alternative to knitting it into yet another shawl. Top marks here. I used finer needles because I wanted a nice dense fabric. So I did modify it a little. I’m very happy with the outcome. Kelly has a whole bunch of patterns to offer and you can find them here.

And on to the yarn…

Okay so I confess I can be a little judgy when it comes to colourways. The truth is that we don’t all like the same things and that is not just okay, it’s a wonderful thing. I know what I like. That having been said… yeah… the book-cover thing I mentioned earlier. So, the yarn I chose for this project is Estelle Colour Story in the Bubblegum colourway. This hand painted sock weight yarn originates in Peru. I specifically chose to knit this colourway because I was feeling bad that I desperately wanted it to prove me wrong. It was the one I stared at, thinking it was ugly. I SO wanted it to prove me wrong. And I’m delighted to I tell you, it did. I’m so happy that I tried this yarn.

The Estelle Colour Story yarns do just that. They tell a story.

This one took me back to my childhood in a delightful and unexpected way. It reminded me of Bubble-Yum, Bubblelicious, Double-Bubble and more! Oh my, as every colour showed its little piece of personality I couldn’t help smiling. Every colour of every bubblegum I ever chewed as a kid was represented. Score! Happiness meter: maxed out! My inner child was seriously satisfied by this yarn. (Go ahead and laugh, but I suspect you know exactly what I mean.) And my conscience is now clear! 😀

I hope you’ll take a look at Kelly’s designs and see what she has to offer.

Hey, I love a free download, but I also respect the amount of work in getting a design from inside your head into pattern form. So, shout out to Kelly at Boho Knits! If you’re looking for a great needle in these shorter lengths, I do recommend what ChiaoGoo has to offer. And finally, in all humility, here’s a shout-out to the yarns that look better knitted up than on the skein. You just never know…

Happy Knitting!

Read the Instructions?

I can’t blame it on dyslexia. Nope. I will be completely honest. I just didn’t read the instructions. It’s interesting what happens with a pattern when you don’t read the instruction. Um, well… sometimes the outcome can be, uh shall we say, unfortunate? Sometimes, the results can be cool and surprising.

Confession time! I have had the Nutkin sock pattern sitting in my library on Ravelry for at least a year. With all the times I looked at it you’d think that I’d have noticed what the pattern truly looks like. It’s interesting how perceptions come into play when we see things. You look, you get an impression of something. You decide whether it appeals to you or not and then you carry on, satisfied with your decision. …all based on a glance.

I had a terrible case of “startitis” that lasted me over 2 weeks before I succumbed to its siren call. On Saturday, I gave in. I pulled out my Estelle Sock Twins yarn and my sock needles and realized I left my tablet at home. Yeah, home is upstairs above the shop. It isn’t a 10 minute drive across town on bad roads or anything interesting like that. I was just too lazy to go upstairs and grab my tablet. So I pulled out my phone and logged into Ravelry. I knew I wanted to make Nutkin socks. End of story.

The screen on my phone is so tiny. That’s my excuse! It’s very much an excuse. The reality is that I really didn’t read the instructions.

So, I glance quickly at the pattern and see what appears to be a toe-up sock. (Who knows at this point whether it even was.) I see a chart and I think, “Hmmmm I thought this was a symmetrical pattern.” I still only saw one chart. I’m thinking, “Oh, I guess I just have to mirror this chart for the second side.” I know, right? Who thinks silly thoughts like that, anyway?

I have my toes knit for both socks so I can knit them two at a time. After running two month-long toe up sock knitting classes in a row, I have my stitch counts in my head for vanilla socks and I have my 56 stitches per sock neatly divided on my circular needle. Good Lord, Judy. How many pairs of socks have you knit? This pattern is gonna tighten up those stitches, just evict the dust bunnies from your brain and think for one second, girl!

But no. Dust bunnies were alive and well in my brain on Saturday morning. Yup.

So rather than increasing to a reasonable 60 stitches to accommodate that little bit of “suckage” from the pattern. I just went on my merry way, adapted the pattern for 56 stitches and gloried in my pretty gradient yarn and the lovely symmetrical pattern that was emerging happily off my needles.

I remained blissfully ignorant until I finished the heel. At this point, it was Sunday evening. I had my tablet this time and on the tablet, the photo is large enough that you can actually see the pattern. Oops. Yeah. Well, reading the pattern would have eliminated this faux pas. I realized there was a wee patterned line dividing the toe from the beginning of the pattern, first off. Oh well, both socks are the same, that’s okay. And then I realized that I was not supposed to mirror the chart. And really, what crazy universe would I have had to be in to have a pattern with a chart and be told in the pattern, “oh, yeah I was too lazy to make a mirror image of the chart for in the pattern so you go ahead and just mirror it in your mind.” It would just never happen. (I’m laughing at myself.)

Don’t get me wrong, the socks look fantastic. They are just a teeny bit too small for me, but you know what, my daughter’s feet are just a teeny bit smaller than mine and she has already claimed these socks with her own personal patriotic flag of sock ownership. So it’s all good.

Whether the socks are complete by the deadline for this blog or not, I’ll include photos of my progress. I’ll be honest, I was so disgusted with myself and my laziness in reading the pattern that I had to set the socks aside for a night or two. And there is no way I’m frogging a perfectly good pair of socks just because I (cough cough) modified the pattern.

Once these socks are complete, I’m determined to make the Nutkin pattern properly, for real, and to fit me. In the meantime these ones look very pretty and will make my daughter happy.

The Estelle Sock Twins yarn I’m using is lovely. It’s quite soft. The gradient colourway makes it fun to knit. I found myself pushing to do another round, another round, another round, because I was anticipating the change to the colour. I’m curious to see how tall of a sock I’ll be able to get out of the two matched cakes of sock yarn. I am determined to knit to the end of the balls just to see. I am fairly certain that even with the patterned knitting they should give me a decent knee sock.

Next, I think I’ll knit up a pair of Nutkin inspired knee socks for myself out of Lang Jawoll Sock Twin yarn. The hardest part will be choosing the colour… well, no it won’t. I’m a sucker for yellow sock yarn. It will be the yellow one. Yup. Maybe I’ll even read the instructions for those ones.

Maybe…

Happy Knitting!

Money Saving Tips: Buying Serger Thread

So you bought a serger? Congratulations! And now you’re standing in front of the beautiful, colourful display of serger cones of thread, taking in the glory of it all. And then you see the price. And you do the math. And you wonder whether you’re going to have to choose between eating and setting up your serger

Fear not! I have some money saving tips for you today.

There is no question that setting up a serger is expensive. Most people purchase 4-thread sergers (although there are 3 thread models too). That’s 4 cones of each colour. Now if you have the money to get 4 cones of every colour, all the power to you. Most people don’t. Yes the cones of thread last for a really long time, so you don’t have to buy them over and over like with sewing machine thread. But you do have to use 3 to 4 cones at all times.

There is a certain amount of thread you’re going to have to buy. You can’t run a typical serger with less than 3 cones. And if you have a 4 thread serger, running it on 3 cones is just silly. That extra needle makes a huge difference to the integrity of your seams; like an insurance policy. Besides, even if you sometimes only run 3 threads, you bought a 4 thread serger for a reason and you’ll want the option of using all 4.

So here’s the thing. The needle that sits to the far left above your work is the really important one. That’s the one whose stitches will reveal themselves (ever so slightly) when there’s a little stress pulling on the seam of the garment. That’s the one that needs to have a colour that will blend well with your fabric. The others are tucked away in the seam allowance. The right needle thread and the upper and lower looper can be a neutral colour.

But what neutral colours should I use?

I suggest that over time, you invest in four different neutrals. I wouldn’t buy them all at once; buy them as you need them. Understand that even though you will be using them for 3 of the needles/loopers along with other colours, you also want to be able to use them for all 4 (3 if you have a 3 thread serger) when they happen to be the right colour for your project. So invest in 4 (3) cones of each of the following.

Black:

you definitely need to have a full set of black cones. Yes, that’s 4 (3) cones of black thread. You can use black for all those dark colours like navy blue, dark brown, deep green, violet and so on; and of course you can use it for black.

White or raw-white:

either of these will do. This is another must have. When sewing light colours you can use a white or off-white in the right needle and the loopers. Again, you want a full set of these. If you buy what’s called a “raw white” which is not quite ivory and not quite white it will blend in nicely with all the pastel colours as well as whites and ivories.

For a lot of sewing, you can get away with just having black and raw-white for your right needle and your loopers. But if you sew a lot of mid range colours then there are two other neutrals that are worth investing in.

A warm medium neutral:

You will want taupe (yes I know that taupe is for grandmas). The thing about a good taupe is that it will blend with so many warm colours that you’ll be surprised. All your browns, greens and in-betweens will work with a nice warm taupe.

A cool medium neutral:

for this one, you want a medium gray. Now trust me there are so many grays it’s crazy. You want a gray that leans into blue. This will be your neutral for all your medium blue and purple options as well as, you guessed it… grays.

These four neutrals will cover a lot of ground for you.

They’ll work with a lot of different fabric colours on their own. When you choose to work with a fabric that has a strong and very obvious colour, buy one spool that colour on its own. You can often get away with using a normal spool of thread for these. I know the sales person told you not to use anything but serger cones. I regularly use 3 different industrial serger-style sewing machines and when I’m doing a job that requires a very specific colour that I don’t own on a cone, I will use a 100m spool of sewing thread instead of investing in a cone. The only thing that will sometimes happen with these is that as the thread gets down toward the end, the spool will hop around unless you have it in a little mesh thread bag. If your serger didn’t come equipped with these, you can buy these at a sewing shop. They may have to special order them. It’s not something that most places would normally stock.

Once you have your four neutrals, you will likely discover that there are particular colours you really want to have on hand. Any colours that you know you will use regularly will be worth investing in. Just get one cone and use 3 cones of the closest neutral colour. Obviously, you can get a full set of any colours that you want, I’m suggesting this as a cost efficient method to avoid having to do so. 🙂

As you use your serger with the neutals on 3 (2) “needles”, bear in mind that the loopers use a lot more thread than the needles do. Some people like to use the same cones for the loopers all the time so that they don’t run out of all the same colour at the same time. That way when they need to replace them, they don’t have to replace them all at once.

Now that you’ve invested in these cones of thread, you may also want to consider purchasing a cone thread holder to go with your sewing machine. It’s a heavy base with a guide that allows you to use your serger cones with any sewing machine. They are relatively inexpensive and allow you to avoid having to buy the same colour of thread in both formats.

And there you have it! Happy serging!


Happy 150th Birthday Canada!

I was born in British Columbia, Canada, to German immigrants. I can only imagine the courage it took for my parents to leave everything familiar, pack up what little they had at the time (and despite knowing very little English) take the long trip to this amazing place that I now call home. I’m glad they did.

I love Canada!

Anyone who has read a few of my blog posts will know that I love fibre arts. I love anything to do with fabric, thread, yarn. That love comes directly from a long line of fibre-loving women from whom I descended. You may not know that I love music just as much. This love of music was also passed down through a long line of music loving ancestors.

I am a

  • Classically trained singer,
  • Vocal teacher,
  • I’m a songwriter and

I play

  • piano,
  • guitar,
  • flute
  • and a bunch of other instruments

(though no where near well enough that I’d want anyone to hear those). My parents told me that I sang before I spoke. I remember being able to memorize songs after hearing them a mere 3 times as a child. (Those days are in the past).

On July 1st this year, Canada celebrates 150 years.

It got me thinking about the songs that I have associated with Canada Day since I was a child. I hope you can humour me as I take a Canadian trip through my musical memories and share them with you.

The first video link I want to share is a song called “Canada Is“. When I first learned this song in school, I was struck by how much there is to this country. It made me feel so proud to be Canadian. My teacher would laugh at me because I could never get through it without sobbing. I still get sentimental and proud when I hear this song and I still can’t get through it without crying.

This next video is a delightful spoof on the previous song as performed by the Muppets in Montreal back in 2012.

This next video link is to C-A-N-A-D-A. It wasn’t until my children were all grown up that I stumbled on the following Video sung by Raffi. If I had known he had recorded it I would have played it for my kids along with his other CD’s that we played endlessly!

And if Canada Is made me cry, you can only imagine what this next one did! I had no idea that there was an American version of this song until much later. When I heard it, I was convinced they had stolen our song. Of course, that’s silly. When I was 10 years old I learned the chords for this on my guitar and fully intended to sing it at a school Canada Day assembly. My teacher had me sing it to her before clearing me to be on the program; she gave me 3 tries and finally ruled that although the sobs of pride were endearing, I really did need to be able to sing it without crying. I wonder whether I could do it now? LOL

One of the things I love about the CBC is the Canada Vignettes video shorts that have been tucked between programs for as long as I can remember. One of my all time favourites (besides The Cat Came Back) is the Log Driver’s Waltz. There is just something so delightful about it that I just never get tired of it. Here is the link:

I could go on, but that would be straight-up self indulgence! I am deeply grateful to all those that came before me who made this country what it is.

To all the First Nations peoples and the countless immigrants who evolved this country into what it is today, I thank you.

I love my home in the Monashee mountains of British Columbia and I wouldn’t trade it for all the world.

To all my fellow Canadians: Happy Canada Day!

(Judy does a happy dance a la Kermit the Frog.)

And next week, we’ll get back to yarn-ie stuff again. 😀

Image by Harry Sandhu